

Bagels became my specialty when we were working on Charlie’s book, The Best Bread Ever. When I lived in New York city for a few years, a warm “everything” bagel was a breakfast staple alternating with an Eli’s Raisin Pecan Roll. Naturally I was the one to adopt making this iconic roll. For the book, we received tips from true bagel mavens and the result is this recipe, New York Chewy Bagels Food Processor Mixing Method. It produces a dense, chewy bagel made from dough mixed briefly in a food processor using the steel cutting blade.
When friends visit for the weekend, I make bagels. When I teach at Boston University, I teach bagel making. (Read one recent student’s comments about bread class here.) I’ve even introduced chewy New York-style bagels to students in Kyoto and Tokyo.
My Bagel-Making Tips
To ensure a New York-style chewy bagel, use high protein bread flour. King Arthur is our preferred brand. Commercial bakeries feed the yeast with a little honey or malt syrup, which contributes to the flavor and dark color of the dough after baking. (Malt syrup is made from sprouted or malted barley. It is half as sweet as refined sugar. Diastatic malt contains active enzymes, which help break down the starch in flour feeding the yeast to make it more active.) I prefer malt syrup but use honey when it’s the only thing on hand. And I use SAF instant yeast, reliable and powerful. Although it can be added directly to the dry ingredients, I get best results when I moisten the instant yeast in a little water before mixing.
To compensate for the heat caused by the friction of mixing in a food processor, use the metal blade and mix it for only 45 seconds. That’s one of the core principles of Charlie’s mixing method. Just don’t look for a classic windowpane* in your dough as when kneading by hand. During the long fermentation, the gluten bonds form and the dough becomes fully hydrated and supple. Bagel bakeries often prepare their dough, form the bagels then bake them the next morning, a system we use to great effect. Your bagels will have more flavor from the long fermentation and the chilled dough from an overnight rest in the refrigerator is easier to handle during the crucial boiling phase.
Forming the bagels takes some skill but you don’t have to go crazy with your technique. As you can see from this short clip on bagel forming, your bagels may look uneven when you form them. But after proofing, boiling and baking, they develop a uniform, shiny surface. (If in doubt, coat the dough with more seeds before baking.)
Here are pieces of dough first formed into a nice uniform ball. Then rolled out into short logs.
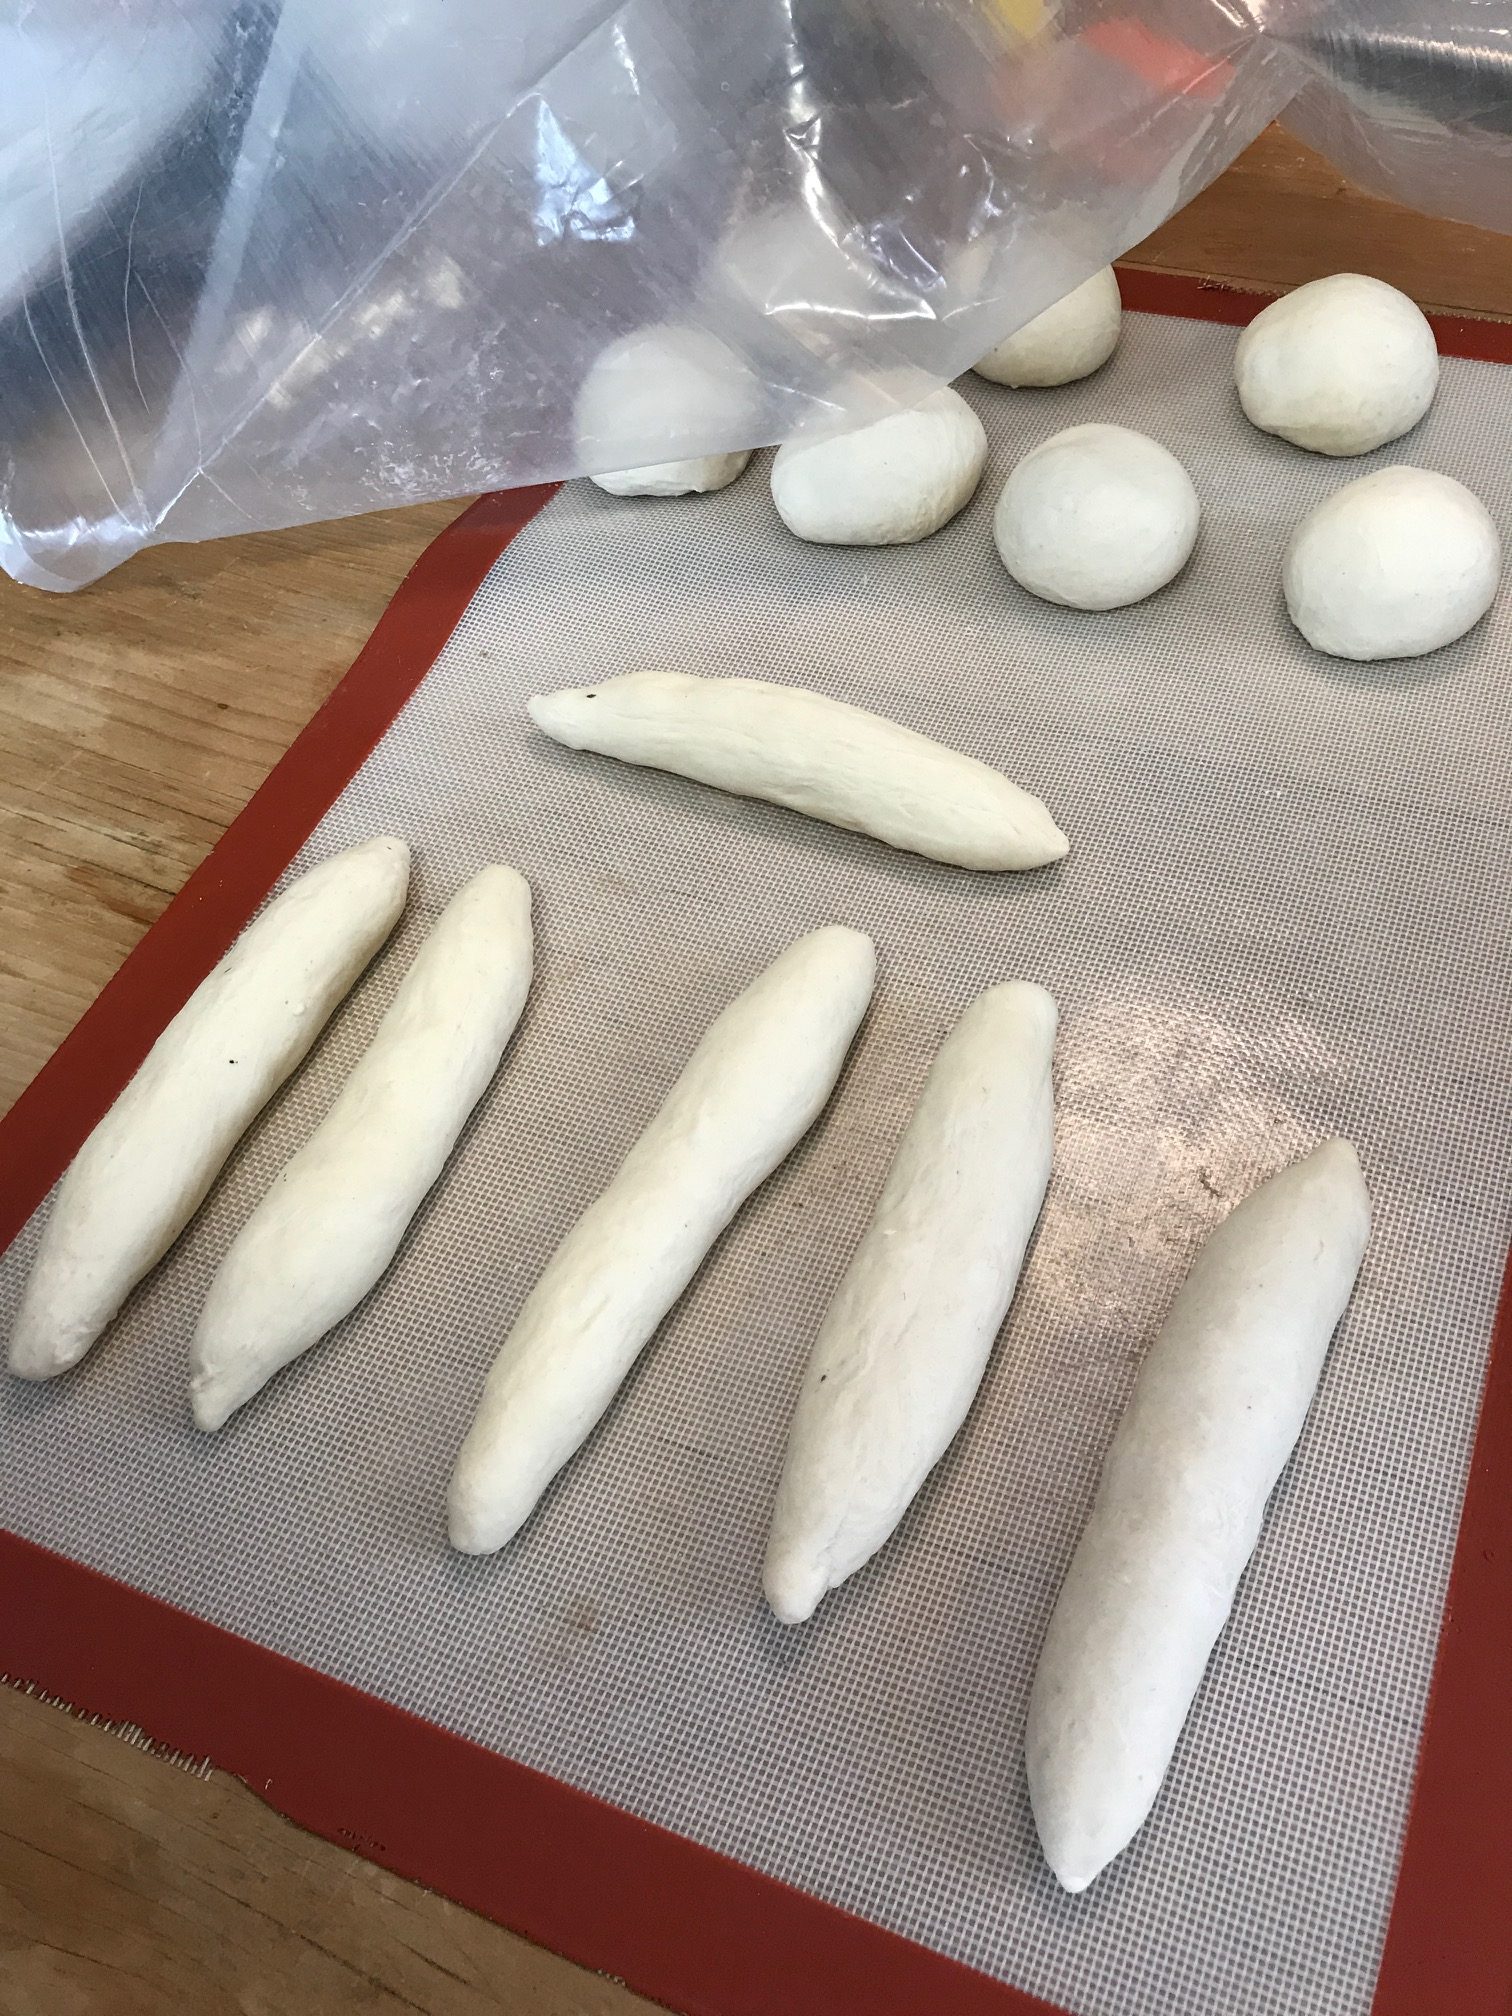
Do be sure to stretch out the formed dough so that you have at least a 3-inch circle. When it proofs overnight, the hole will close up as the dough rises. And be sure to sprinkle the tops of the formed bagels with flour before covering them with plastic. If you forget this step, the dough will stick to the plastic. I insert the whole baking sheet of formed bagels into an unused trash can liner, fluffing it up like a balloon to keep it from sticking to the dough.
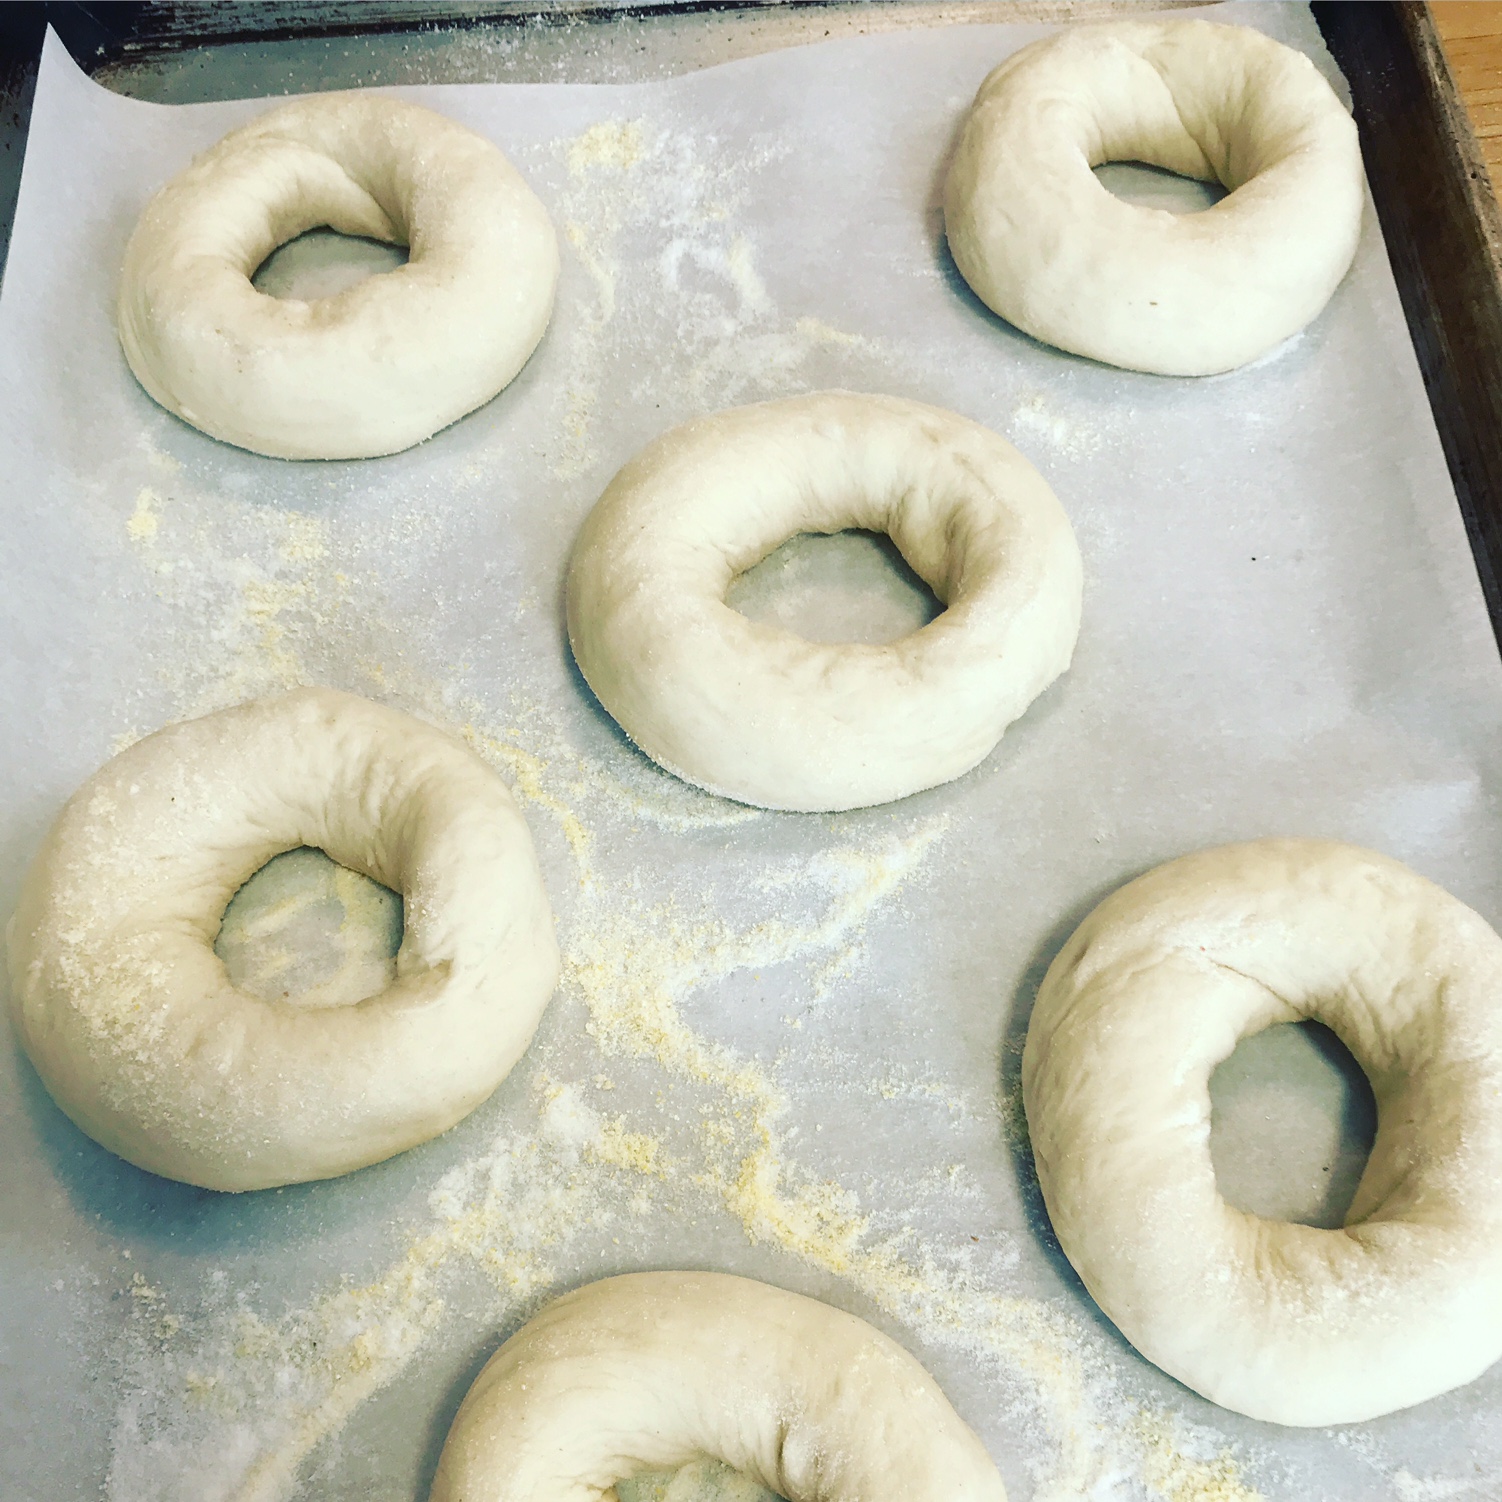
Here is a tray of formed bagel dough ready for fermenting/proofing.
Ideally the formed bagels should retard for about 12 to 16 hours in the refrigerator. That’s why making them the night before makes the most sense. I have retarded them for as little as 4 hours with decent results.
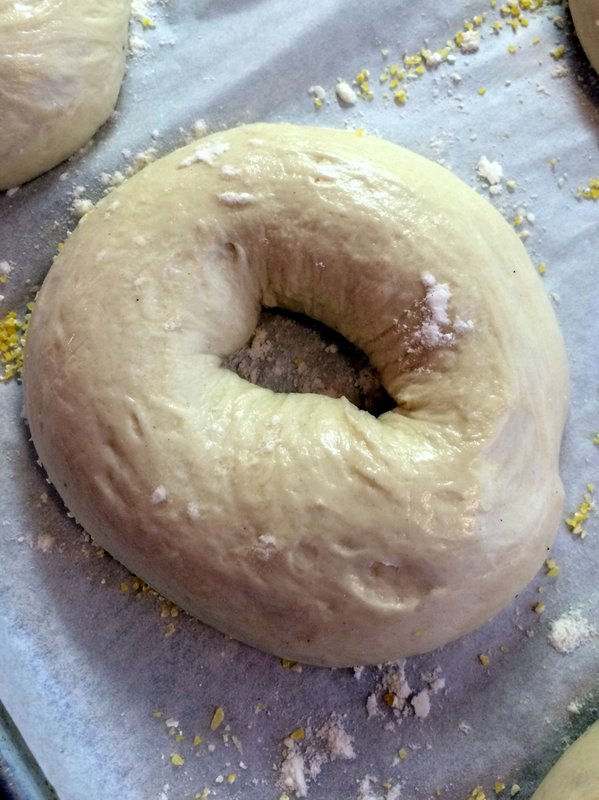
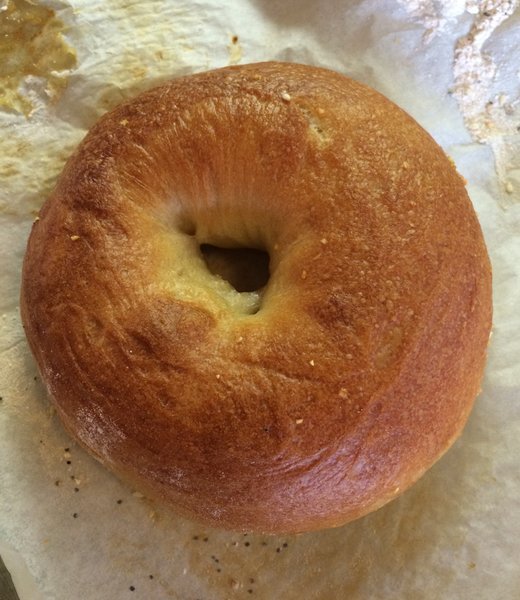
And here you can see that the bagel dough after baking has a pleasant smooth surface. The raw dough on the left has some dimples. But after boiling and baking the surface is pleasantly smooth.
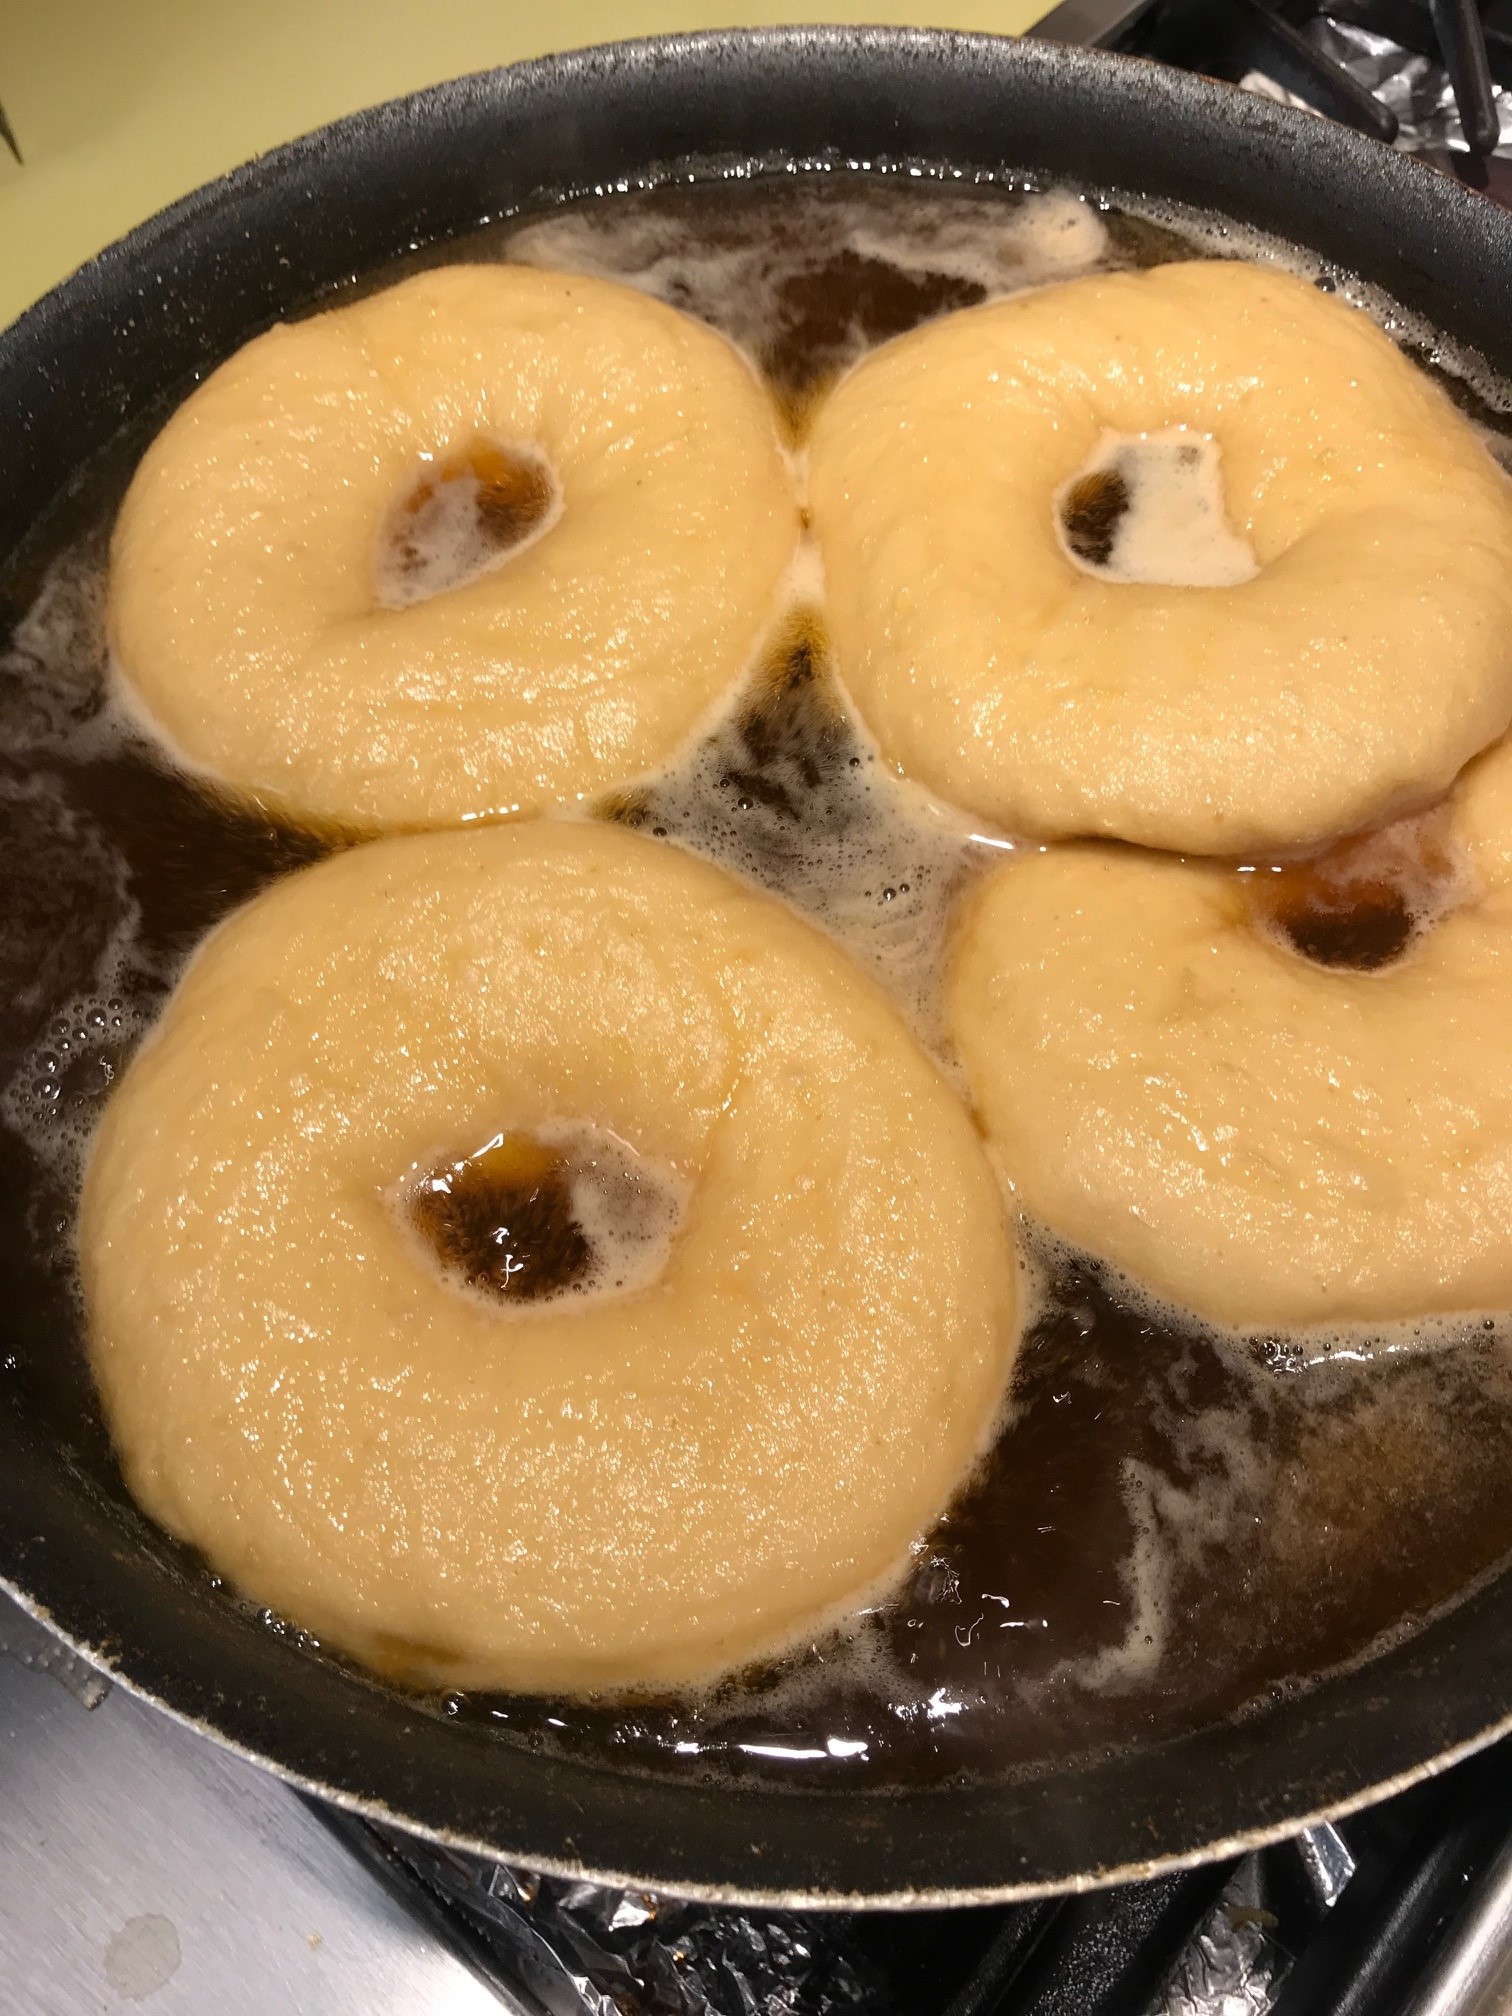
Boiling Bagels Before Baking
For the uninitiated, bagels are boiled before baking to give them a dark and shiny surface. (The moisture sets the starches on the surface of the dough, turning them into a gel that bakes into a shiny coating. Steam in an oven during bread baking does the same thing.) When you are ready to bake, remove the bagels from the refrigerator and let them warm to about 60F. Bring a large saucepan of water to boil. Add some baking soda and malt syrup or honey to enhance the surface color then drop a couple of bagels into the water for a brief bath, 30 seconds per side. Scoop them out with a mesh strainer or slotted spoon then let the boiled dough drain for a few minutes.
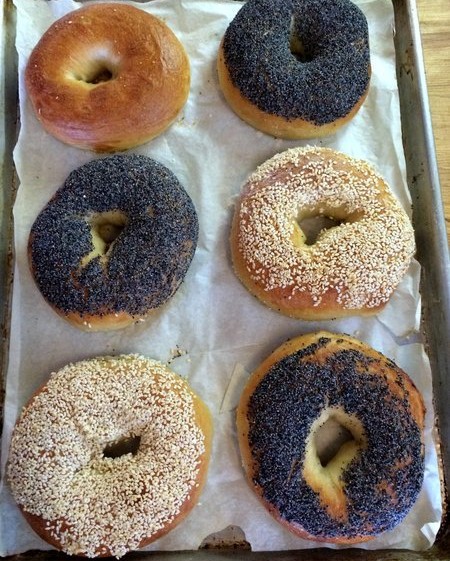
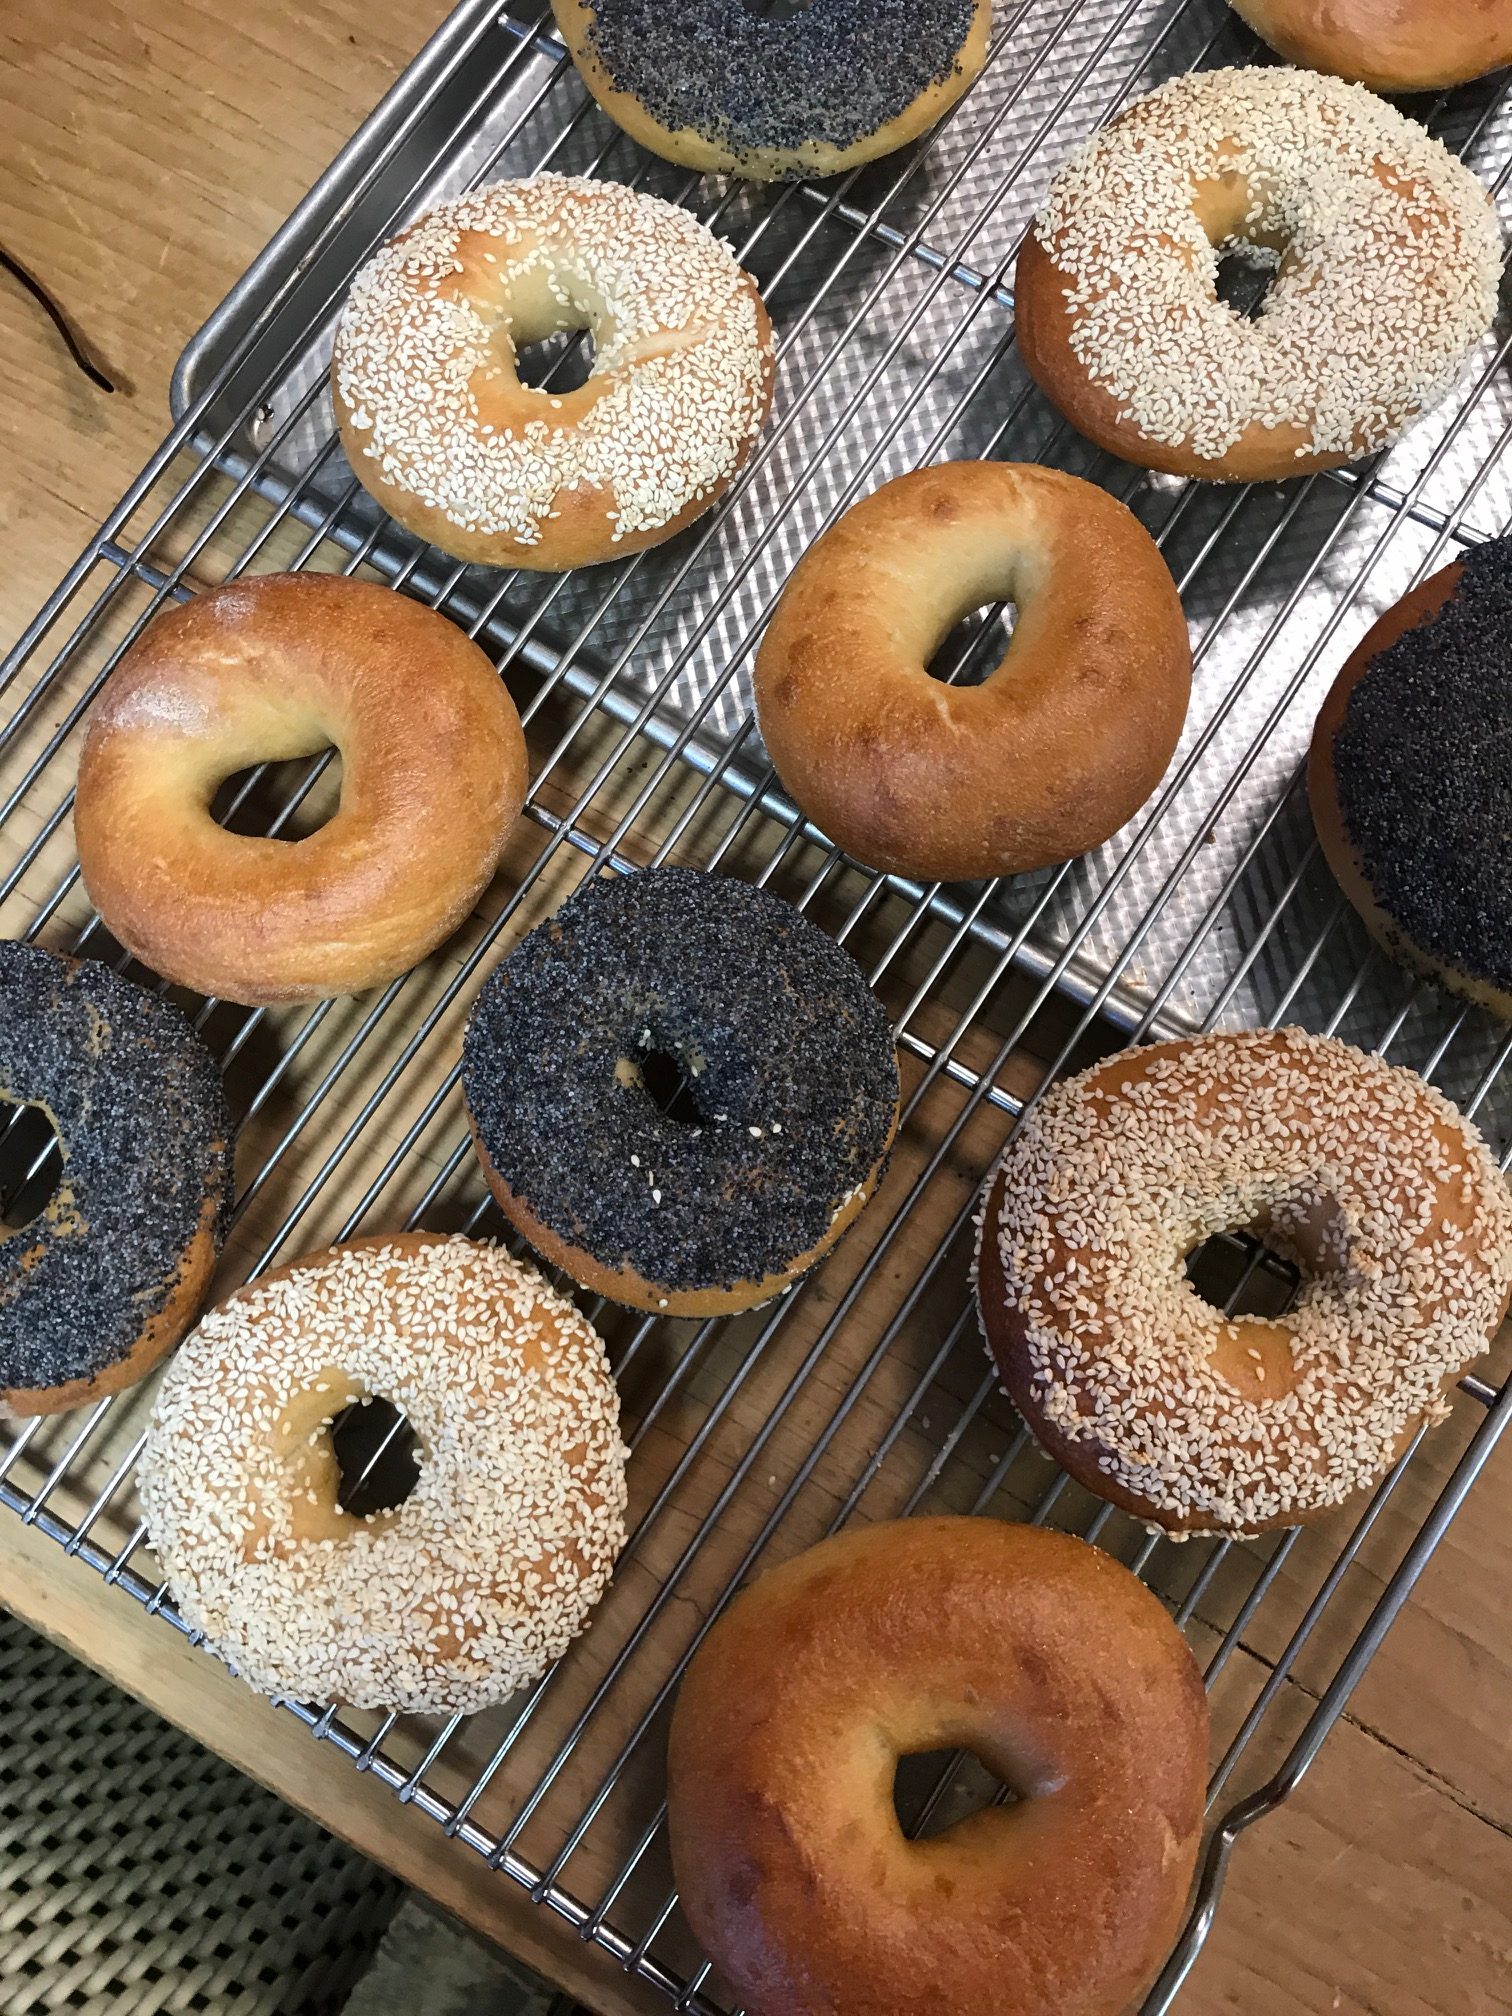
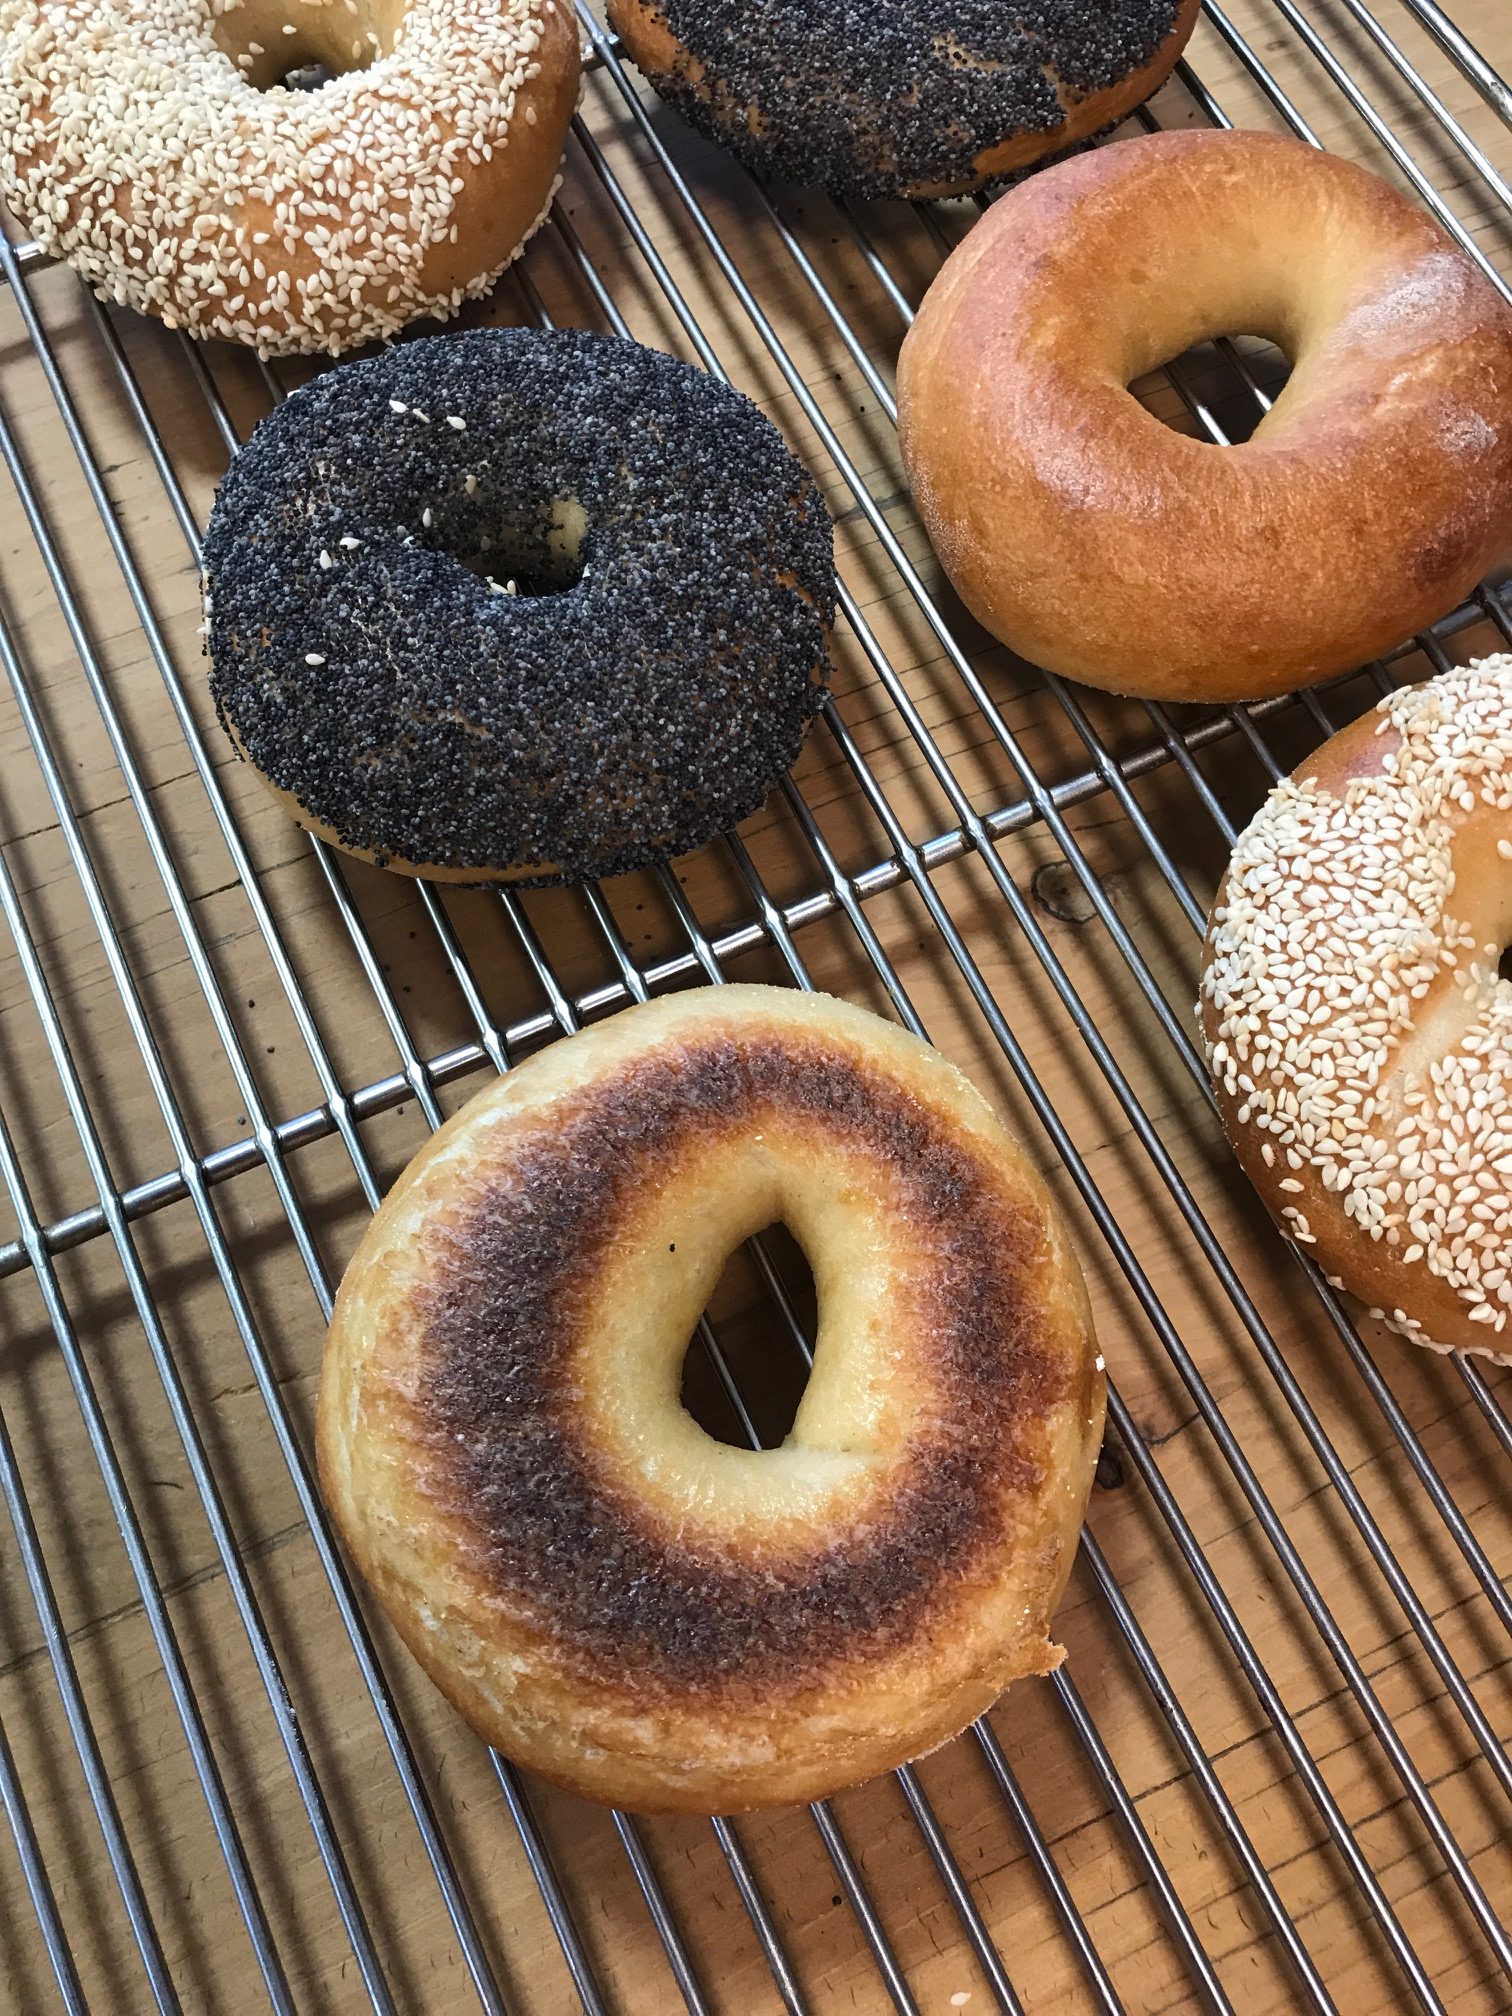
Place about ¼ cup of sesame, poppy or other seeds into a dinner plate. Then dip each bagel into the seeds. I like to dip BOTH sides of the bagel in the toppings. You can also sprinkle the bagels with seeds once they are placed onto the baking sheet.
Be sure to bake the bagels long enough so that they develop a deep, brown color. That’s what gives bagels, and bread in general, its flavor. Don’t be afraid to remove the tray of bagels from the oven for close inspection. You’ll be surprised how pale they may look. Everything always looks darker when still in the oven.

*Windowpane refers to a test bakers give their dough to determine if it has been properly kneaded. You stretch the dough out between two hands. Fully kneaded or fully “developed” dough will stretch out into a smooth, nearly transparent skin that you can almost see through.


Fermentation: 12 to 16 hours in the refrigerator, 37°F to 45°F. Proofing: 20 to 25 minutes at room temperature, 70°F to 72°F
Each ingredient is listed with the metric, ounce or volume measurement. Use one method and stick to it throughout. For ingredients that are too small to weigh without a specialized scale, the measurements are in volume. (Apologies that this program doesn't allow me to list the measurements in three distinct columns.)
Ingredients
1 cup + 5 teaspoons (305 grams) water
4 teaspoons (20 grams) malt syrup or honey
3 to 3 ½ cups (500 grams) unbleached bread flour
1 teaspoon (3 grams) instant yeast
2 teaspoons (10 grams) fine sea salt
1 teaspoon baking soda
3 tablespoons malt syrup or honey
Directions
- Combine the water, malt syrup and yeast in a small bowl. Stir to dissolve the yeast.
- Place the flour and salt in a food processor fitted with the metal blade. Using an instant-read thermometer, adjust the water temperature so that the combined temperature of the flour and the water is the base temperature for your food processor, between 130°F and 150°F. (We have found that 145°F works well for most machines.) With the machine running, pour all the water through the feed tube. Process for a total of 45 seconds.
- Scrape the dough onto a lightly floured work surface. It will be relatively firm. Knead it by hand a few times then form it into a tight ball. Place it in a bowl, cover and let rest for 30 to 45 minutes.
- With a dough scraper or kitchen knife, divide the dough into six or seven equal pieces. To form the bagels, take each piece of dough and roll it into a ball. Flatten the ball of dough, then fold it in half. Seal the edges of the dough with your fingertips. Then fold the dough again to form a tight cylinder.
- Roll the dough into a tube about 9 inches long. Wrap this piece of dough around the palm of your hand overlapping the dough by about 3 inches. Pinch together the dough where it overlaps to form a smooth ring. The hole in a bagel formed this way will be the right proportion once the dough is proofed, boiled, then baked. Transfer the formed pieces of dough to the baking sheet spacing them 2 inches apart.
- Sprinkle the top of each piece with flour then cover the sheet loosely with plastic wrap. (Or place the entire baking sheet into a food grade plastic trash bag.) The flour will keep the plastic wrap from sticking to the dough as it ferments. Place the formed pieces of dough in the refrigerator for 12 to 16 hours, preferably overnight.
- One hour before baking, put the oven rack on the second shelf from the bottom of the oven and place the baking stone on the rack. Preheat the oven to 450°F.
- Take the formed dough from the refrigerator. Remove the plastic wrap and let the pieces proof at room temperature, 70°F to 72°F, for 30 to 35 minutes. (The dough should reach an internal temperature of 58°F to 60°F.)
- While the formed dough is proofing, bring a large, 4-quart pot of water to boil. Add the baking soda and malt syrup. Sprinkle a baking sheet with rice flour or fine cornmeal. Sprinkle some sesame seeds, poppy seeds, caraway seeds and other garnishes into individual plates.
- Test to see that the dough has proofed. Insert an instant-read thermometer into the center of one of the formed piece of dough to check the internal temperature. It should measure between 55°F and 60°F.
- Set a colander in the sink. Drop one formed piece of dough in the boiling water. If it floats this means the dough is proofed and ready to be boiled and baked. Add two or three more formed pieces of the dough into the boiling water. Boil them for 30 seconds. Use a slotted spoon to turn them over and boil for another 30 seconds. Transfer the boiled dough from the boiling water to drain in the colander. Boil the remaining pieces of dough, in the same manner, then drain them in the colander.
- Quickly dip each boiled piece of dough into one of the seeds or garnishes, if using. Dip the other side too if you like. (Or, while the boiled pieces of dough are still moist, sprinkle then with the seeds and garnishes.)
- Transfer the coated dough to the baking sheet spaced two inches apart.
- Place the baking sheet of dough into the oven. Reduce the heat to 425°F and cook the bagels for about 10 minutes. Open the oven and rotate the tray of bagels so that they brown evenly. Continue baking for 10 to 15 minutes until the bagels are uniformly browned.
- Remove the baking sheet from the oven and transfer the bagels to a wire rack to cool. Serve the bagels warm from the oven or let them cool completely before storing. Store the bagels in a pager bag for up to 24 hours. For longer storage, put the bagels in a plastic bag and store in the freezer.