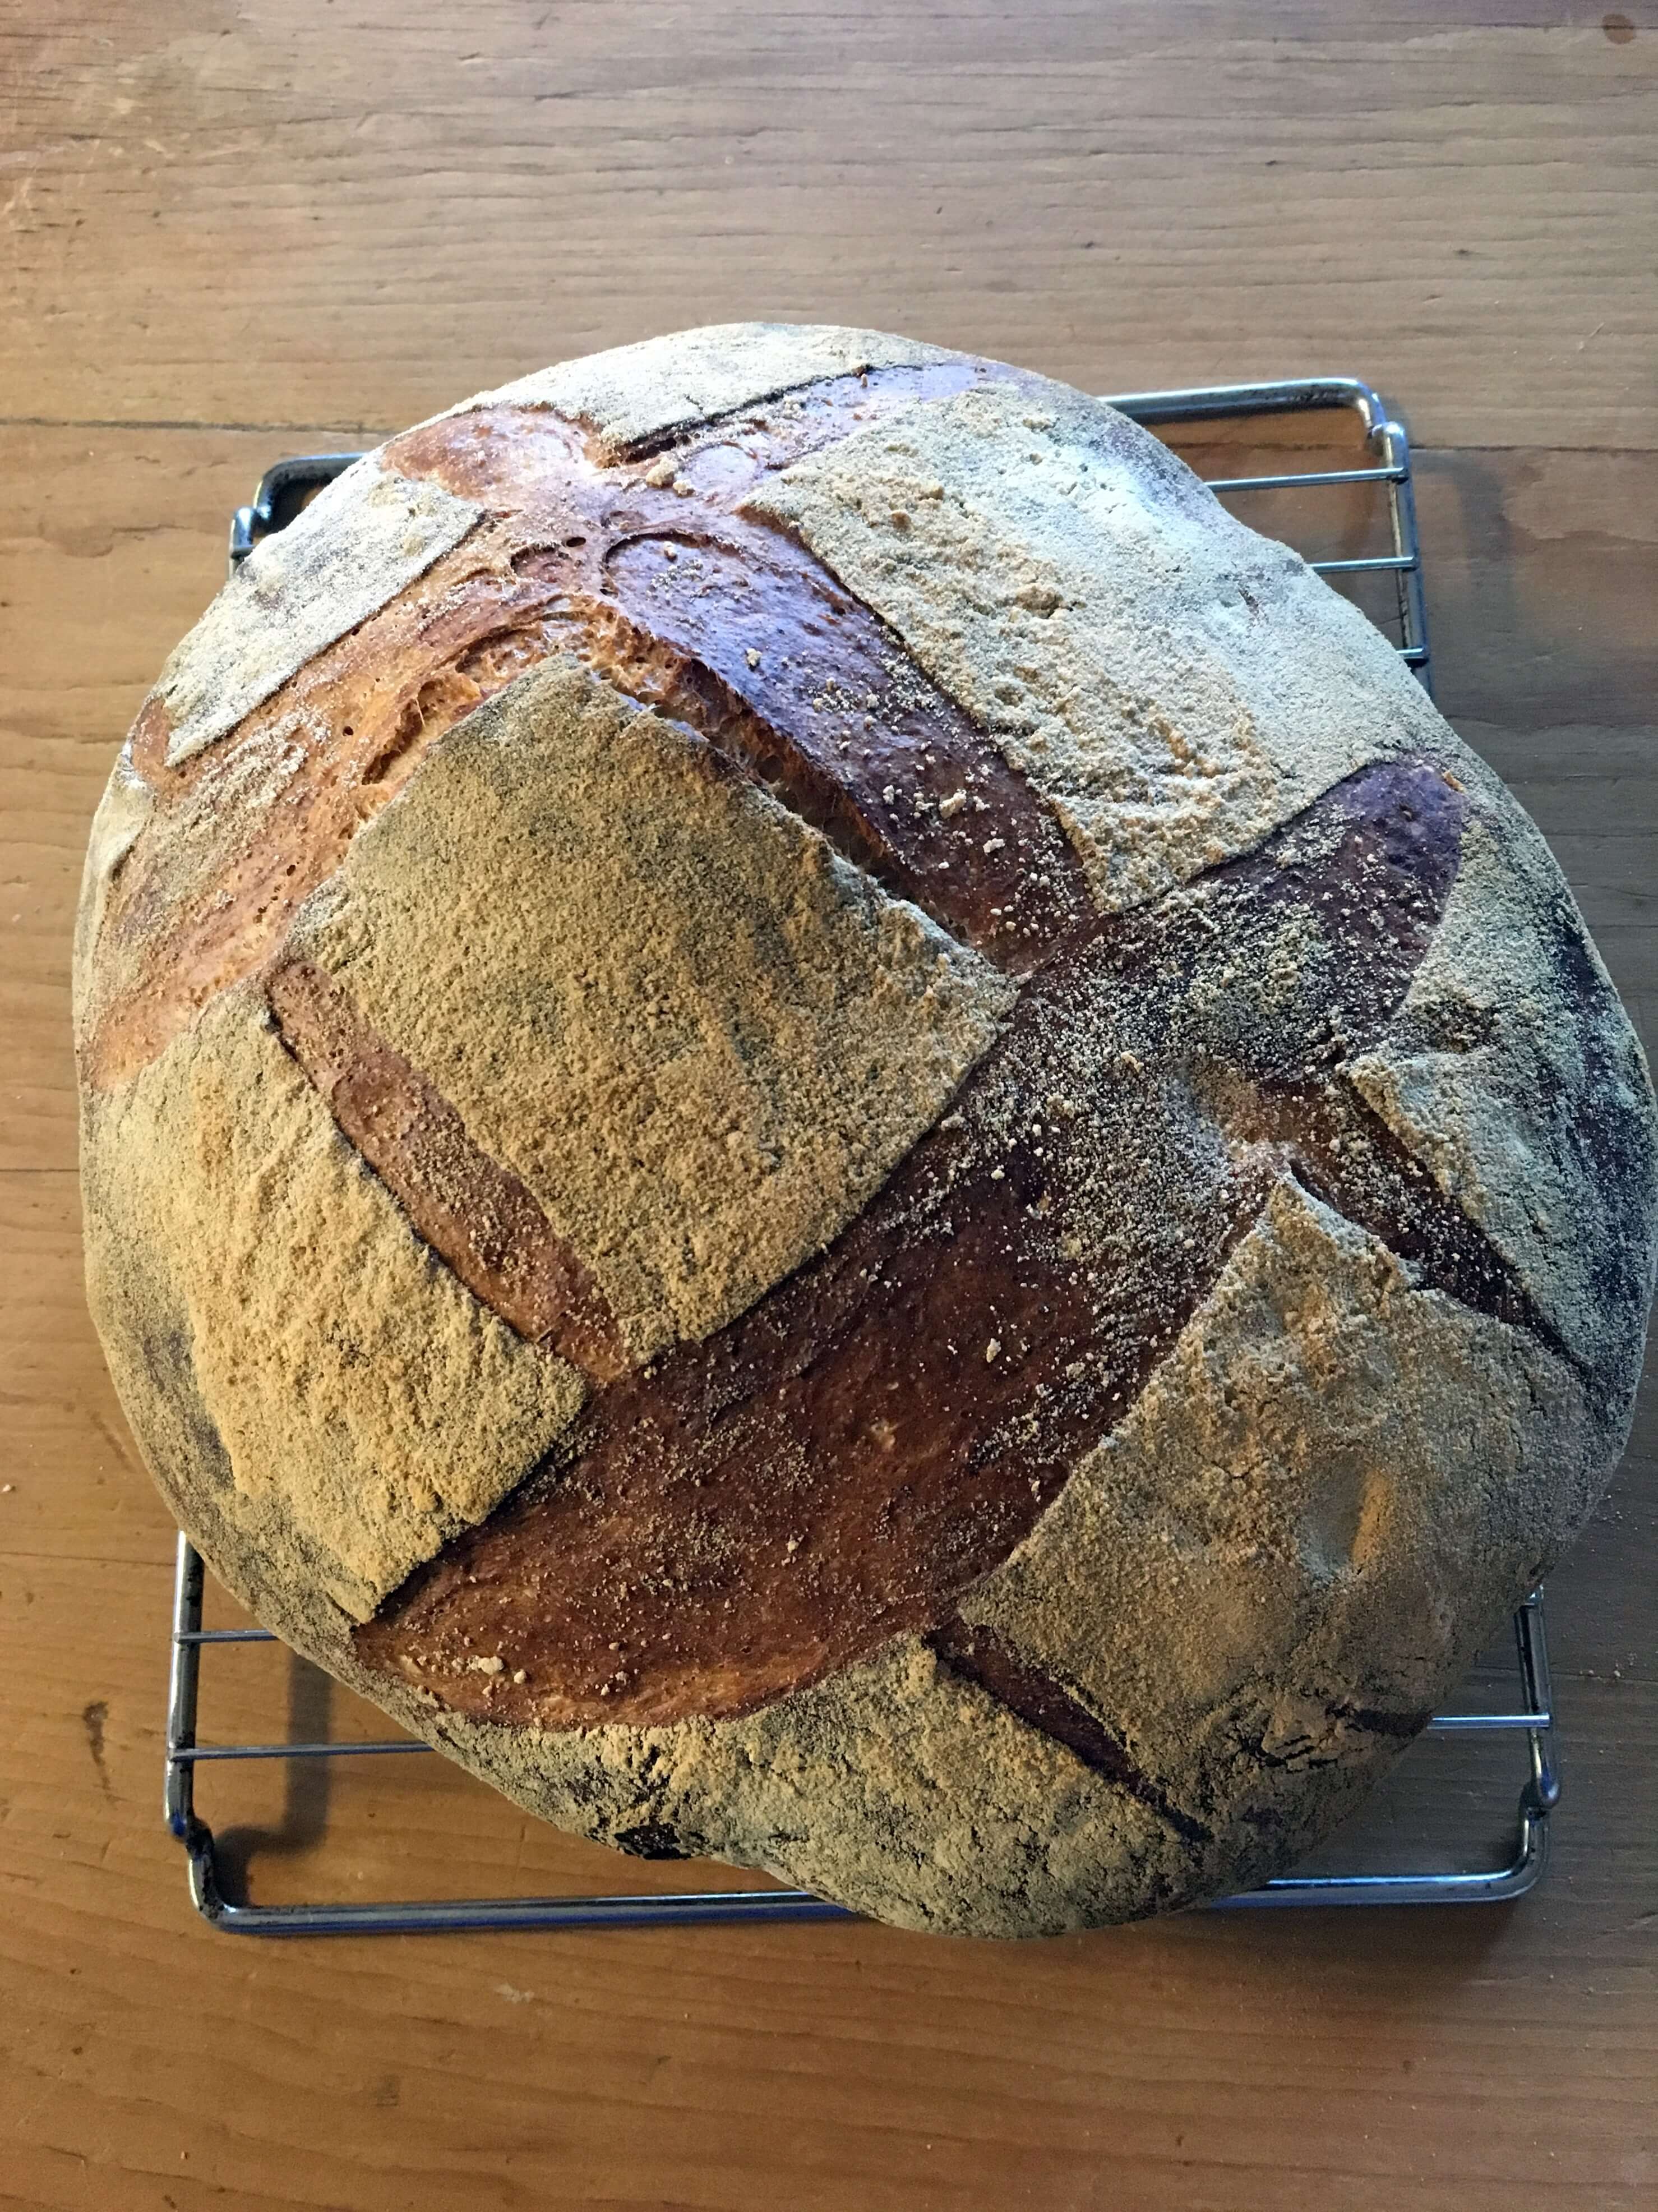
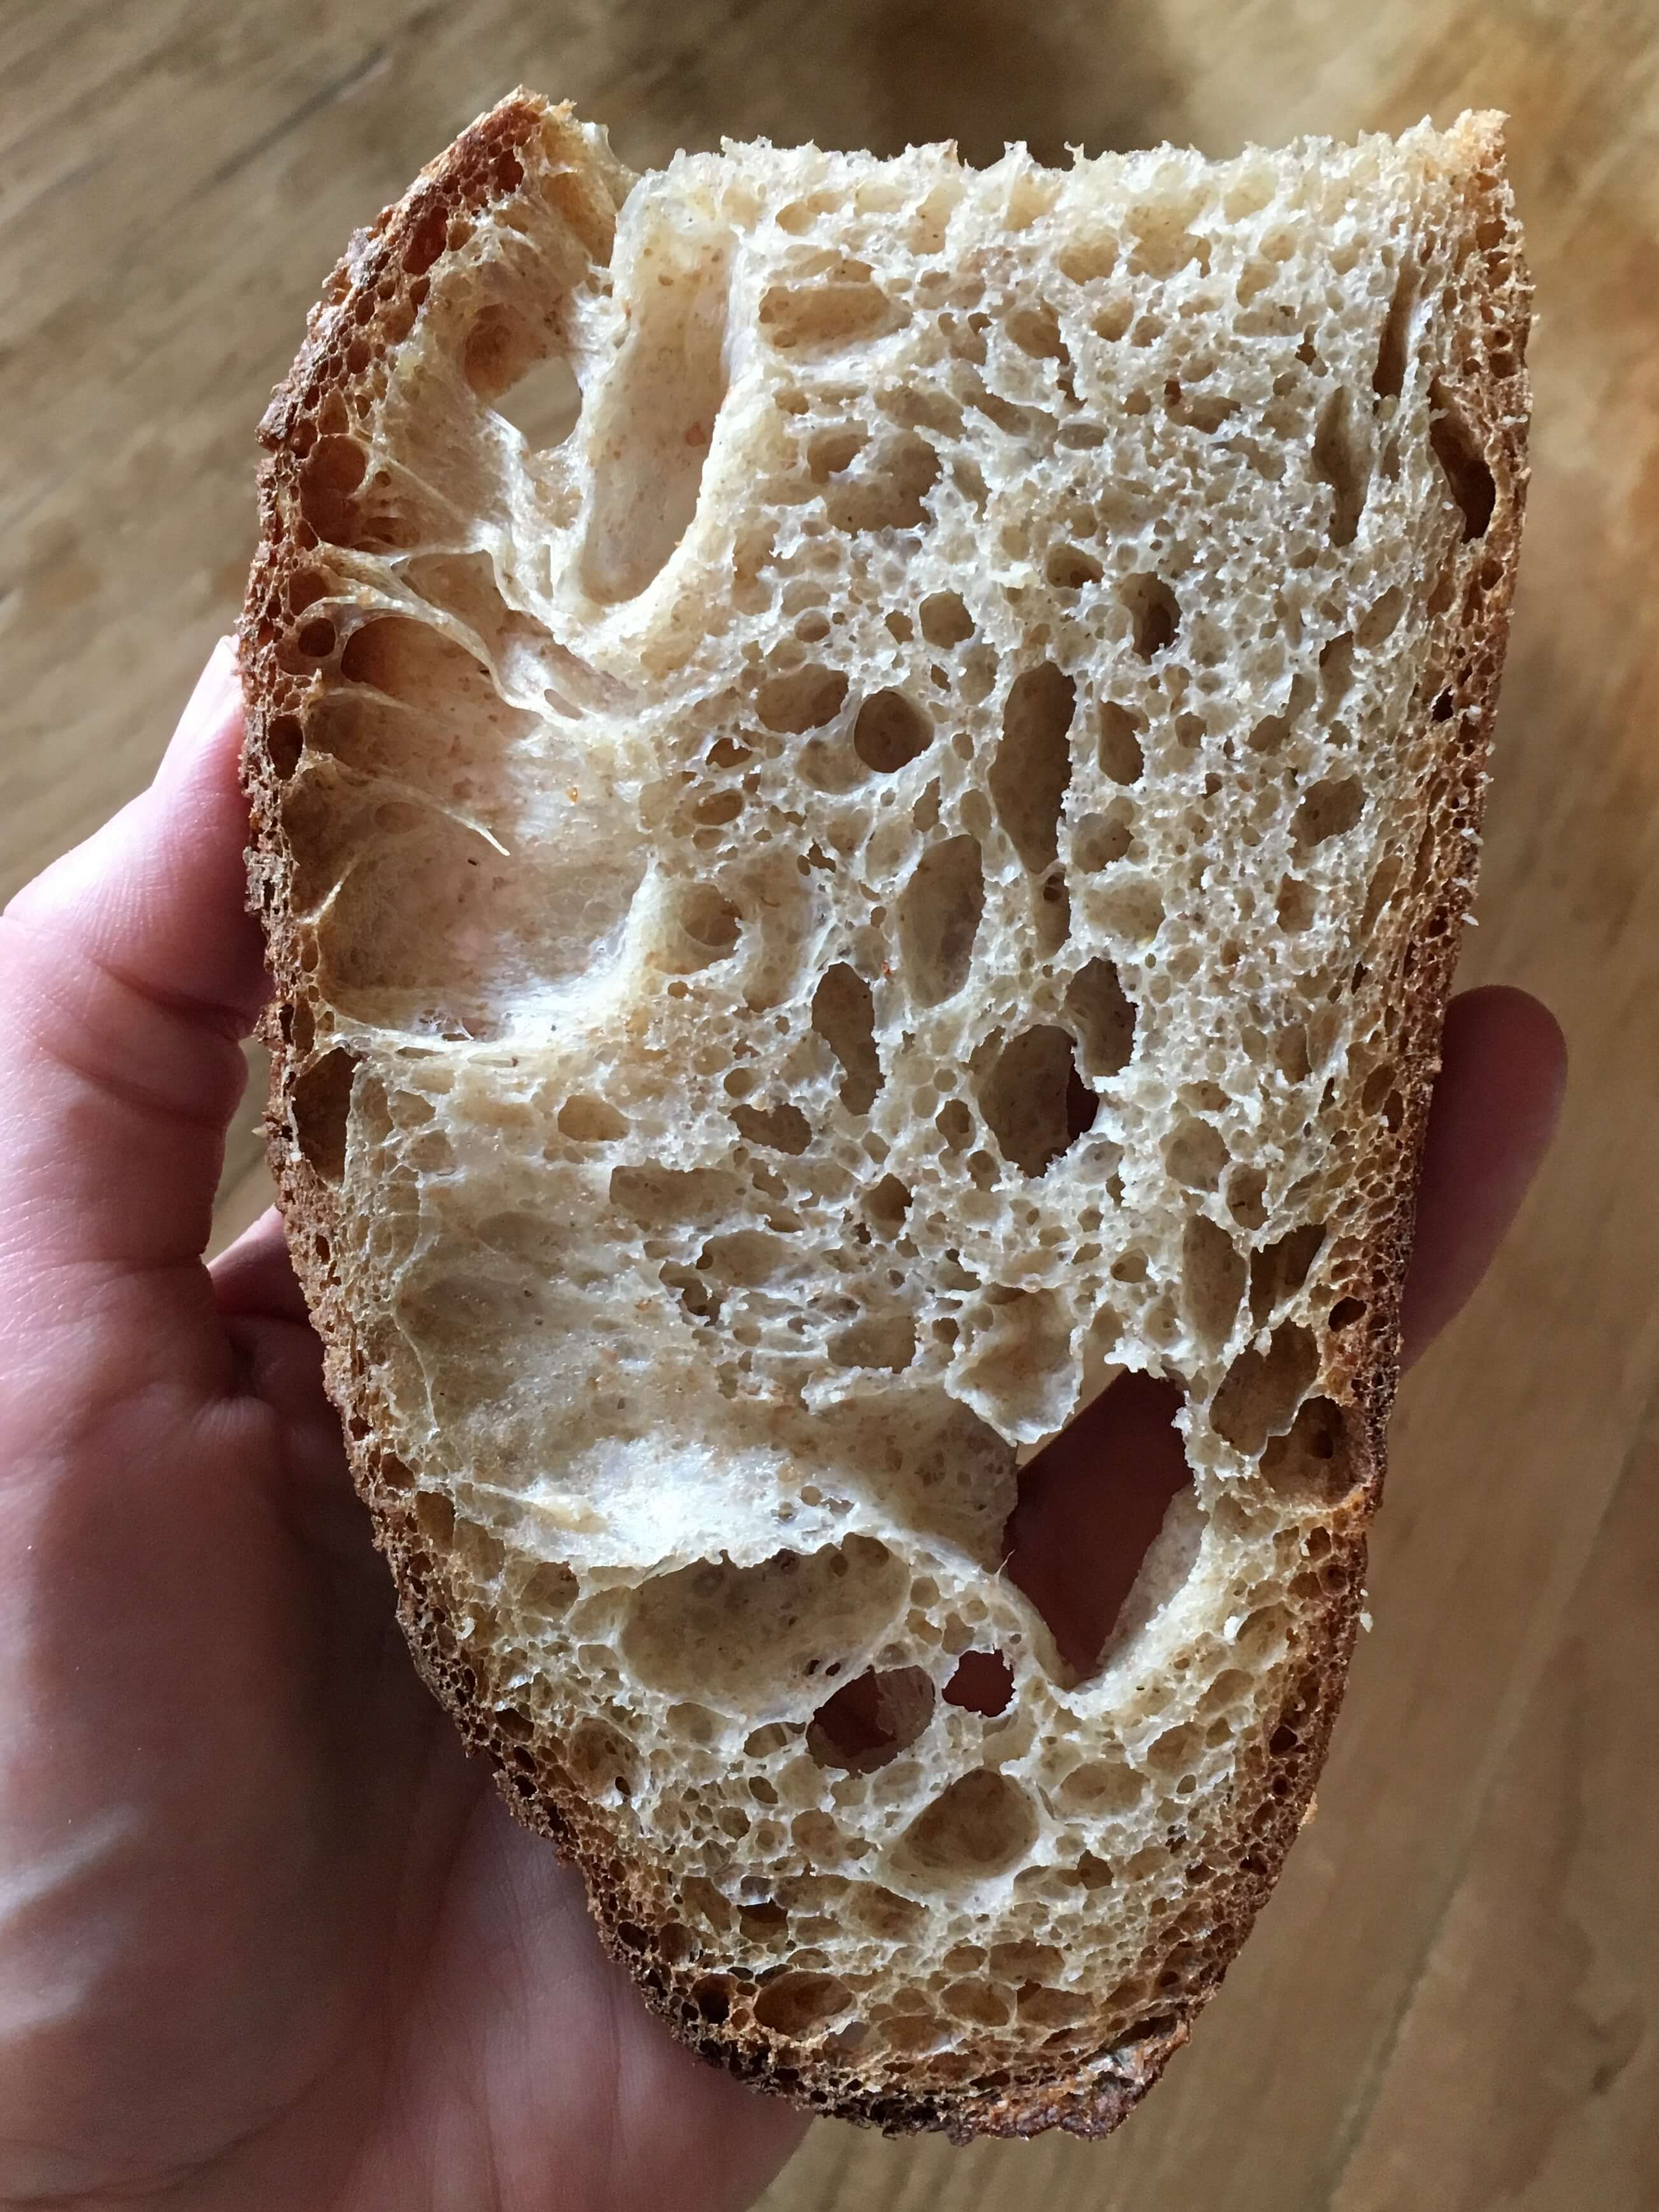
The miracle of bread making is how a wet mess of a dough bakes into a billowy loaf of bread. If you’ve been baking along with me, you are ready to tackle Country Wheat and Rye Boule. This is the monster loaf we all crave, one with a dark, caramelized crust, big holes and a chewy crumb.
When I teach people to make bread, most are looking for something rustic, perhaps with some whole grains and often with a sourdough starter. A tall order for one’s first day baking bread, I tell them. But this recipe might be the one to try if you’re looking for the flavor of long fermented bread. No need for a sourdough starter to get terrific results.
The dough has a high hydration, which means it contains a large amount of water in relationship to the flour used. Don’t be daunted. Using a rubber spatula or plastic dough scraper, you can maneuver the dough to accomplish the mixing and kneading.
First you start with an overnight starter called a poolish. It is a small batch of dough made with flour, water and a pinch of yeast. While it rises overnight, the starter develops delicious flavors from the fermentation of the yeast. I’ve used a combination of bread flour and stone ground rye flour for this overnight starter. Yeast organisms love rye flour so it ferments rapidly. And rye gives a subtle flavor to the dough. Bread flour adds some extra elasticity that I like. But you could use all-purpose flour instead.
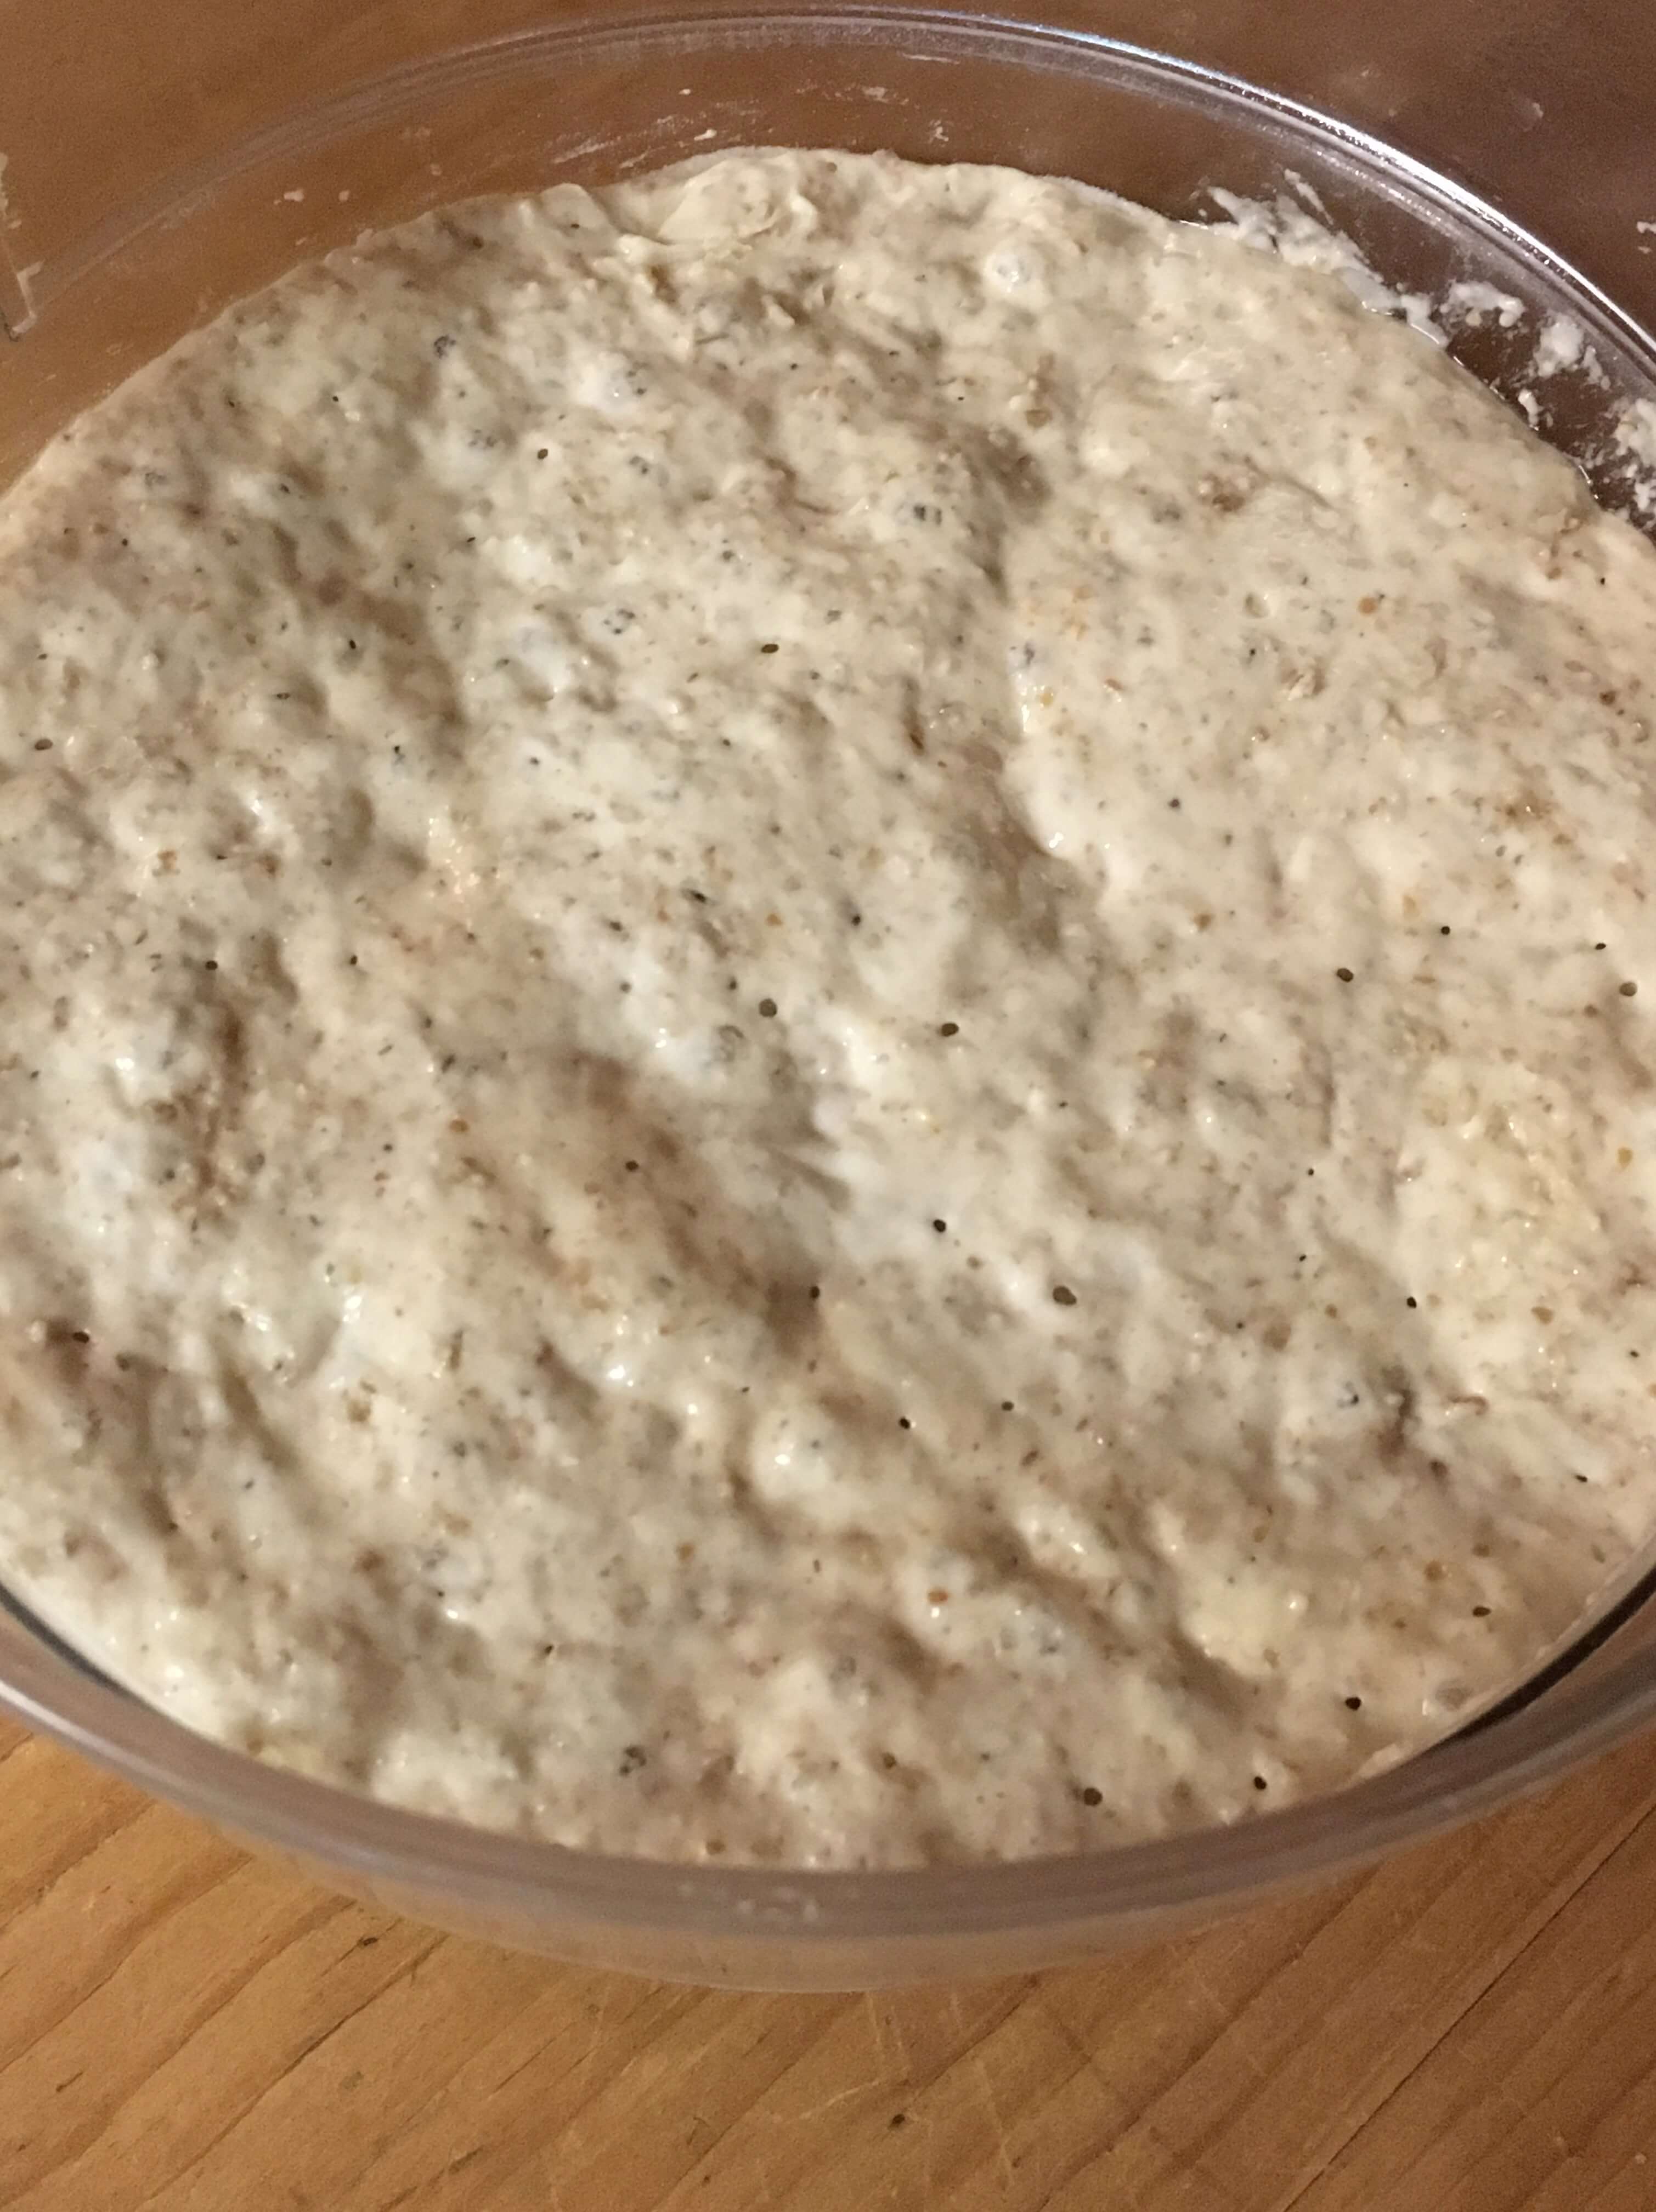
The starter sits for 10 to 16 hours. If your kitchen is especially cool, you’ll want to let it sit for closer to 16 hours. In that time it will rise noticeably and develop pleasant aromas.
You can see the sticky dough and the bubbles from yeast activity in the overnight starter. It smells pleasant too with a hint of alcohol.
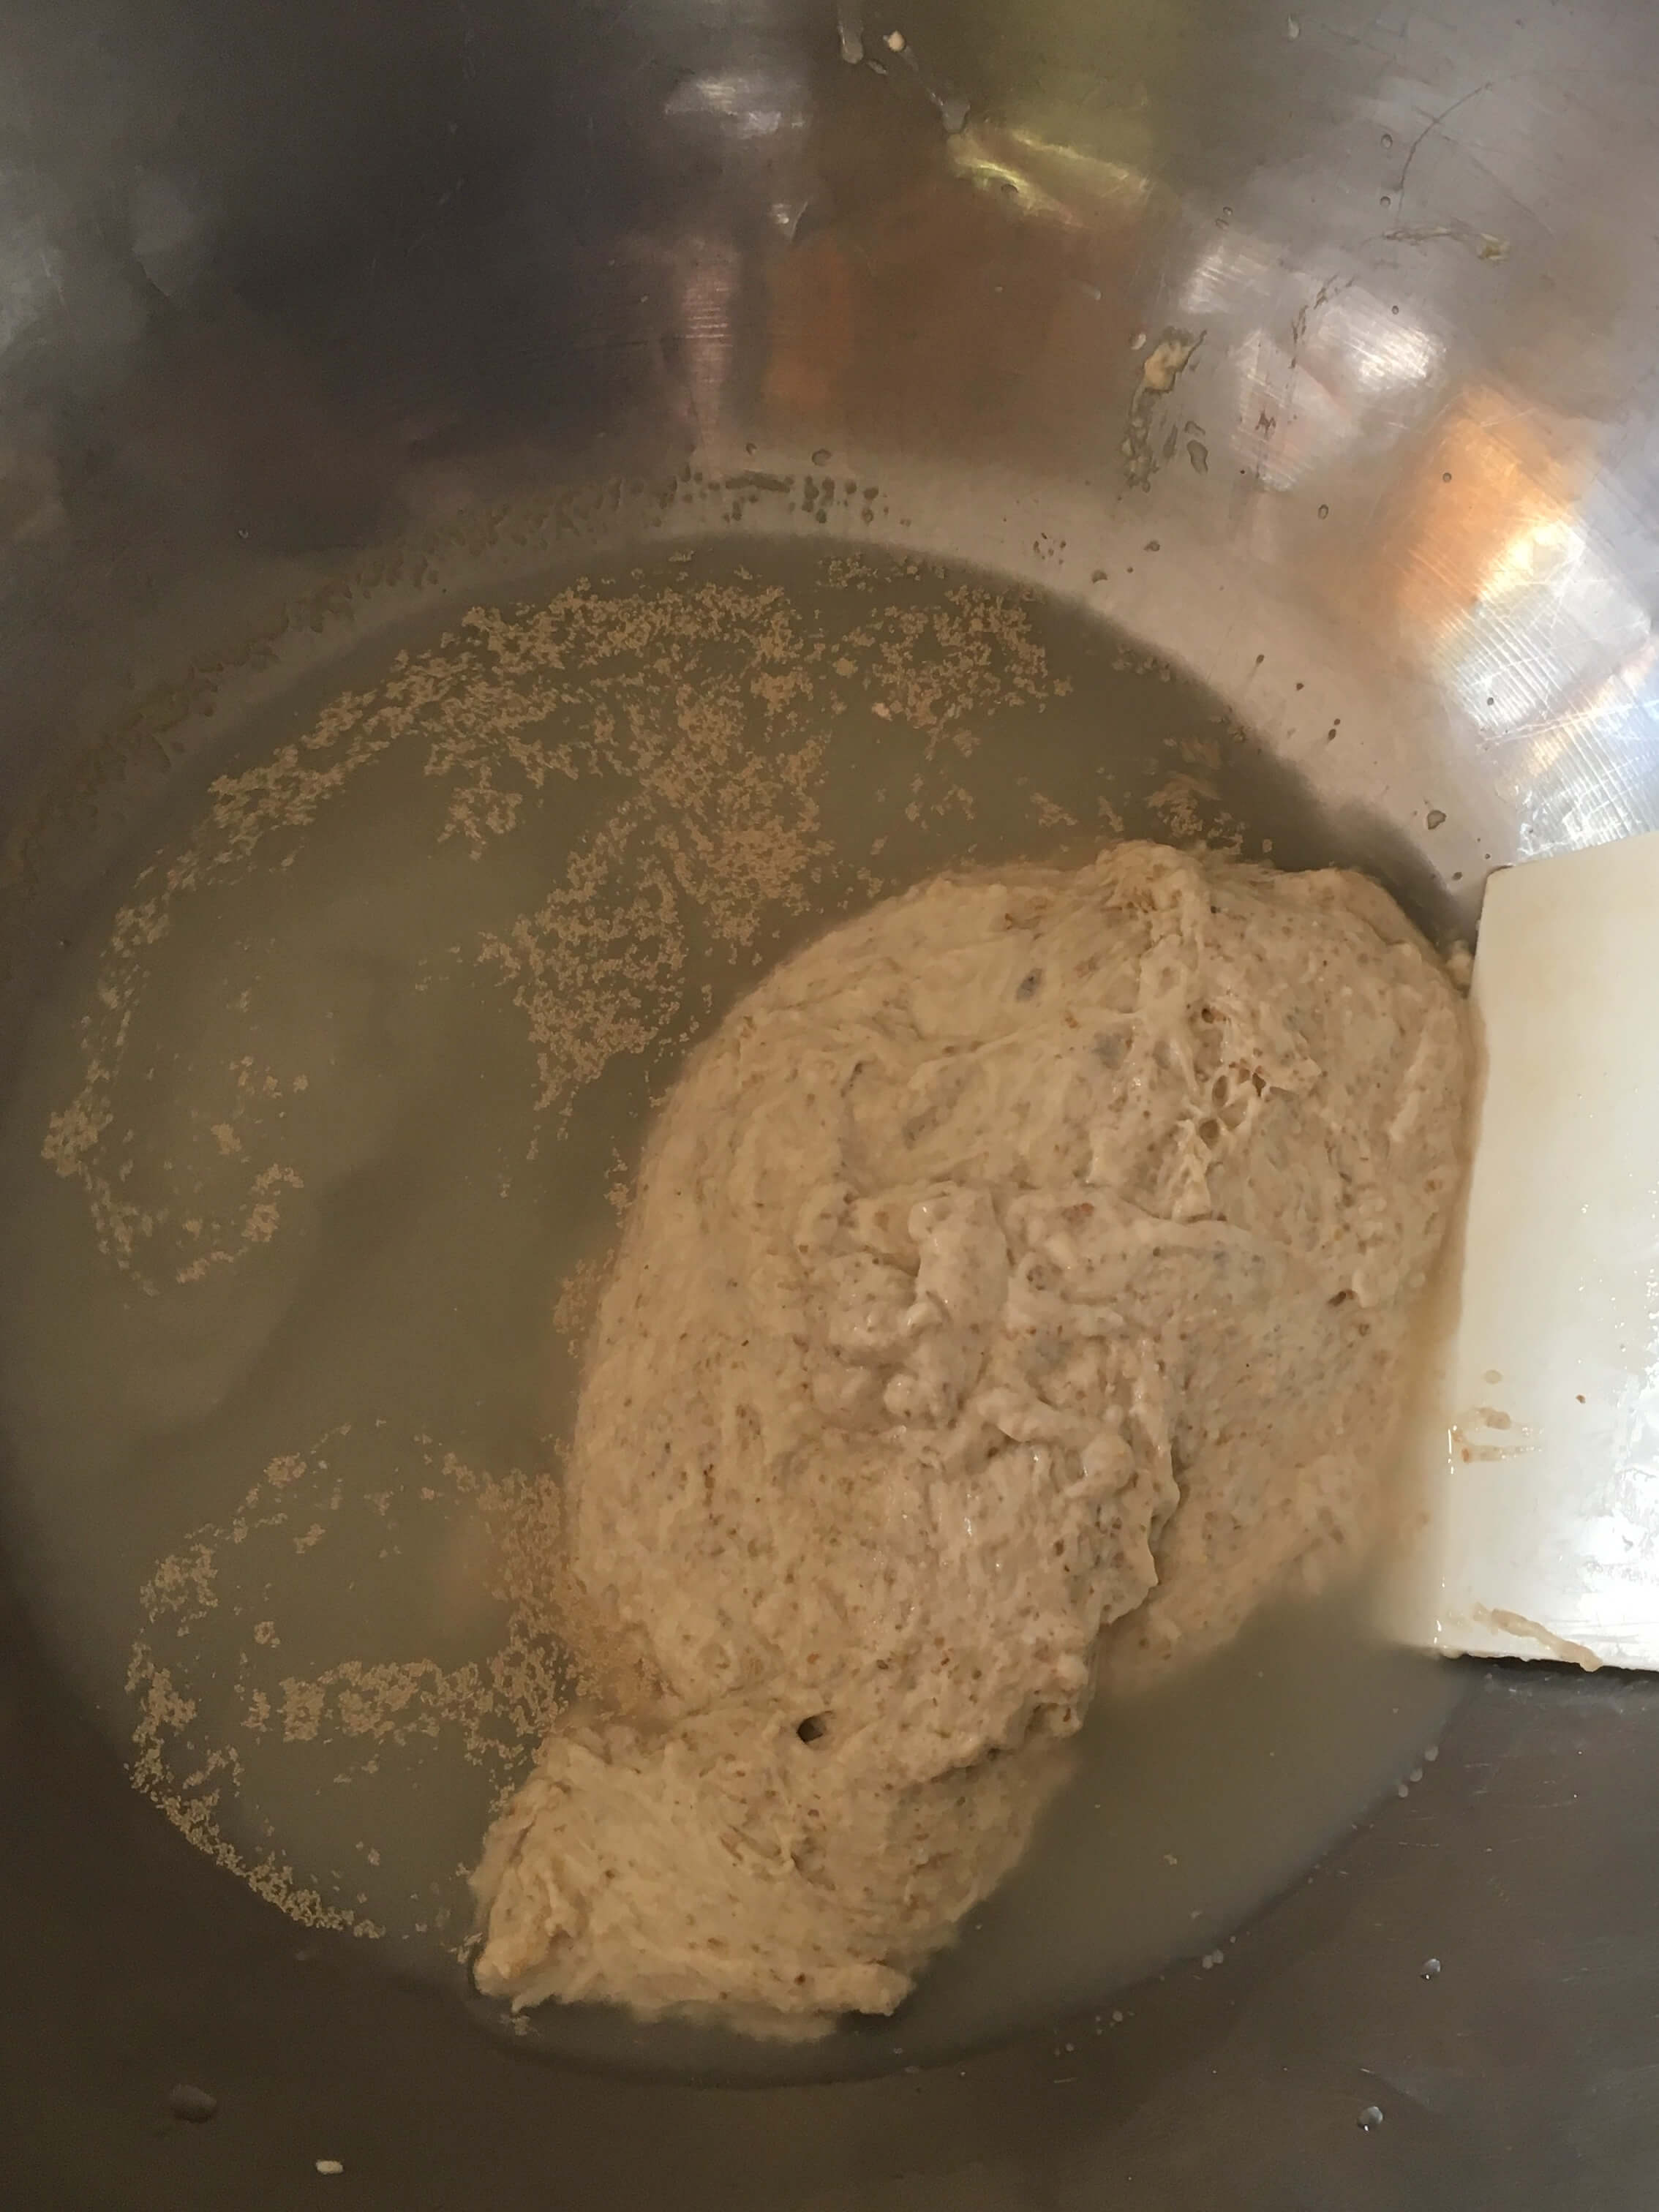
To mix this sticky dough, you’ll need a large wide bowl. You’ll mix and knead the dough in this bowl. First you place the water and yeast in the bowl along with the starter.
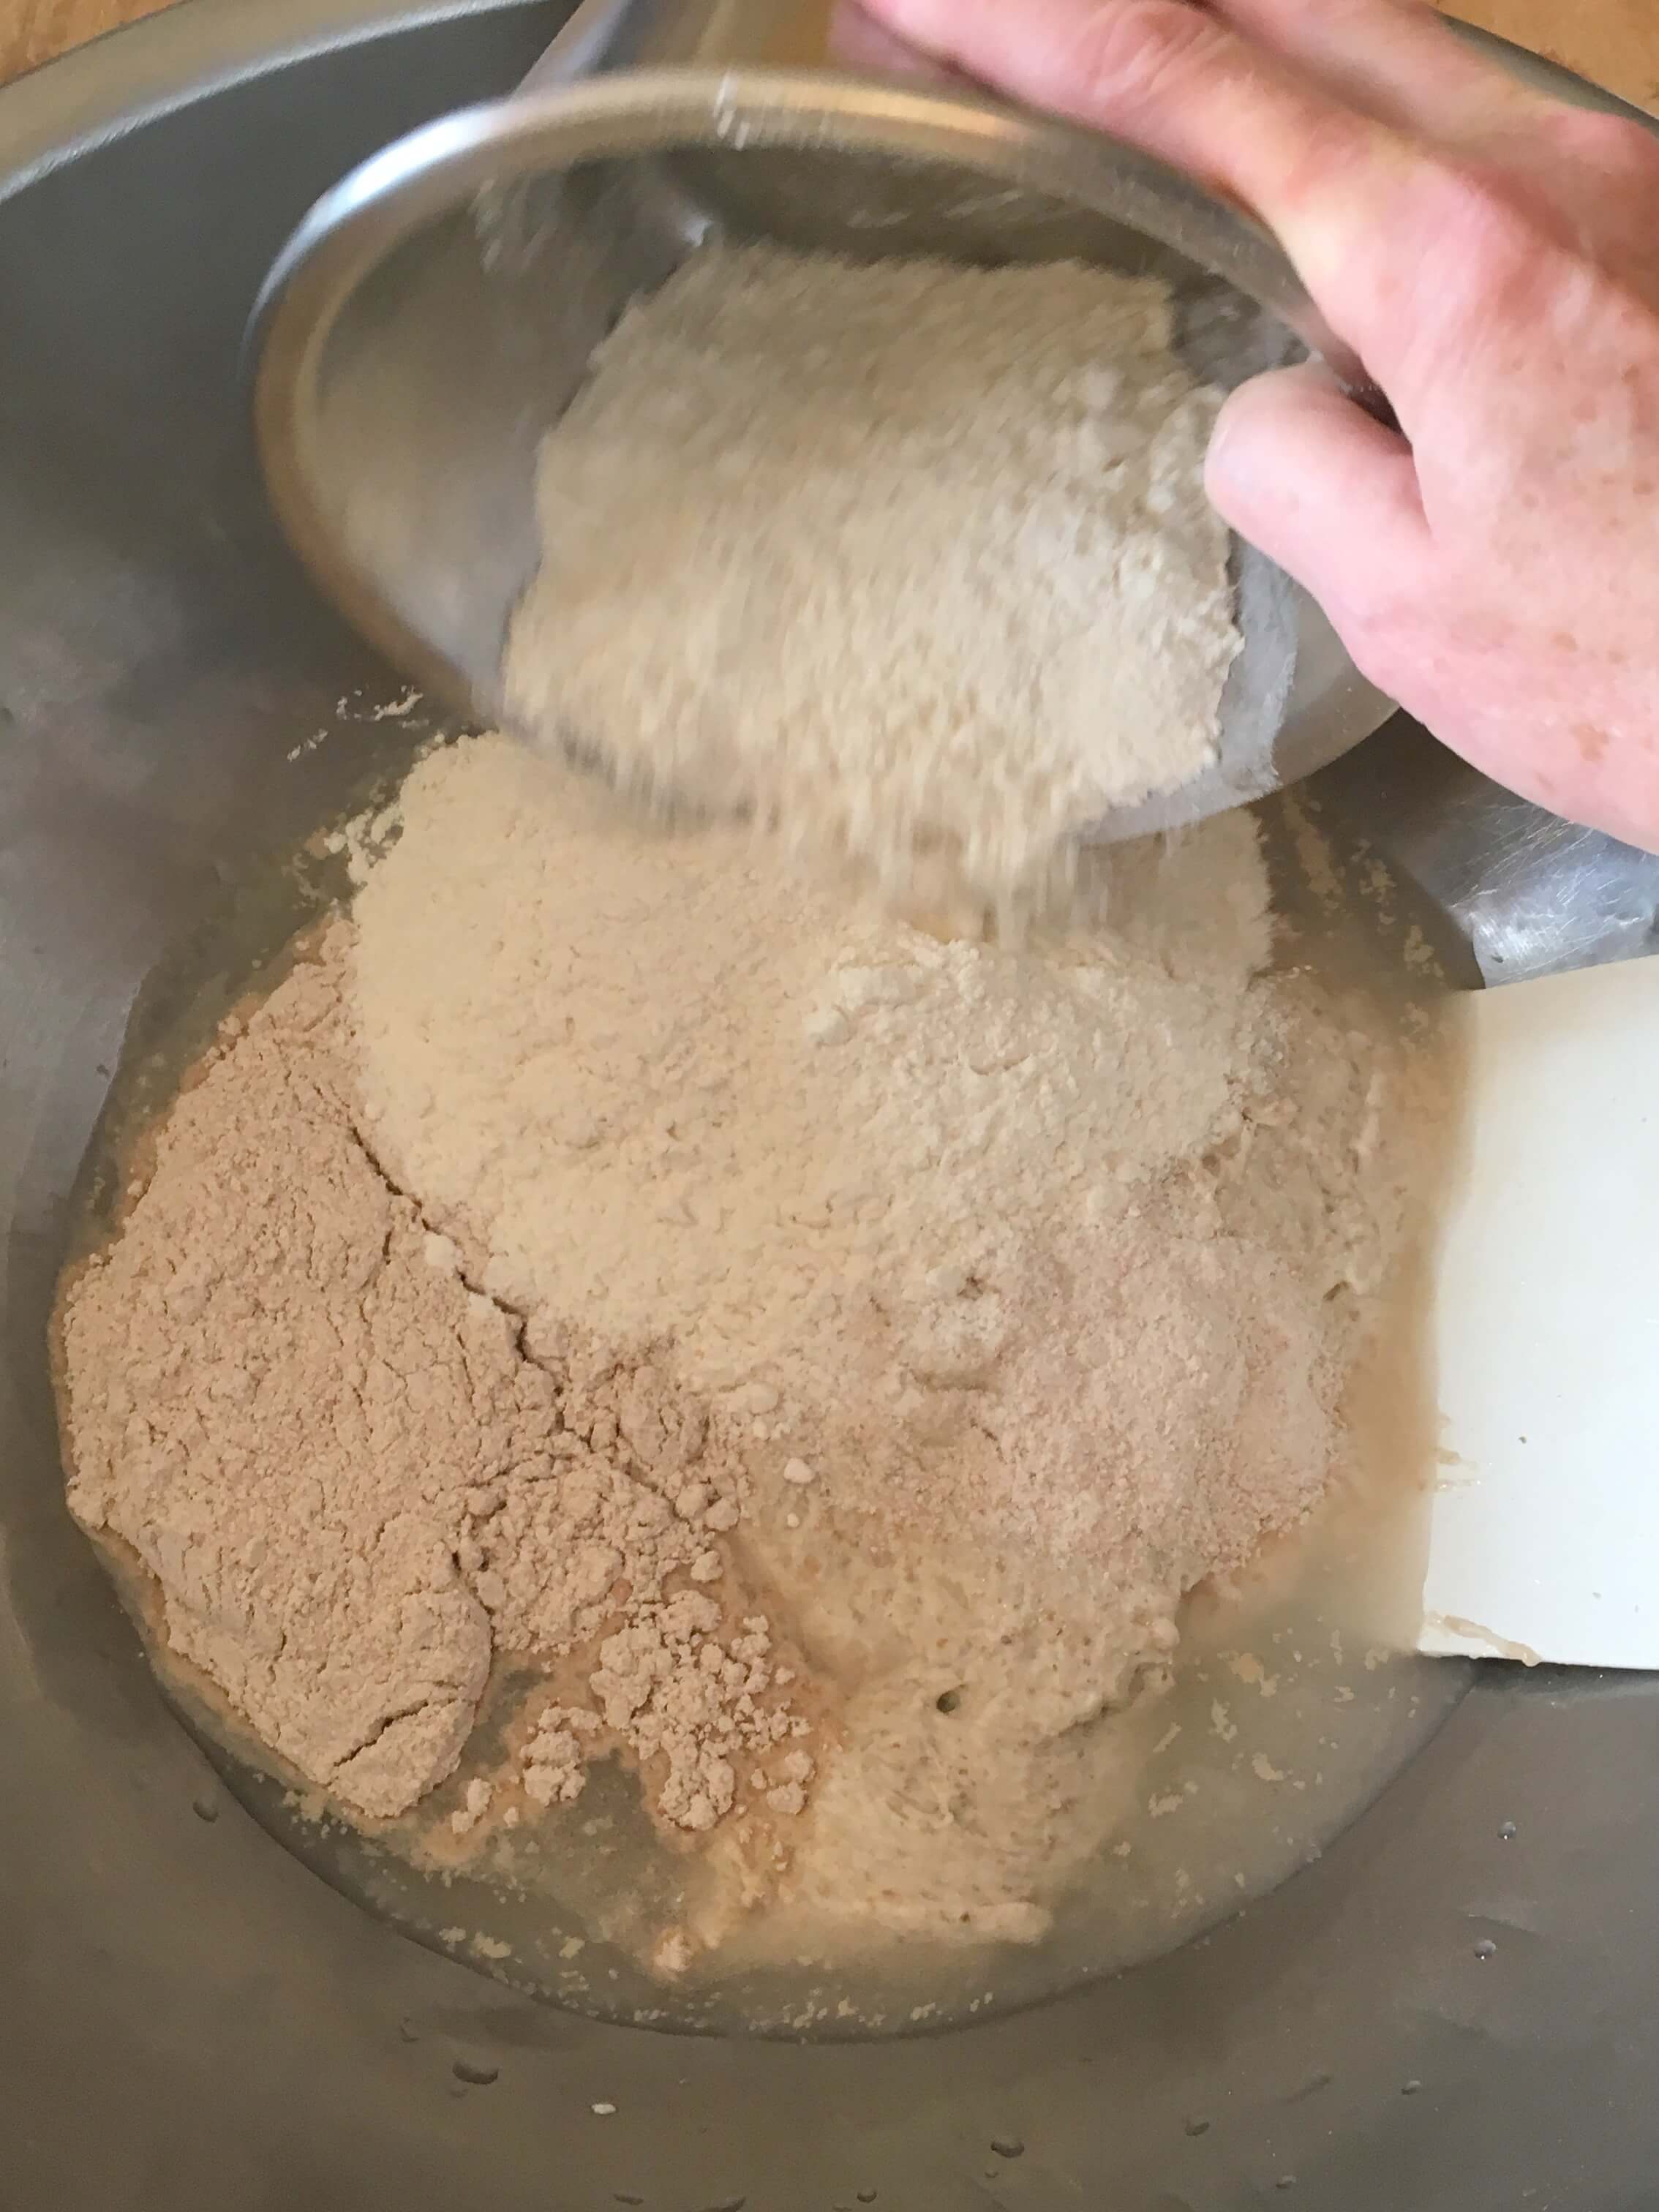
Then you add all-purpose flour, stone ground whole wheat flour and salt to the bowl. The stone ground whole wheat gives tremendous flavor to the dough. There is enough for taste but not so much as to make the loaf dense and heavy. (Here I’ve used King Arthur’s organic stone ground whole wheat.)
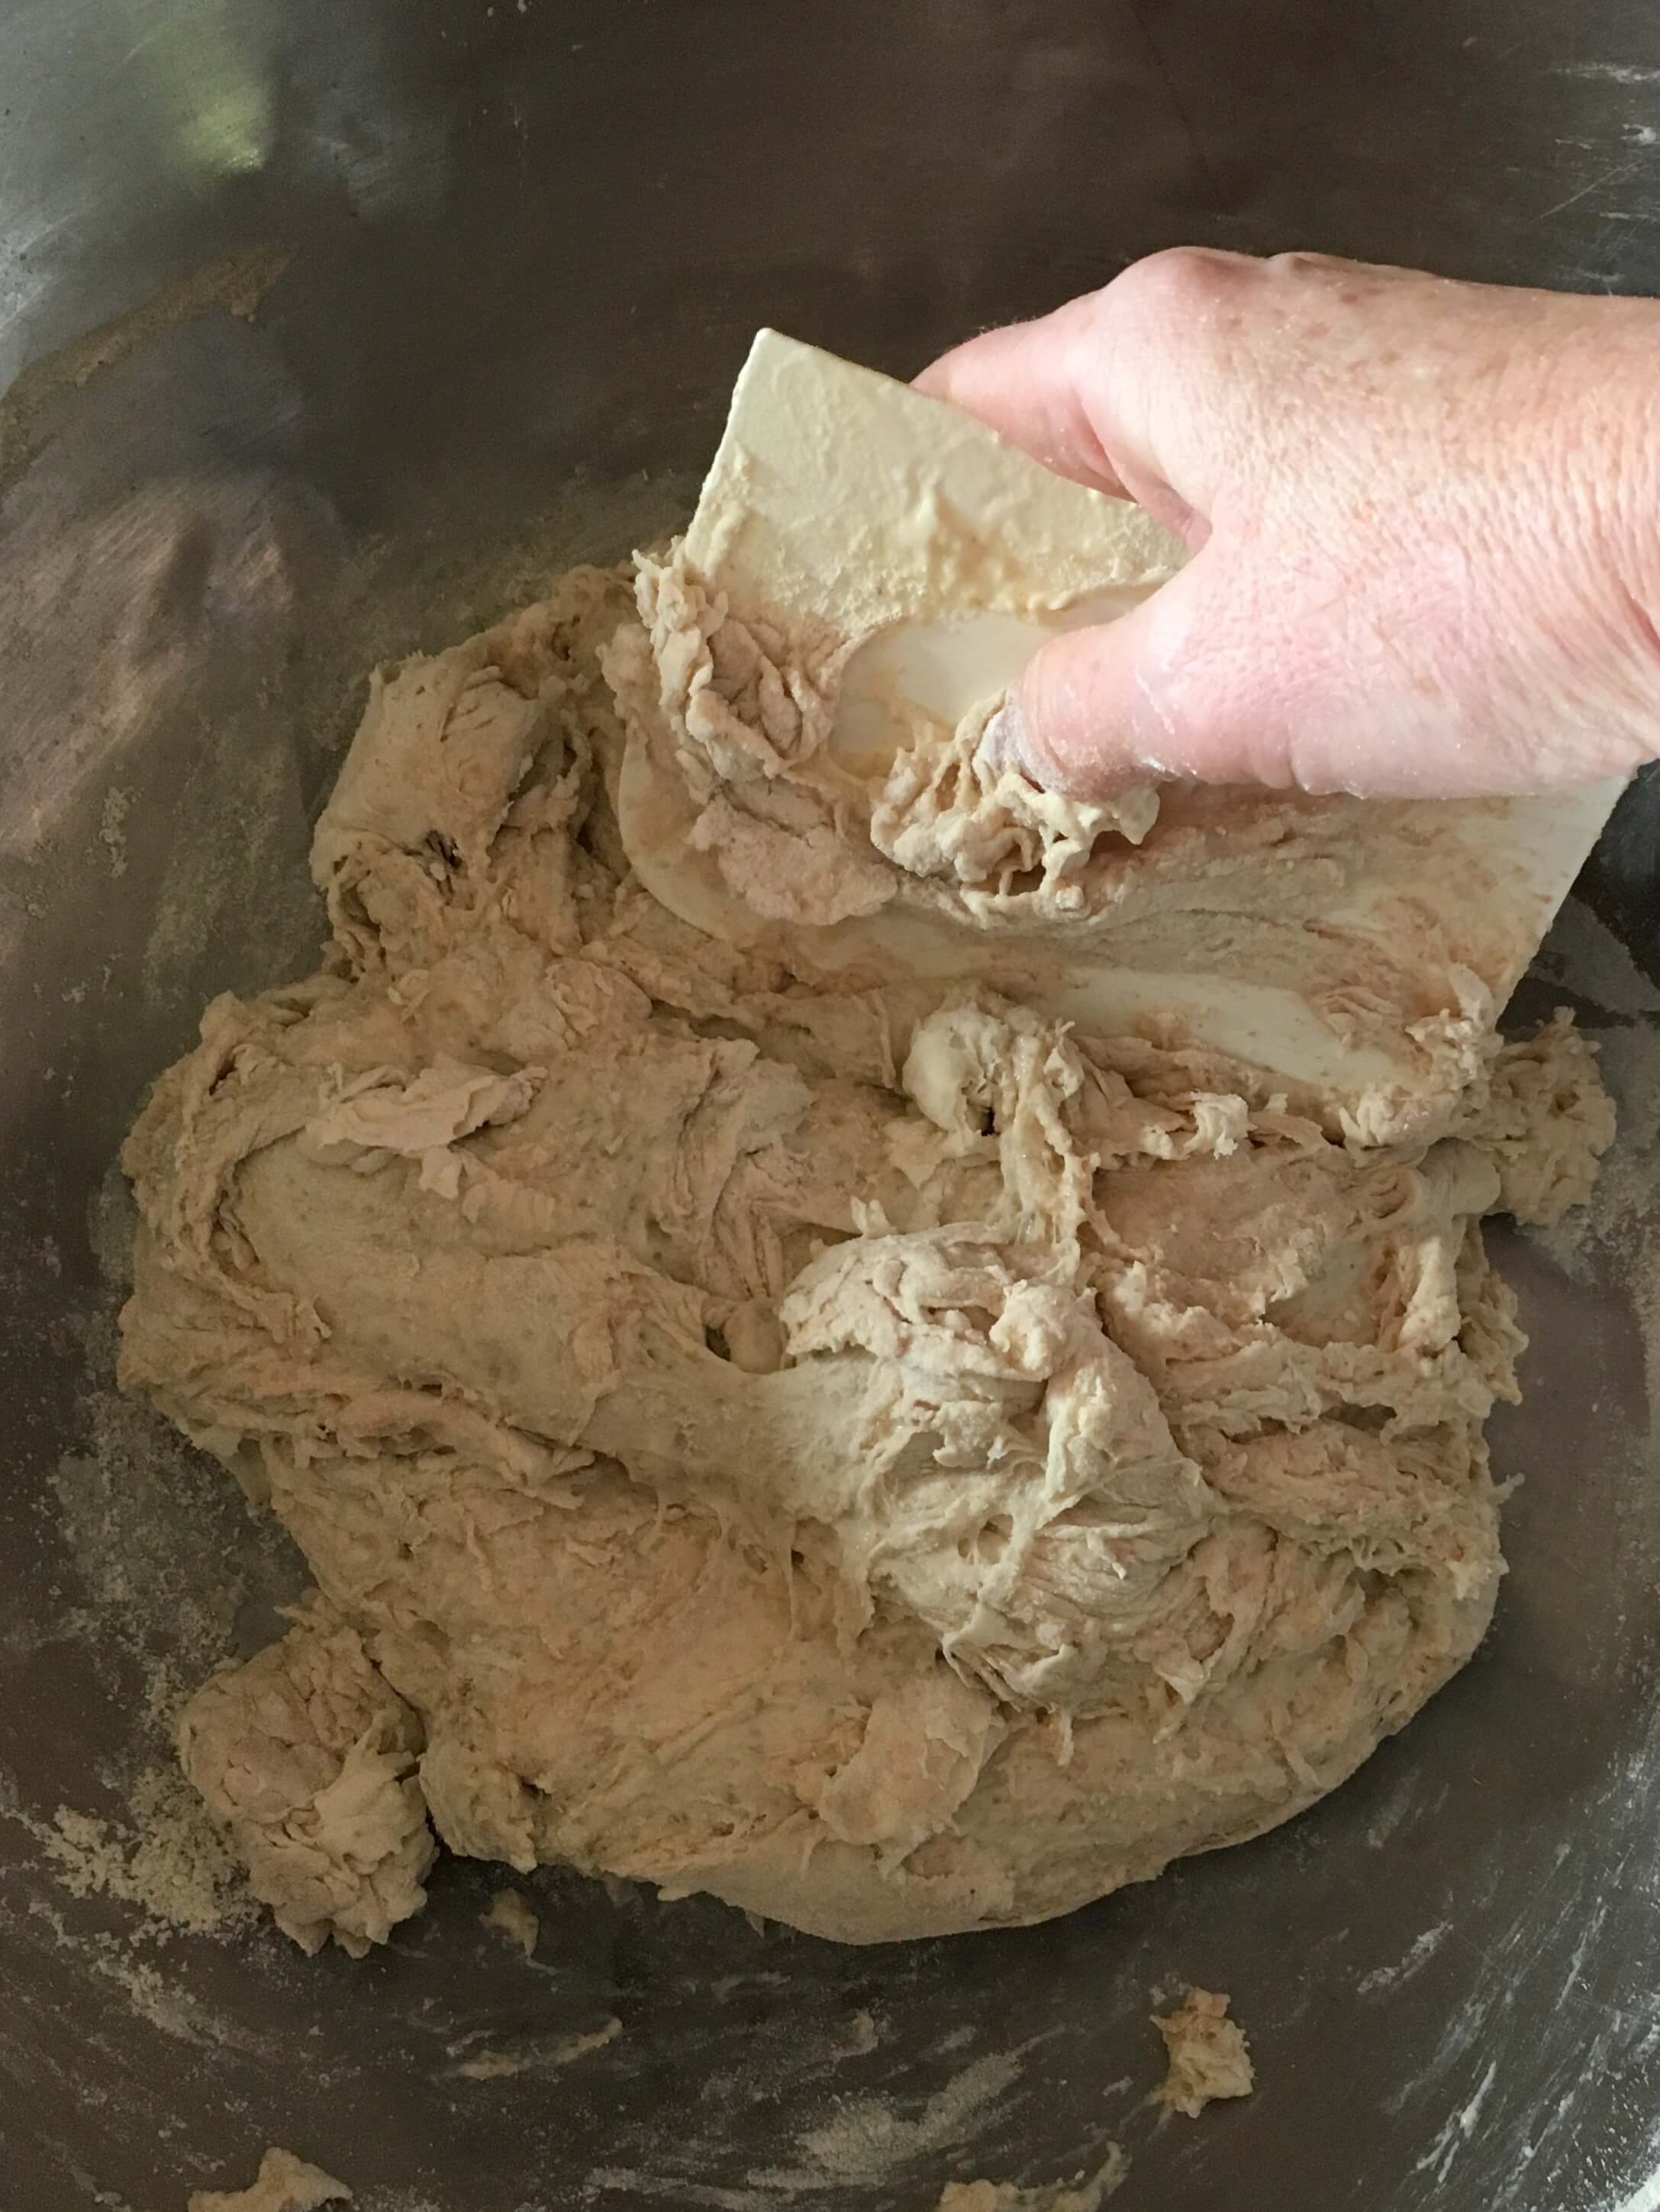
Now the sticky fun begins. Using a plastic dough scraper or silicone spatula, start stirring the flour into the water.
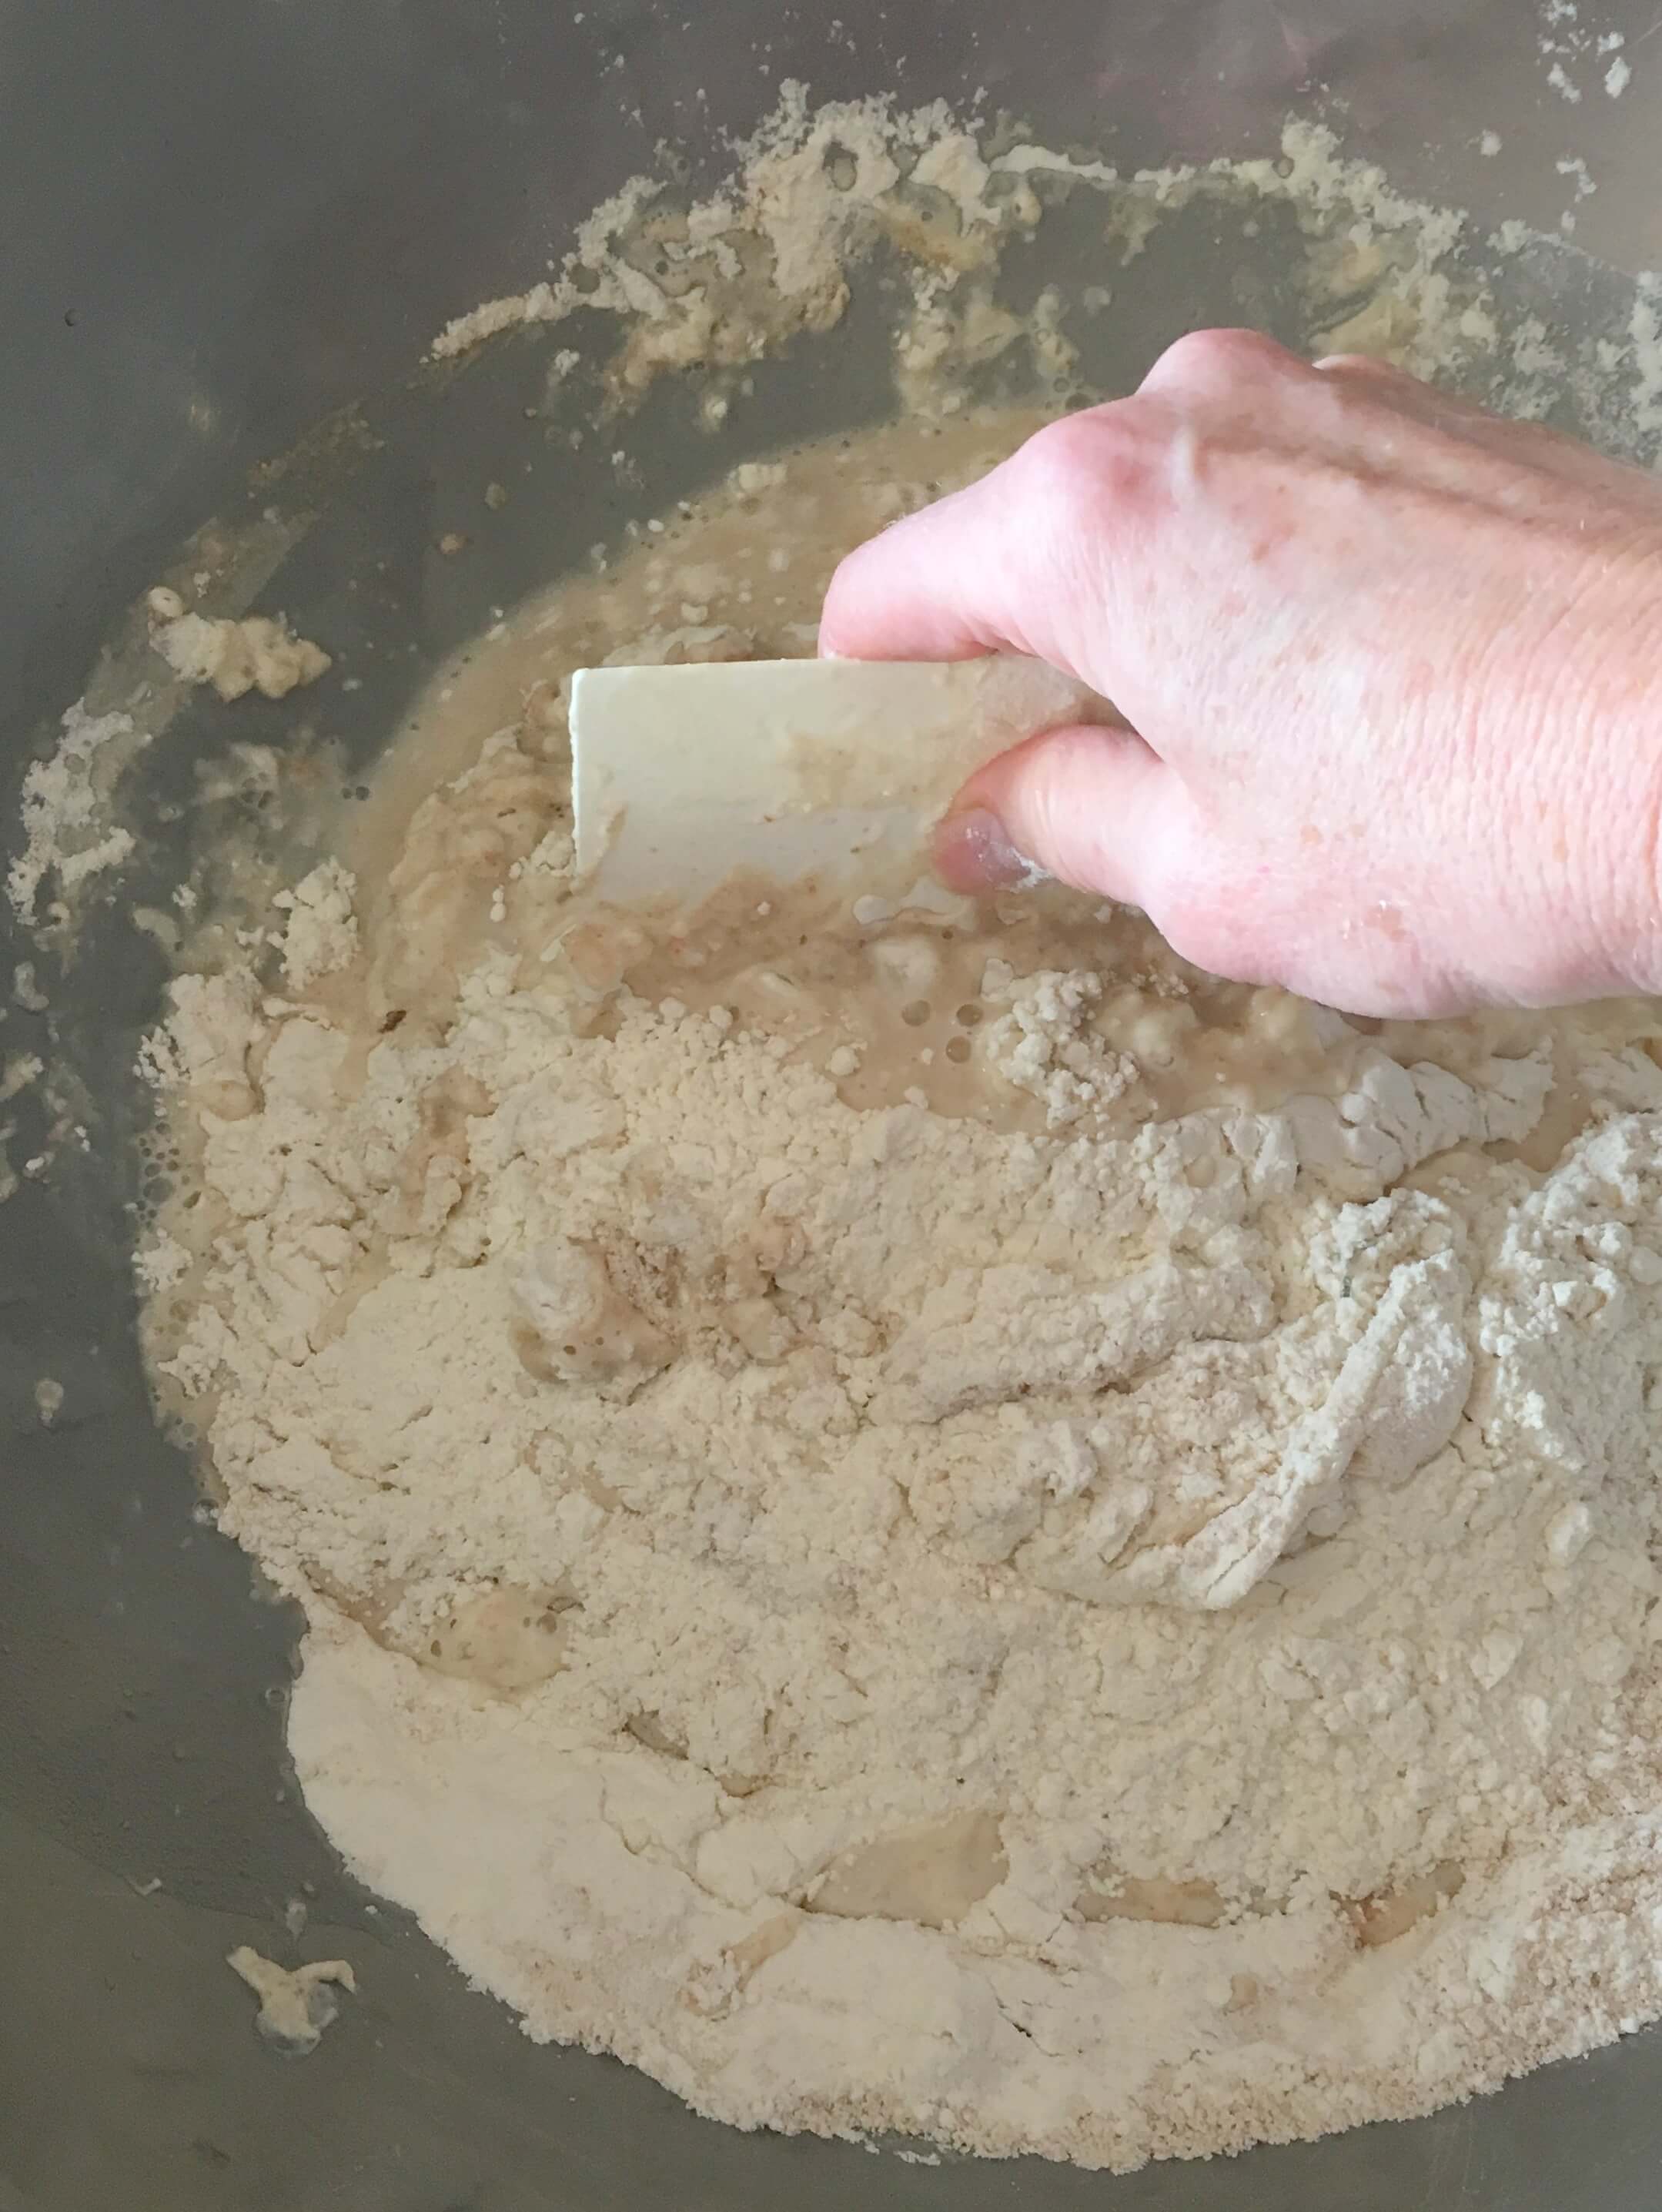
Scrape the edge of the bowl and stir until all of the flour is moistened. This is light work and will take about 3 to 4 minutes.

You keep scraping the edge of the bowl and folding in the dry bits like this. See how the wet mixture is coming together?

After 3 minutes you’ll see something that vaguely resembles bread dough. At this point, scrape off your hand and the dough scraper and let the dough sit for 5 to 10 minutes. As the dough sits, the starches in the flour will absorb some of the water in the dough.
See how the dough has come together while resting? This is an excellent trick to learn when making any yeast bread dough. If the dough gets rubbery and resists handling, give it a rest. It will slacken and be easier to handle.

Generously flour your work surface. (Keep a bowl of flour on hand to dip your fingers in if the mass becomes unmanageable—all-purpose or bread flour.) I put a silicone baking mat down on my table for this purpose. The dough is so wet and sticky that the mat helps me with the kneading.
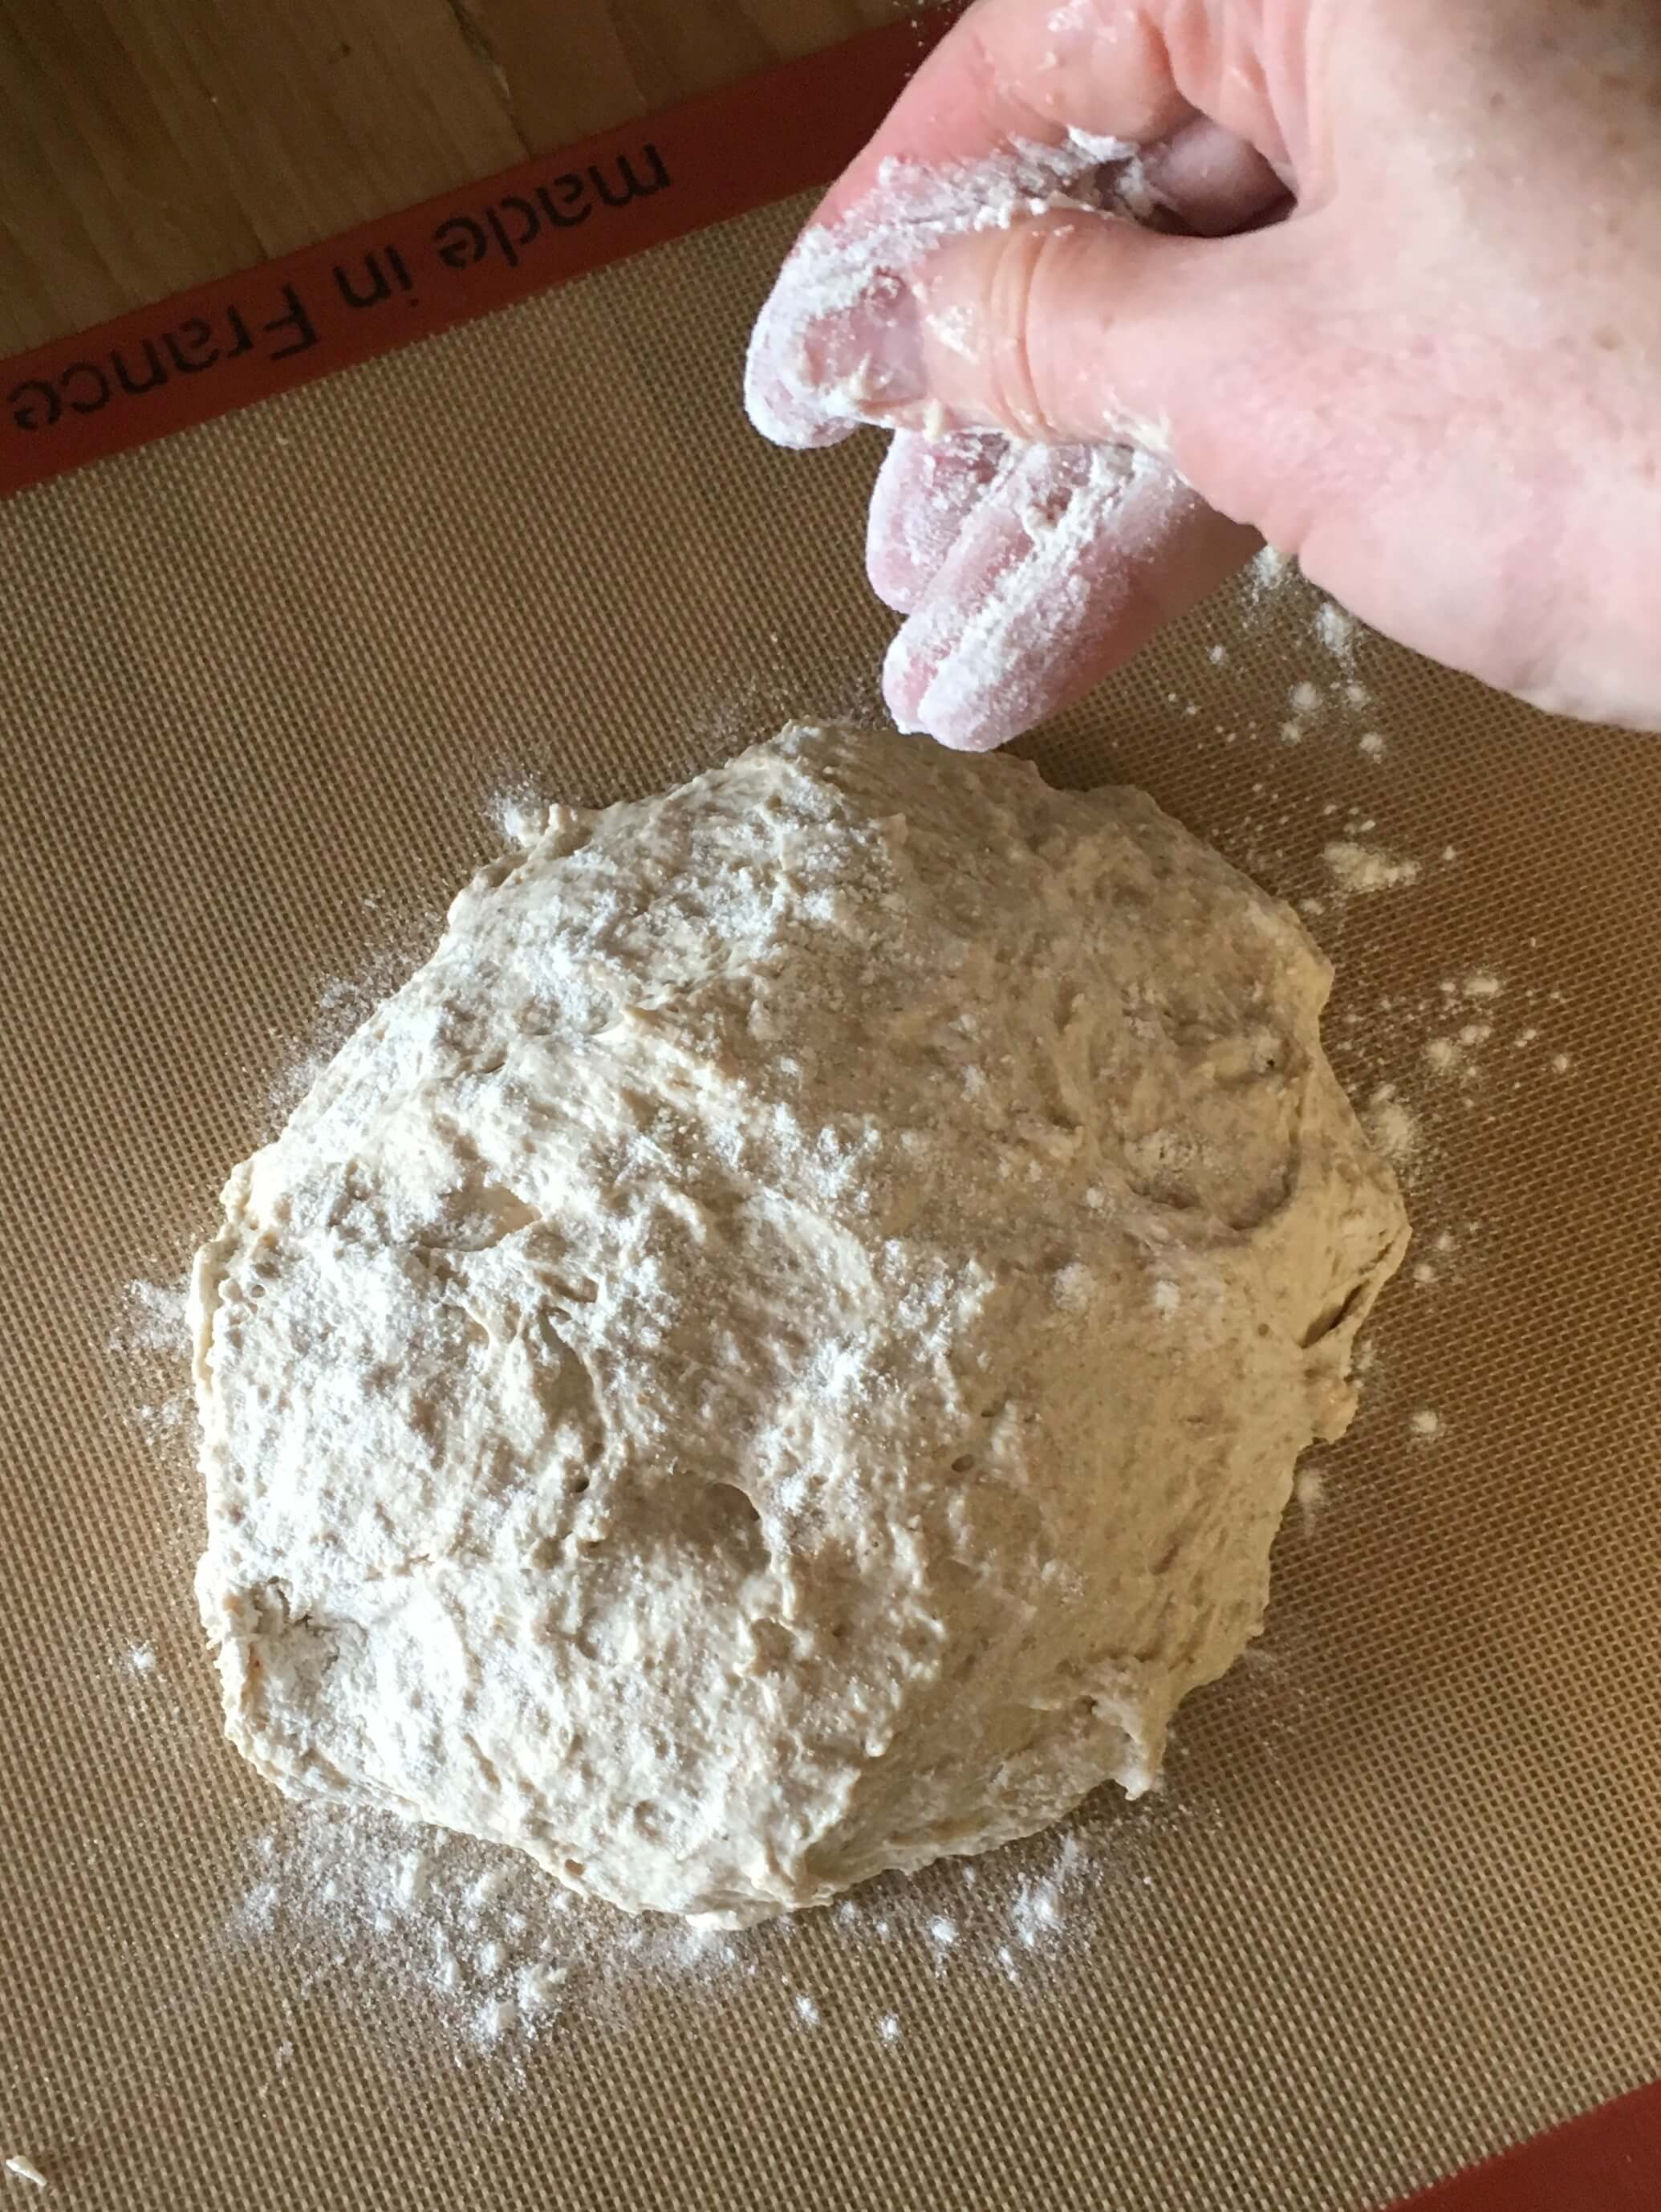
Although I call this kneading, it is more of a scrape and fold process. With floured fingertips and a dough scraper, scrape the dough into a round shape. Lift up the dough with one hand, stretch it then fold it over itself.

Resist the urge to add too much flour.

Keep lifting up the dough and folding it back down onto itself for 4 to 5 minutes. The dough will start to feel a little more silky. But the dough will still be very sticky. Scrape it into a plastic container or bowl and cover it.
Even after kneading the dough is still sticky.

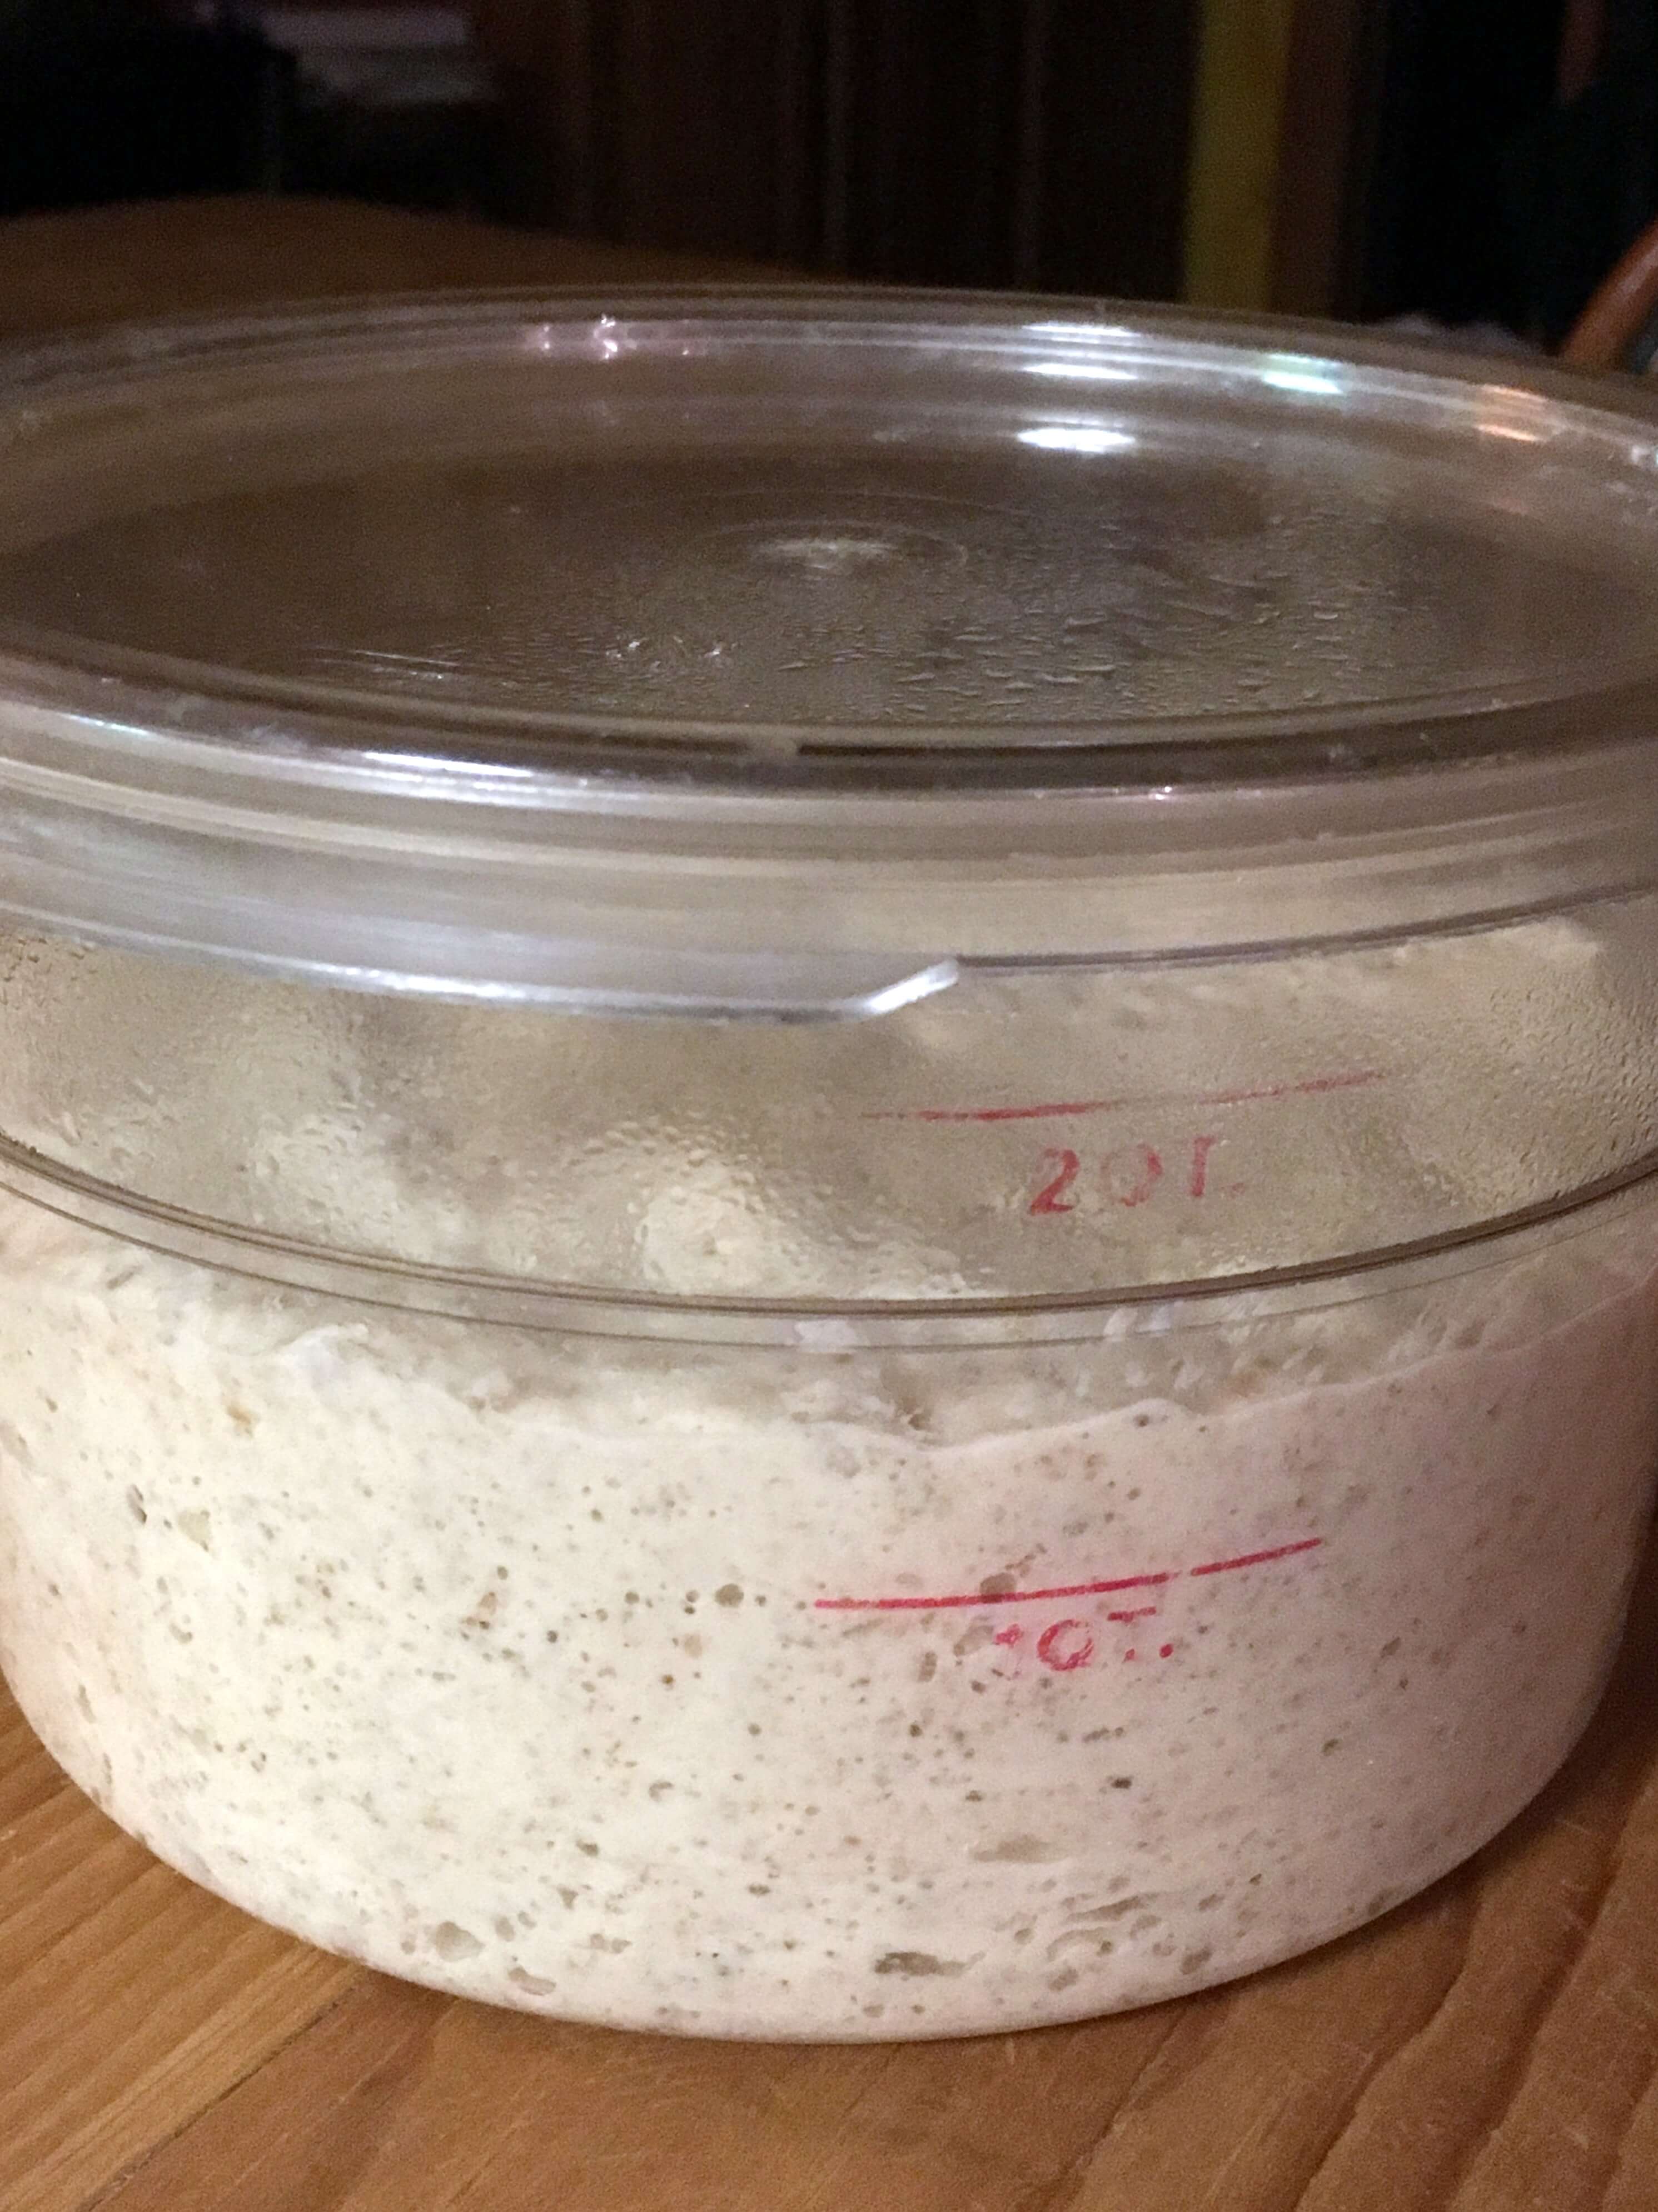
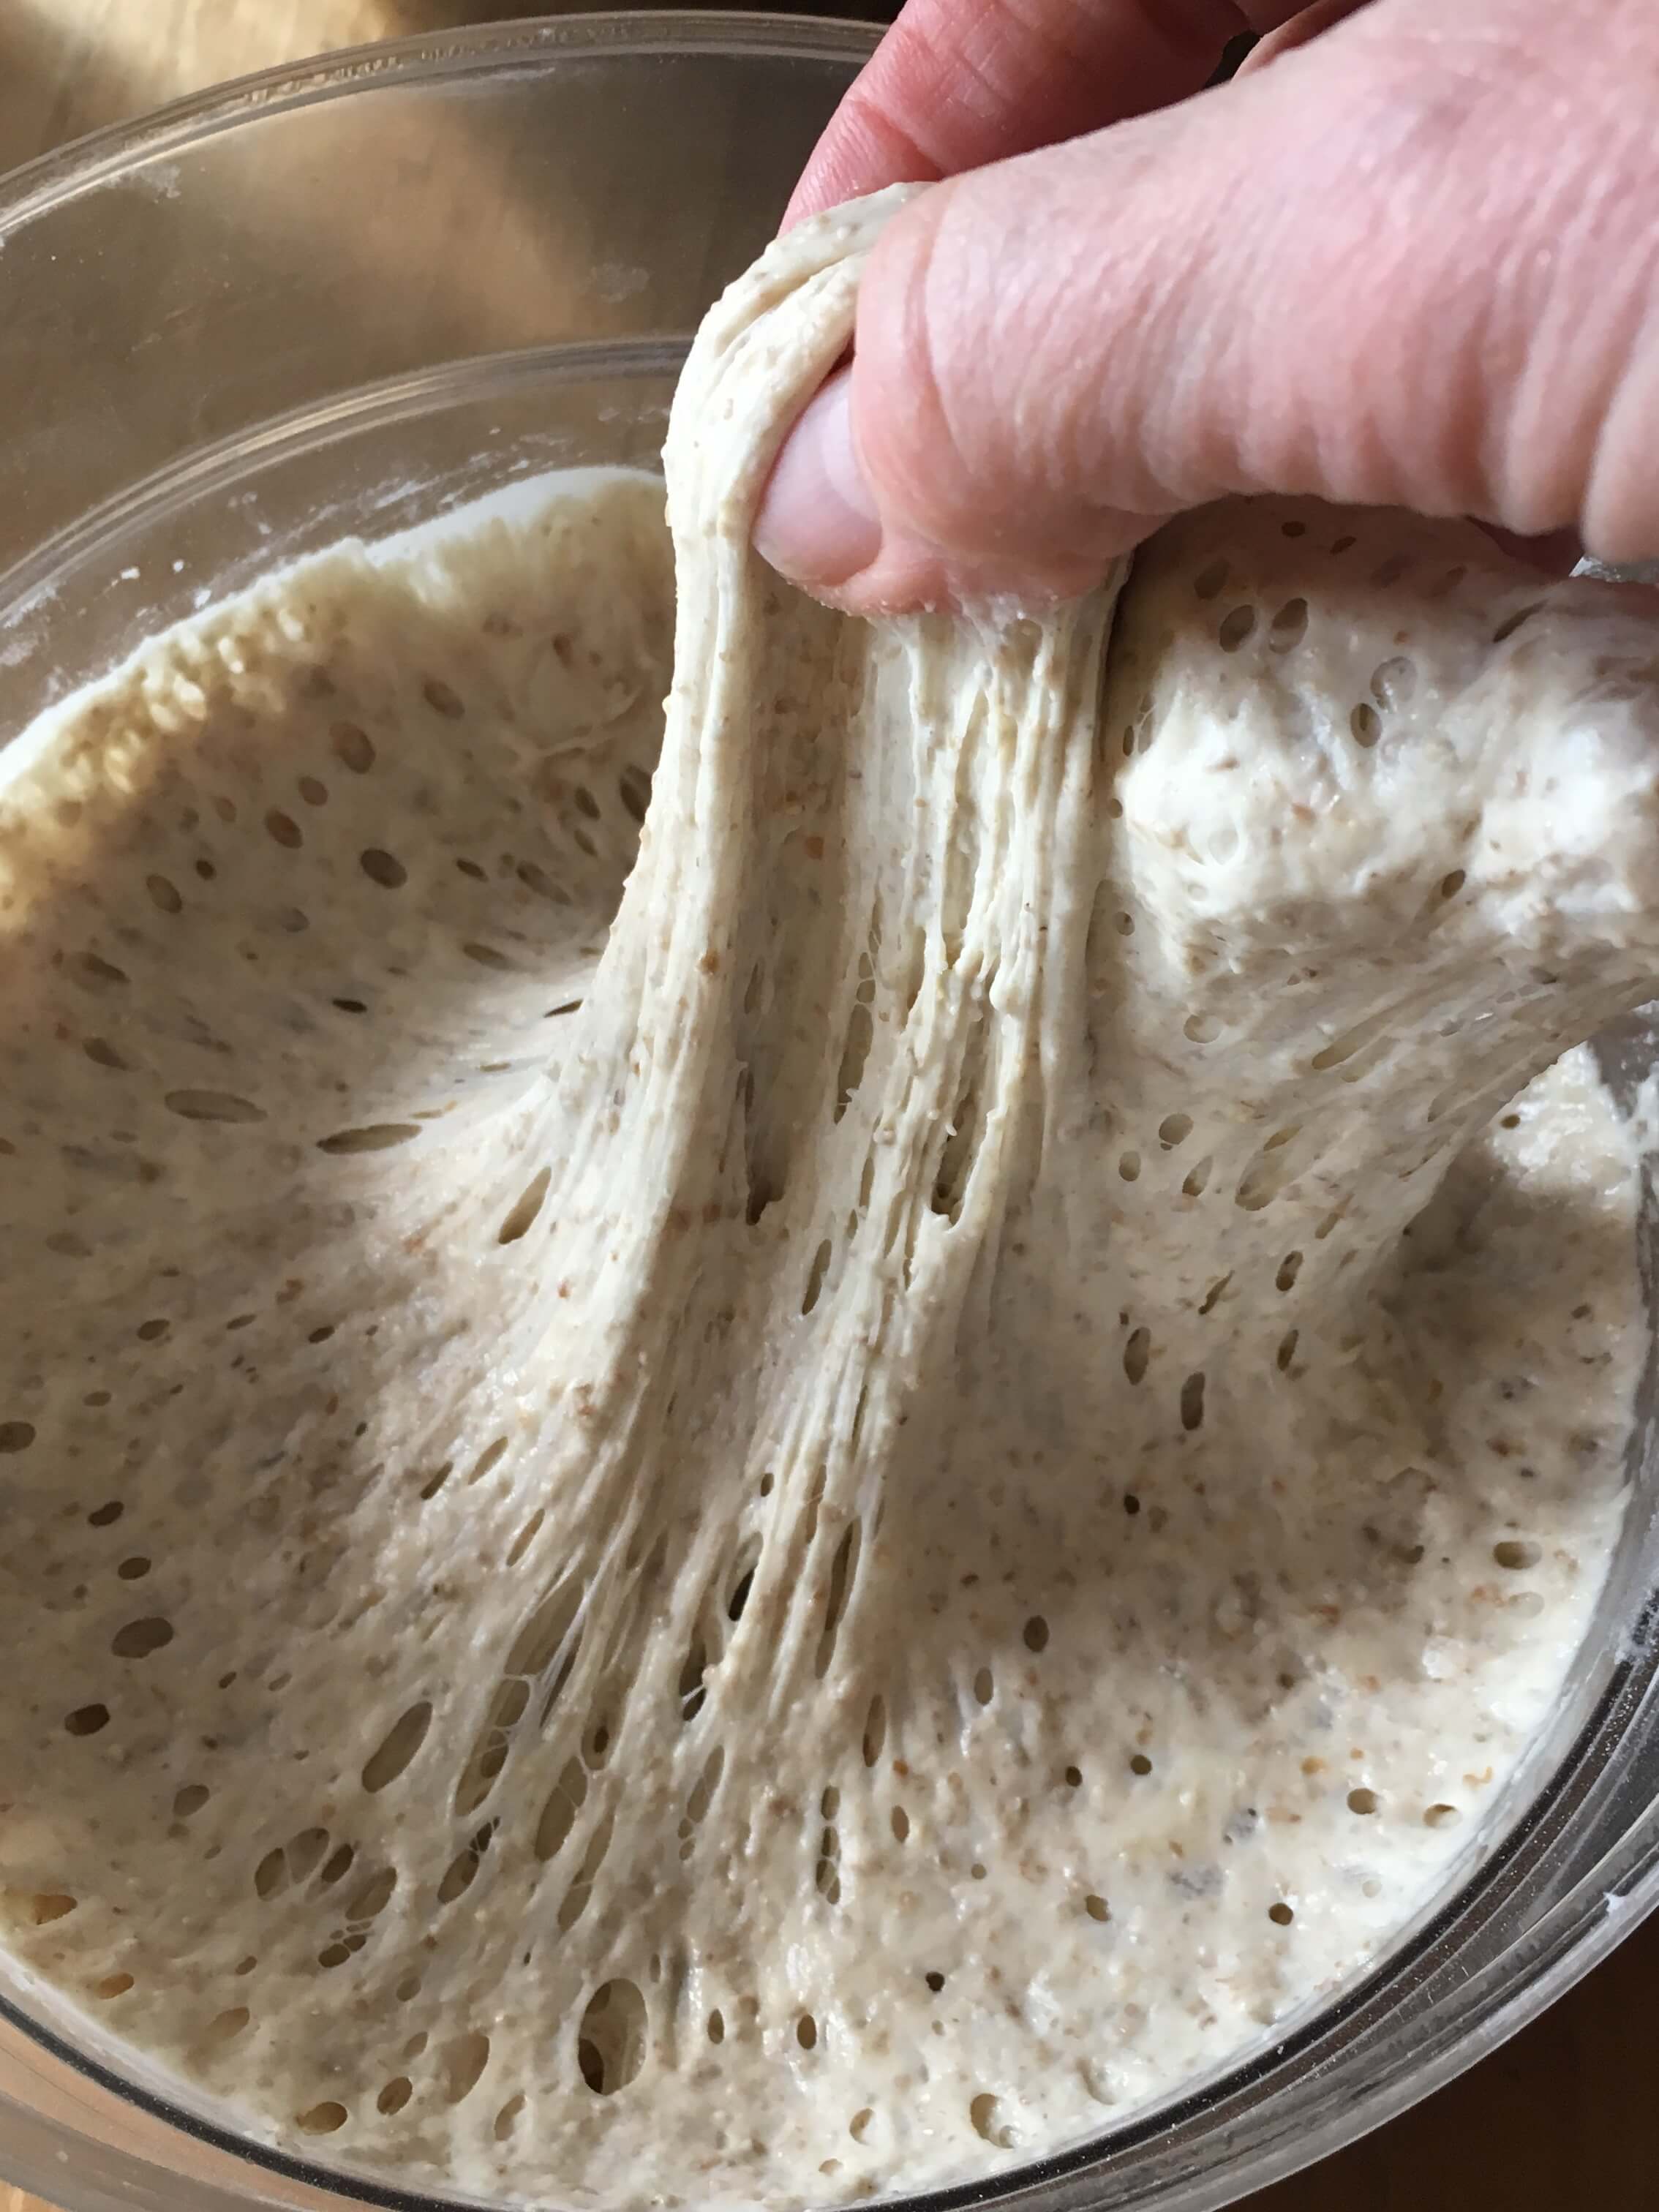
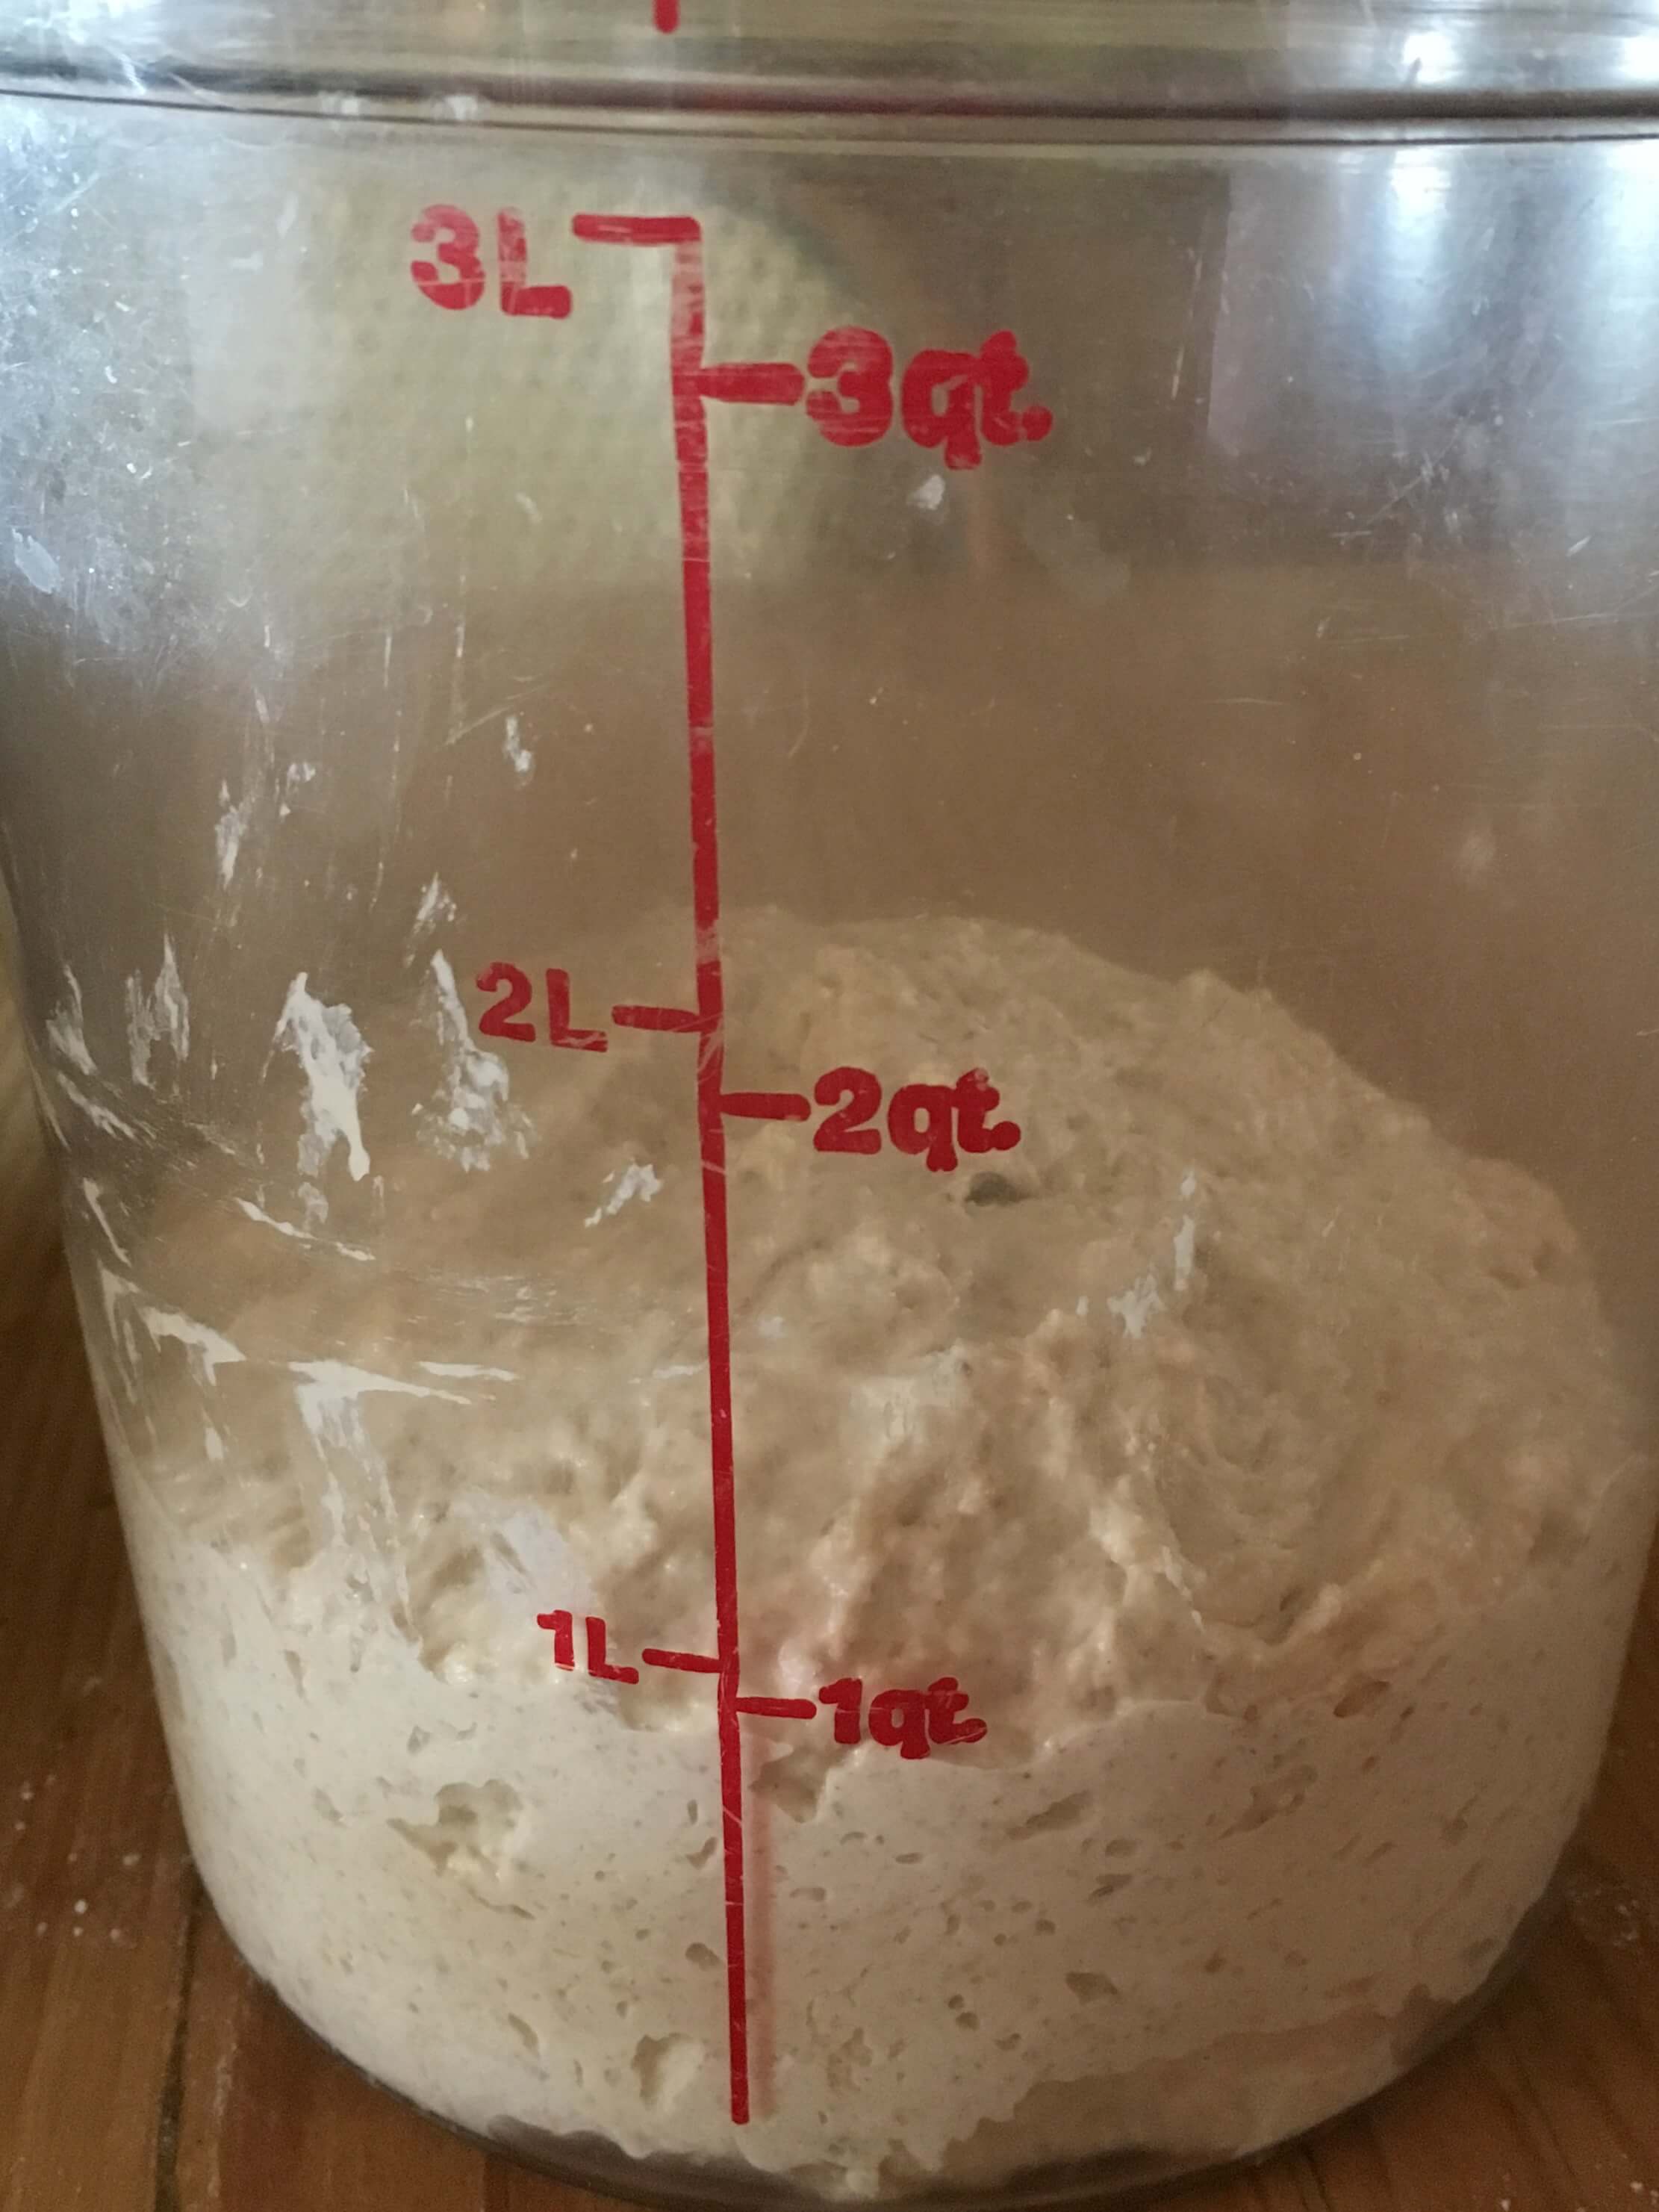
Cover and let the dough ferment and rise until double in bulk, for 2 ½ to 3 hours. See how active and alive it is?

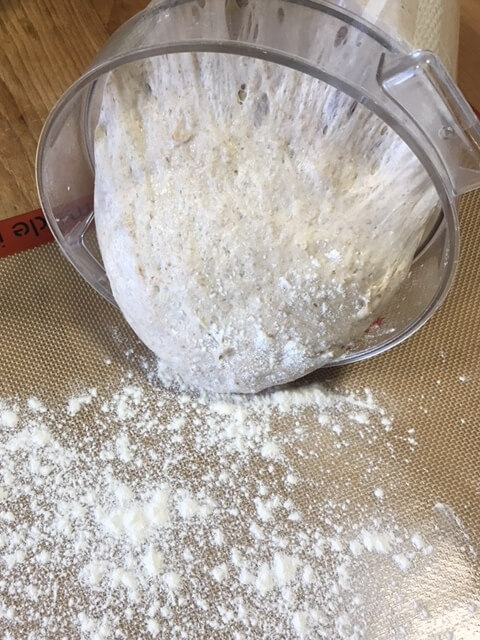
You need to transfer the dough from the container to a well floured work surface. I love this step.
Here you can see all the gluten strands in the dough and smell the aromas of fermentation.

With floured hands, gather the dough into a round shape by tucking the dough in on each side. Then place your hands under the top edge of the rough ball of dough. Pull it towards you, dragging the dough along the work surface to stretch it tightly.
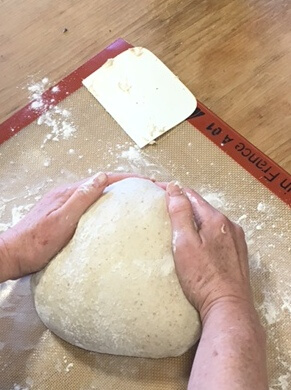
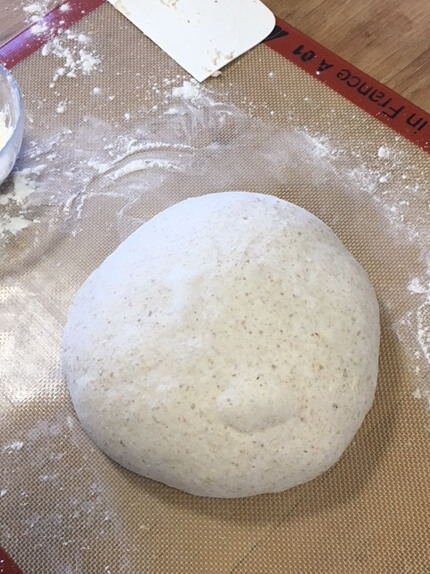
See the smooth ball of dough? When you are shaping the dough into a ball, pick one spot as your presentation side. That is the side where you want to stretch the dough smooth.
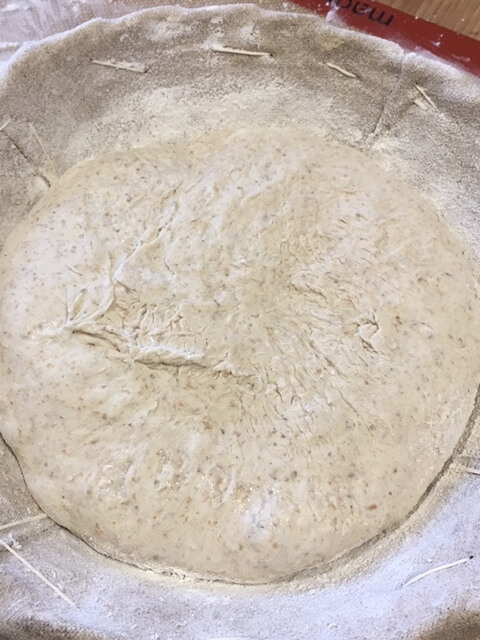
This soft mass of dough won’t hold its shape during the proofing stage. So it needs to sit in some kind of form. We use French linen-lined baskets called bannetons. But you can create the same effect by lining a 10-inch or 12-inch wide bowl with a linen cloth. You need to sprinkle the banneton or cloth-lined-bowl with lots of flour. This is a wet dough that may absorb the flour and stick.
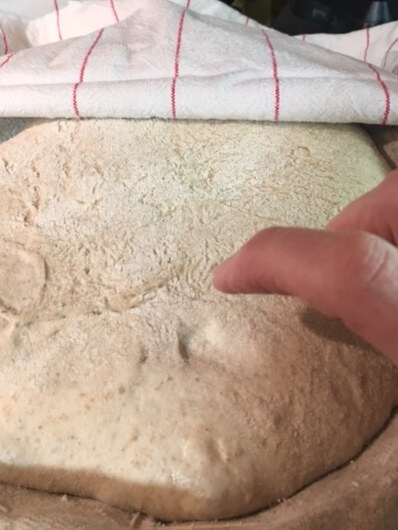
Cover the dough with a clean towel and let it proof for 30 minutes to an hour. The dough will increase 50% or more in volume.
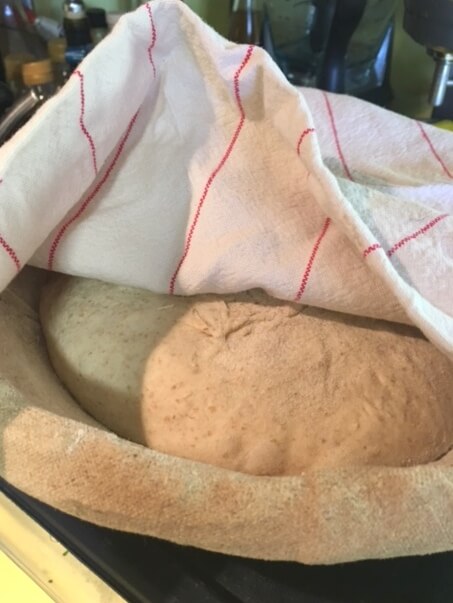
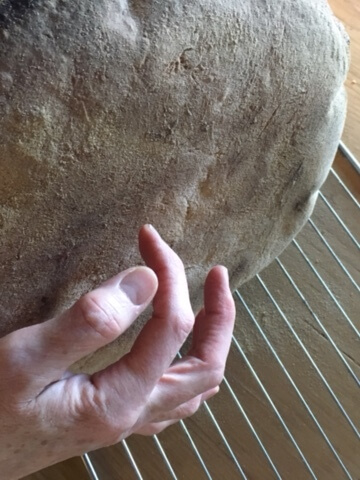
You know the dough is ready when you perform a little test. Gently press a finger into the dough.
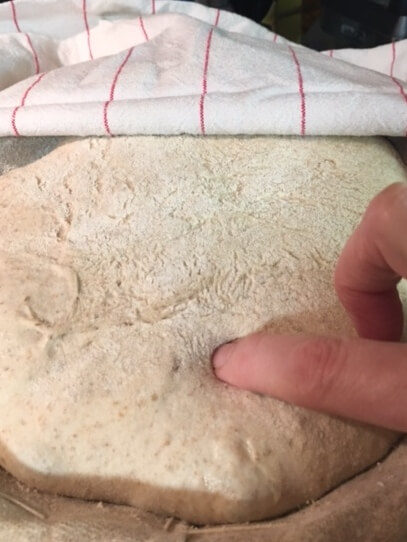
It will be soft but still spring back slowly when pressed with your finger leaving a slight indentation in the dough.
You’ll be baking this bread on a baking stone for the best results although you can bake it on a parchment-lined sheet pan. Make sure that your baking stone is in place and preheated before you unmold the dough. And place a pan on the bottom shelf of your oven. You’ll use this to create steam in the oven.
To transfer the dough onto the baking stone, invert the proofed dough onto a generously floured baker’s peel. (The back of a baking sheet also works.)
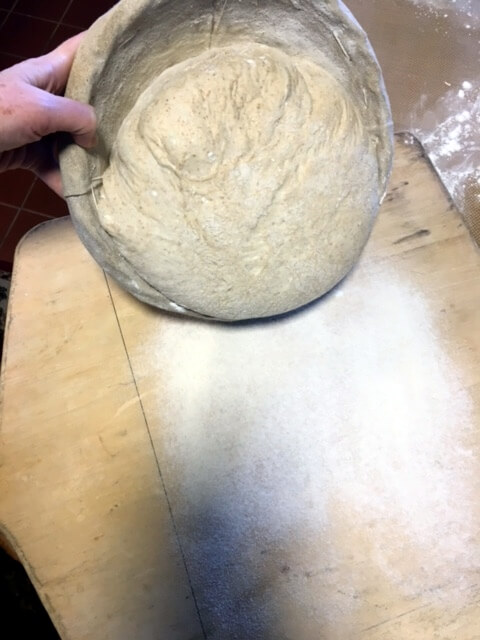
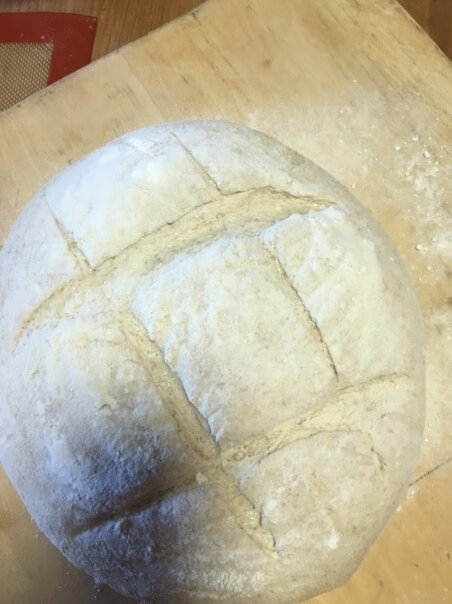
Here is the jiggly ball of dough. Gently brush off some of the flour if you prefer a smoother surface. But act quickly at this stage. The dough can deflate if left to sit for more than 4 or 5 minutes.

To help the dough expand fully in the oven, you need to score the surface. I use a serrated twine knife. You need to be decisive when scoring the dough.
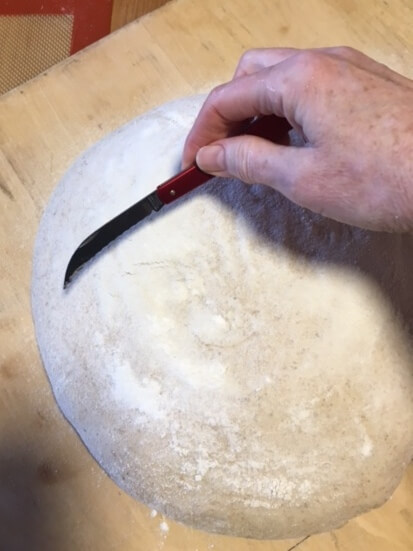
Slash the loaf in four places, two horizontal and two vertical cuts to form a large square in the center of the top.
Now time to work quickly. Pour about ½ cup of boiling water into the pan in the oven then slide the loaf directly onto the baking stone. Bake for 20 minutes. Then rotate the bread so that it bakes evenly. Bake for another 35 to 40 minutes, until the crust is a deep, dark brown and the bread makes a nice hollow sound when tapped on the bottom. The loaf needs to bake for about 55 minutes to an hour.
Let this loaf cool for a good hour or more before slicing.
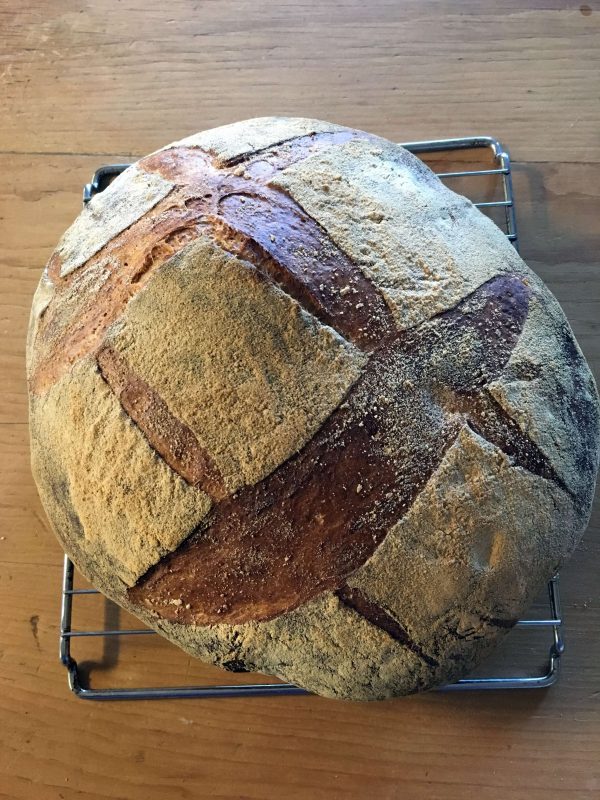
Here is the bread fresh from the oven. As soon as I could, I sliced into the loaf and slathered with with imported butter. Bread Makes the Meal. Sometimes bread is the meal.
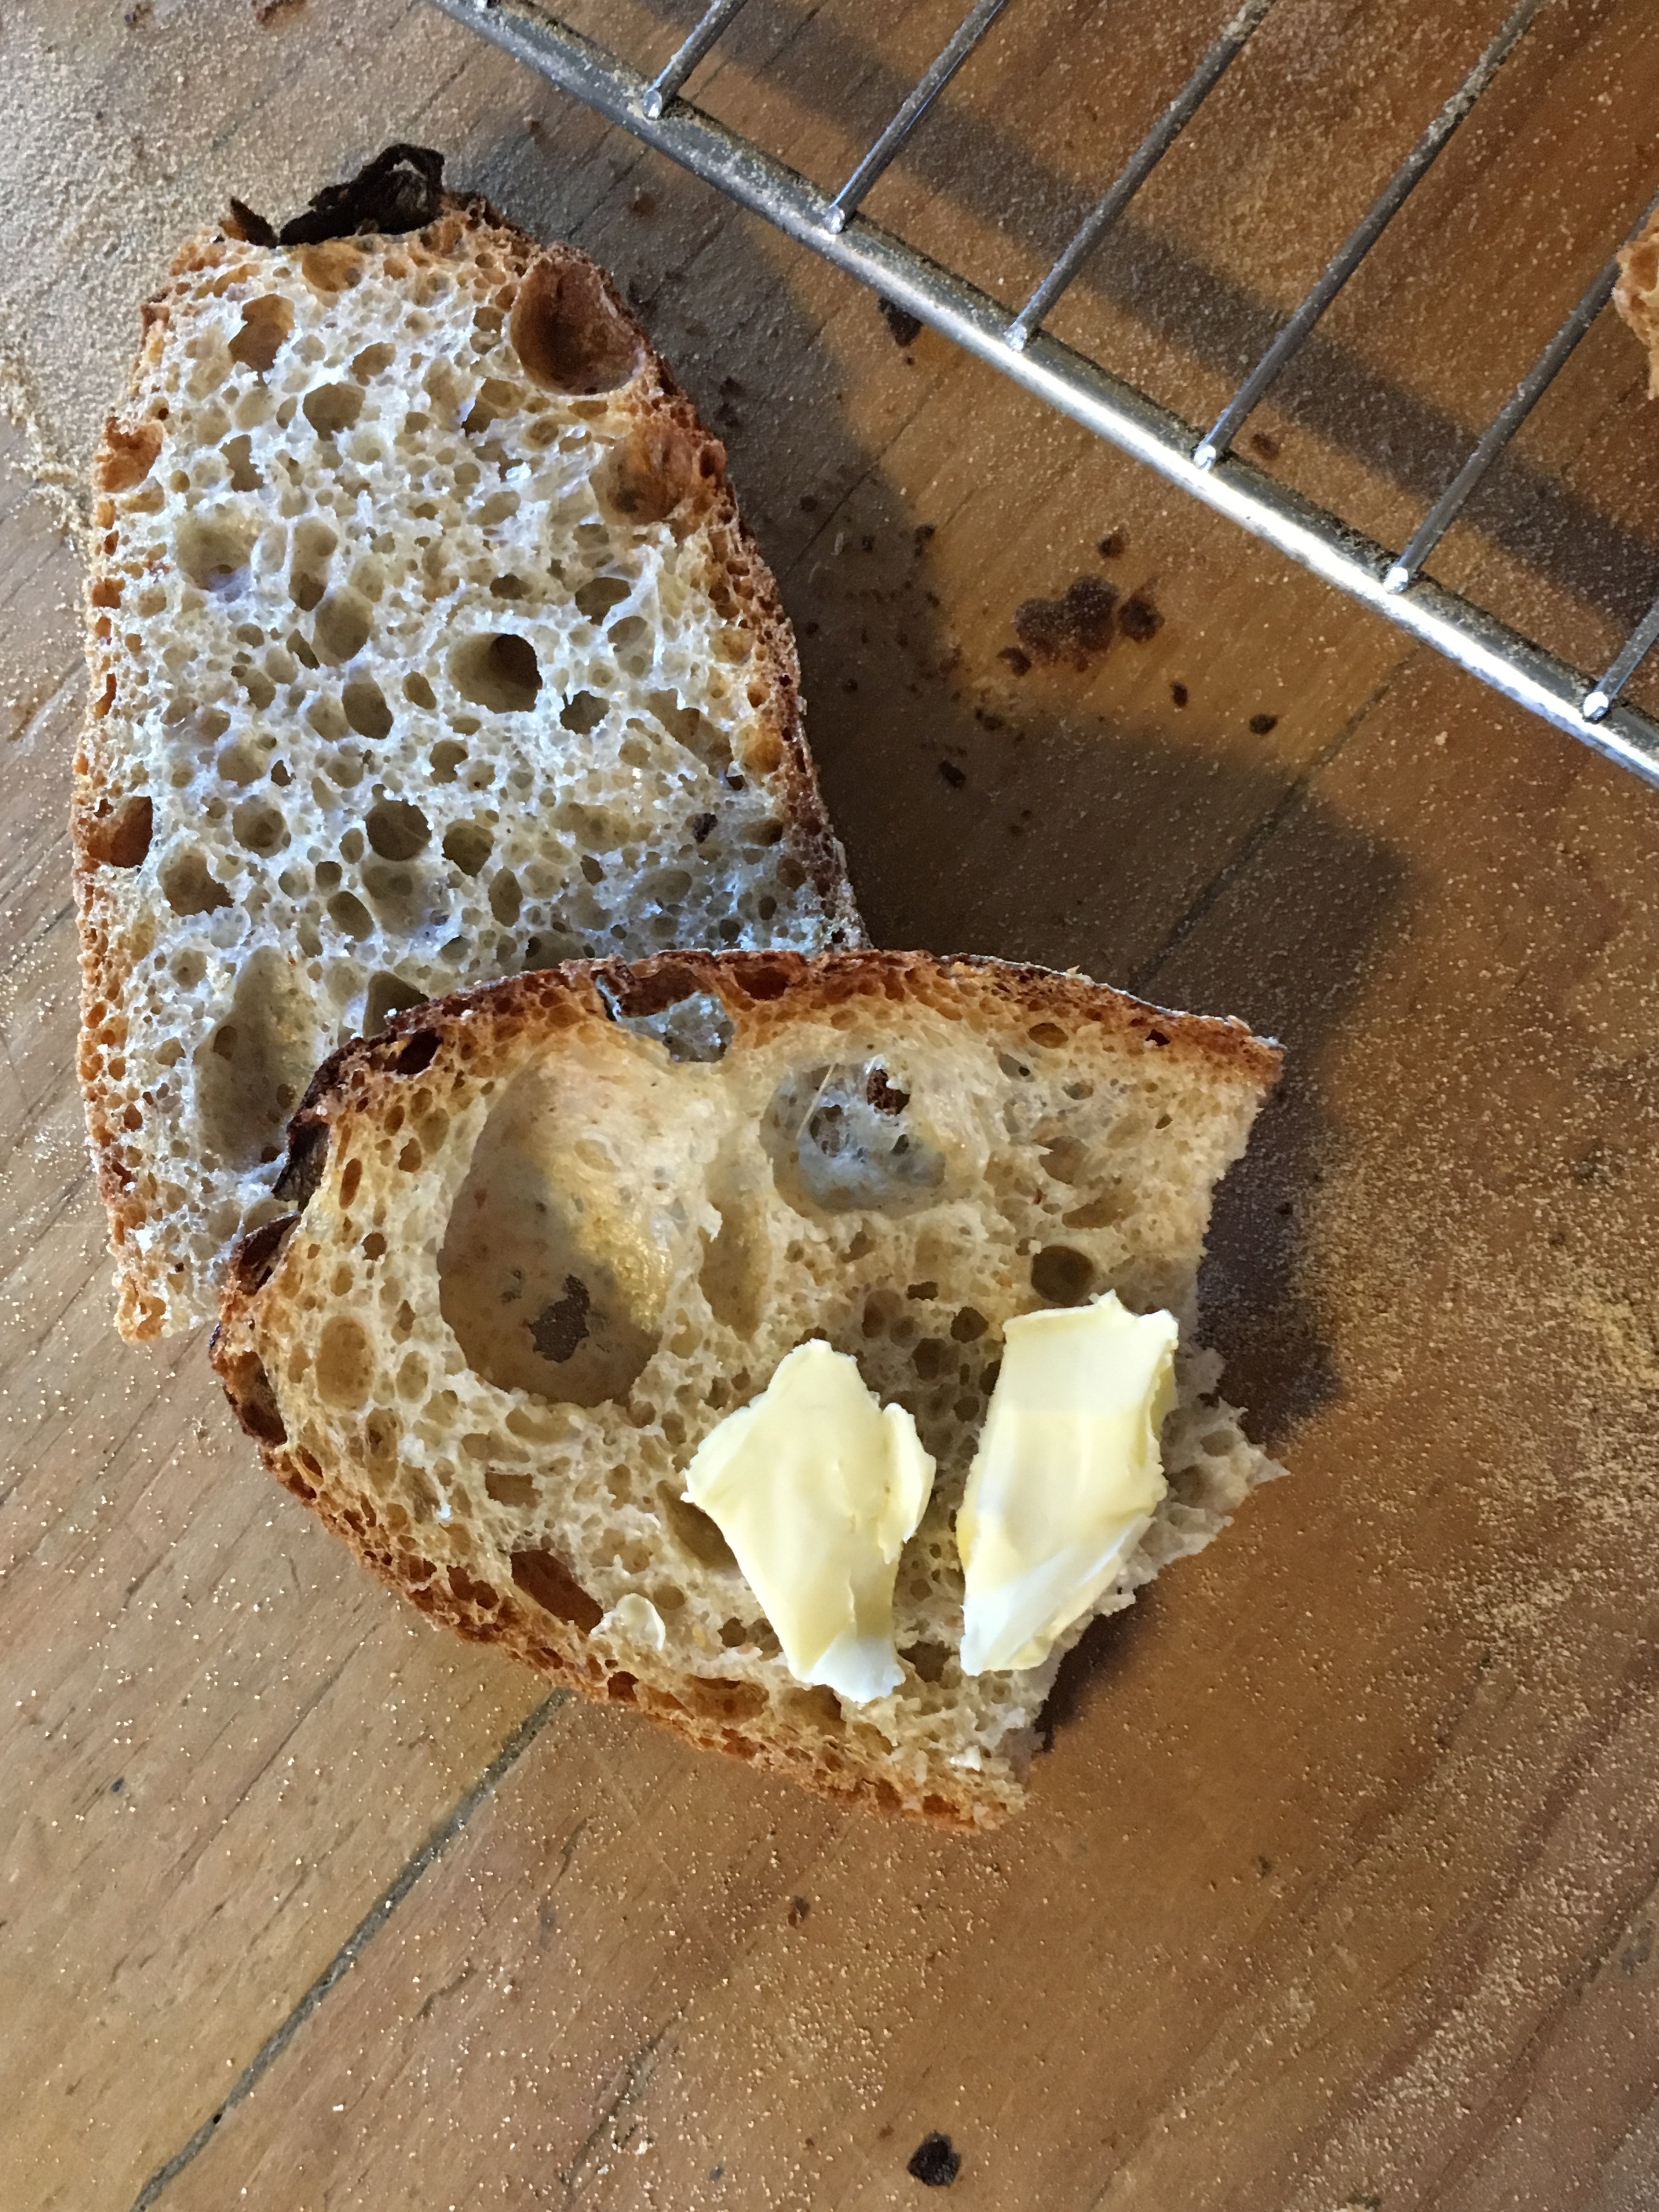

This wet mess of a dough bakes into a billowy Country Wheat and Rye Boule with big holes and a chewy crumb. If you’ve baked along with me, you’ll be ready to give this monster loaf a try.
When I teach people to make bread, most are looking for something rustic, perhaps with some whole grains and often with a sourdough starter. A tall order for one’s first day baking bread, I tell them. But this recipe might be the one to try if you’re looking for the flavor of long fermented bread. You needn’t have a sourdough starter to get terrific results.
The dough has a high hydration, which means it contains a large amount of water in relationship to the flour used. Don’t be daunted. Using a rubber spatula or plastic dough scraper, you can maneuver the dough to accomplish the mixing and kneading.
Ingredients
For the Overnight Starter:
1 cup (8 ounces) warm water, 75°F to 80°F
⅛ teaspoon instant yeast
1 ½ cups (7.5 ounces) bread flour
1/3 cup (2.5 ounces) stone ground rye flour
For the Dough:
1 ½ cups (12 ounces) warm water, 75°F to 80°F
½ teaspoon instant yeast
2 ½ cups (11 ounces) all-purpose flour
1 cup (4 ounces) whole wheat flour
¾ teaspoon salt
Directions
- To make the Overnight Starter: Dissolve the yeast in the water. Stir in the flours using a rubber spatula or your hand and a dough scraper to make soft dough.
- Cover tightly and place the starter in a draft-free place for 10 to 16 hours.
- To make the Dough: Pour the water into a large wide bowl. You’ll mix and knead the dough in this bowl. Add the overnight starter and the yeast. Let is soften for a minute or two. Add the flours and salt.
- Using a rubber spatula or a plastic dough scraper, stir the water into the flour.
- Scrape the edge of the bowl and stir until all of the flour is moistened. Keep scraping and folding the dough over onto itself for 3 to 4 minutes until you have a moist, sticky mass. Let the dough sit for 5 to 10 minutes. As the dough sits, the starches in the flour will absorb some of the water in the dough.
- Generously flour a work surface or large silicone baking mat. Scrape the sticky dough onto the floured surface, then sprinkle it with some flour. With floured fingertips and a dough scraper, scrape the dough into a round shape. Lift up the dough with one hand, stretch it then fold it over itself. Keep lifting and folding for 4 to 5 minutes. The dough will start to come alive under your hands but it will still be very sticky. Resist the urge to add too much flour.
- Gather the dough up into a loose ball. Place it in a bowl or plastic container. Cover and let the dough ferment and rise until double in bulk, for 2 ½ to 3 hours.
- Scrape the dough out onto a well floured work surface or large silicone baking mat. With floured hands, gather the dough into a round shape by tucking in the dough on each side. Then place your hands under the top edge of the rough ball of dough. Pull it towards you, dragging the dough along the work surface to stretch it tightly.
- Generously flour a cloth-lined banneton. Or line a 12-inch bowl with a clean linen towel. Flour the towel generously. Slide your hands under the formed dough and plop it into the banneton or cloth-lined-bowl. Cover with a kitchen towel and let the dough proof until it has gained 50% in volume. It will be soft but still spring back slowly when pressed with your finger. This may take from 30 minutes to an hour, depending on how warm your kitchen is.
- Thirty minutes before baking, put the oven rack on the second shelf from the bottom of the oven and place a baking stone on the rack. Place a small pan for water on the floor of the oven and preheat it to 475°F.
- Uncover the loaf and invert it onto a peel or the back of a baking sheet that has been sprinkled generously with rice flour. If it seems to stick to the cloth in the banneton or bowl, use your fingers to pry the dough gently from the basket. Don’t worry if you slightly dent the loaf. Unless the surface is torn, most dents will disappear once the bread is baked.
- Make 4 slashes across the top of the loaf, 2 horizontal and 2 vertical, to form a large square in the center. Dust lightly with flour if you like.
- Pour about ½ cup of boiling water into the pan in the oven then slide the loaf directly onto the baking stone. Bake for 20 minutes. Then rotate the bread so that it bakes evenly for another 35 to 40 minutes. Bake until the crust is a deep, dark brown and the bread makes a nice hollow sound when tapped on the bottom, for about 55 minutes to an hour. Or, insert an instant-read thermometer into the bread, and if the internal temperature is 205°F to 210°F the bread is done.
- Remove the bread from the oven and place it on a wire rack to cool completely before cutting.
Notes
I provide volume measurements here as a convenience but I always use weight when I bake bread. Thanks to Heidi Pie Aronson of El Cerrito, California who called to question the original measurements in this dough recipe. Thanks Heidi. The recipe has been adjusted.