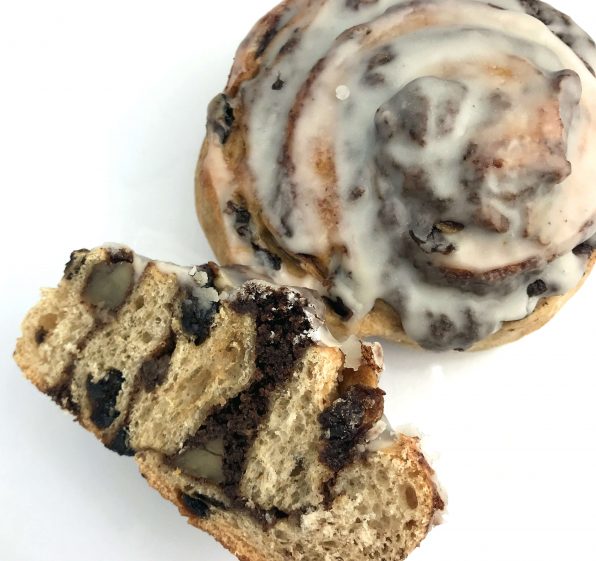
Weekend bakers look for projects that make them shine. And taste delicious. These Lemon Glazed Cinnamon Raisin Buns fit the bill. So much so that Charlie ate two of them in one day, a record for someone who finds an English muffin a little sweet.
Inspiration for this recipe came a friend, a novice baker looking to make cinnamon rolls. Searching for a reliable dough for her to make, I realized that the one I use to make Cinnamon Swirl Raisin Bread would be perfect for this type of treat. The flavor is complex but not too sweet. The dough is firm enough to be easy to handle.
The bun filling is adapted from my book On Baking. Intense in flavor, the cinnamon filling can be spread thick or thin. Taste a little after you make it and decide your own taste preference then use as much as you would like. I used the entire batch of bun filling in the recipe here.
Making the Buns
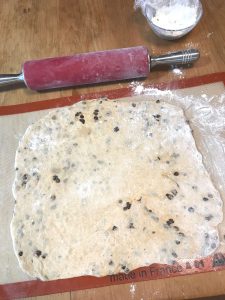
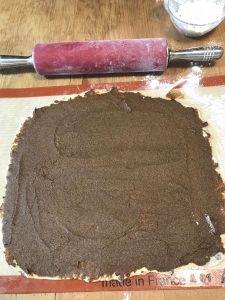
When making these Lemon Glazed Cinnamon Raisin Buns, give yourself enough time to chill the dough after it rises because cool dough is easier to handle than a room temperature one. I always work on a flour-dusted silicone baking mat. This keeps the dough from sticking to my wooden worktable. The cinnamon bun filling spreads easily if it has not been refrigerated. If you decide to make the bun filling ahead of time, remember to take it out of the refrigerator to soften. The addition of some chopped pecans adds taste and texture to the buns. Feel free to omit them or add more to suit your taste.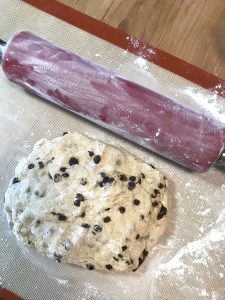
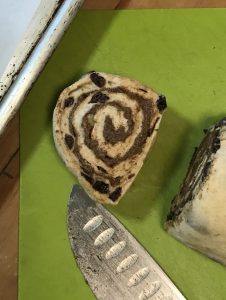
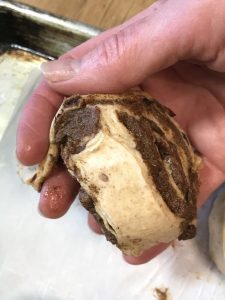
When rolling the dough up into a log, work from the longest edge. And roll the dough tightly. You do not want any air gaps that will cause your buns to expand unevenly. After you cut the dough into individual portions, tuck the end underneath as shown here. This keeps the end in place and prevents each roll from developing a little tail.
Finishing the Buns
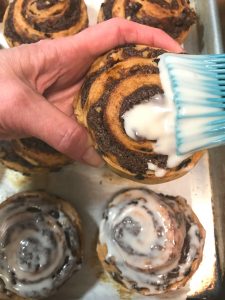
A sugar glaze gives the buns a final decorative touch and adds just enough sweetness. I brush it on while the buns are just faintly warm. A cream cheese glaze would also be delicious, but it makes the buns difficult to freeze. After I gobble up a freshly-glazed bun, I let the buns sit until the glaze sets. Then freeze each bun separately in a zip top bag. When rewarmed, the buns taste as fresh a they day I made them although the glaze gets finger-licking sticky.
Kitchen Notebook
Weekend baking projects take time but not all of it is working time.
My rough estimate of the time to make this project is as follows: 15 minutes to mix the dough. 2 to 3 hours to ferment the dough. One hour to chill the dough. 15 minutes to roll, fill and portion the dough. 45 minutes for the rolls to proof. 40 minutes for them to bake. 10 minutes to glaze them.
Total time: 6 hours. Your working time: 1 hour
Time Saving Strategy: You could mix the dough the night before and place it in the refrigerator overnight. Then roll and fill the dough in the morning. Because the dough will be cold, it will take longer to proof in Step 5, perhaps 1 ½ hours.

Weekend bakers look for projects that make them shine. And taste delicious. These Lemon Glazed Cinnamon Raisin Buns fit the bill. So much so that Charlie ate two of them in one day, a record for someone who finds an English muffin a little sweet.
Ingredients
Cinnamon Swirl Raisin Bread (dough)
4 ounces unsalted butter, soft and pliable
2/3 cup dark brown sugar
1/2 teaspoon salt
1 teaspoon vanilla
1/2 teaspoon almond extract
1 egg
1/4 cup almond flour
1 Tablespoon all-purpose flour
2 to 3 Tablespoons ground cinnamon*
1/2 cup chopped pecans
1 cup powdered sugar
2 teaspoon lemon juice
1-2 tablespoons warm water
*Depending on the freshness of the cinnamon, you may prefer to use 2 Tablespoons.
Directions
- Line a half sheet pan with parchment paper.
- Let the Cinnamon Swirl Raisin Bread dough rise and ferment in a covered container until double in size, for approximately 2-3 hours.
- Refrigerate the dough for 30 minutes to an hour to make it easy to roll.
- To make the Cinnamon Bun Filling, combine the butter, sugar and salt in the bowl of a food processor fitted with the metal blade for about one minute. Scrape down the sides of the bowl and pulse to be sure that the butter and sugar are creamed together. Add the extracts and egg. Pulse 10 or 12 times until combined. Scrape down the sides of the bowl. Add the flours and cinnamon. Pulse until well blended.
- Scrape the dough onto a lightly floured surface. Pat it into a uniformly thick rectangle.
- Roll out the dough into a rectangle, turning it over from time to time, dusting the dough with flour if it seems to be sticking. Roll it into an 18 x 16-inch rectangle approximately 1/3-inch thick.
- Spread the Cinnamon Bun Filling evenly over the dough using an offset spatula. Sprinkle with the chopped pecans. Roll dough starting from the widest edge into a tight log.
- Cut the dough using a sharp knife in a sawing motion into 1 1/2- inch pieces. You should get 12-15 pieces.
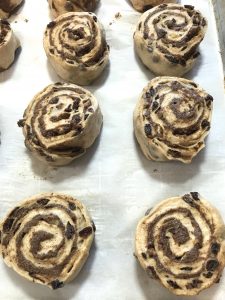
- Place each piece, cut side down spaced about 1/2 inch apart on the sheet pan. Tuck the tail end of the rolled dough underneath each bun to prevent it from sticking out during baking.
- Cover the dough loosely with a flour-dusted towel or a sheet of plastic and let it proof until the portions are nicely puffed and almost touching, for about 45 minutes to an hour.
- Preheat the oven to 350°F. Place a pan on the bottom shelf of the oven.
- Place the proofed buns into the preheated oven. To create steam in the oven, carefully pour 1/2 cup hot water into the pan you placed on the bottom shelf of the oven for this purpose. Bake for 35-45 minutes until the buns are nicely browned and cooked through.
- Cool on a wire rack for 5 to 10 minutes.
- Brush each bun with the Lemon Sugar Glaze.
Notes
Weekend baking projects take time but not all of it is working time.
My rough estimate of the time to make this project is as follows: 15 minutes to mix the dough. 2 to 3 hours to ferment the dough. One hour to chill the dough. 15 minutes to roll, fill and portion the dough. 45 minutes for the rolls to proof. 40 minutes for them to bake. 10 minutes to glaze them.
Total time: 6 hours.
Your working time: 1 hour
Time Saving Strategy: You could mix the dough the night before and place it in the refrigerator overnight. Then roll and fill the dough in the morning. Because the dough will be cold, it will take longer to proof in Step 5, perhaps 1 ½ hours.

