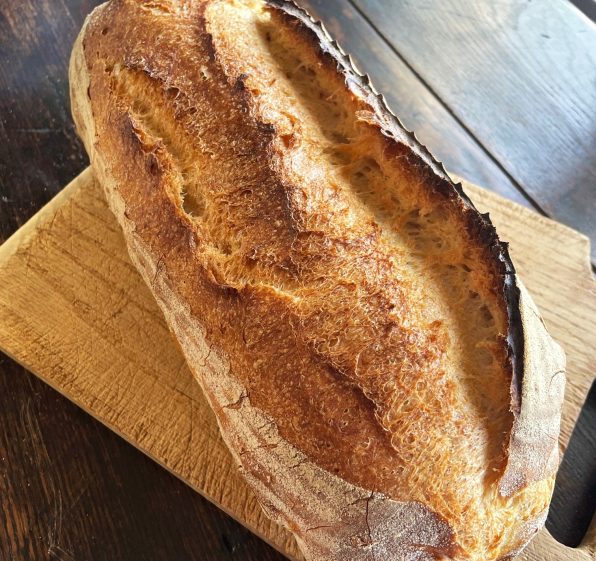


“Time equals taste,” bakers say. One reliable way to get a tasty loaf of bread without too much fuss is letting it rise slowly. This Slow Rise Picnic Loaf is one I bake when I need lots of good bread with a pleasant chewy crumb and crisp crust with little fuss.
Quality wheat gives this loaf its great flavor. I use all-purpose flour from King Arthur or Maine Grains. Sometimes I swap out a few ounces of rye flour for some of the all-purpose in the recipe. It adds to the flavor of the bread and helps it rise beautifully. (This is helpful in cooler weather when yeast and humans can be sluggish.)
To make this loaf, plan on mixing it one day and baking it the next. While it takes time, it isn’t your time. The wet dough for this loaf is barely mixed. It requires only enough kneading to bring the ingredients together into a loose ball.
You let the dough rise for two hours at room temperature. Once the dough has risen at room temperature for two hours, you form the loaf for a long overnight rise in the refrigerator.
Here is an important caveat: Make sure to form and retard the dough after two hours. If you let the dough ferment longer, it will become very active. And it might proof too much in the refrigerator. If that happens, plan on baking the bread the same day you mix the dough.
I shape the dough and place it in a banneton, or proofing basket. (It can also be shaped and placed in a linen-towel-lined bowl. Or directly into a large parchment-paper lined loaf pan.)

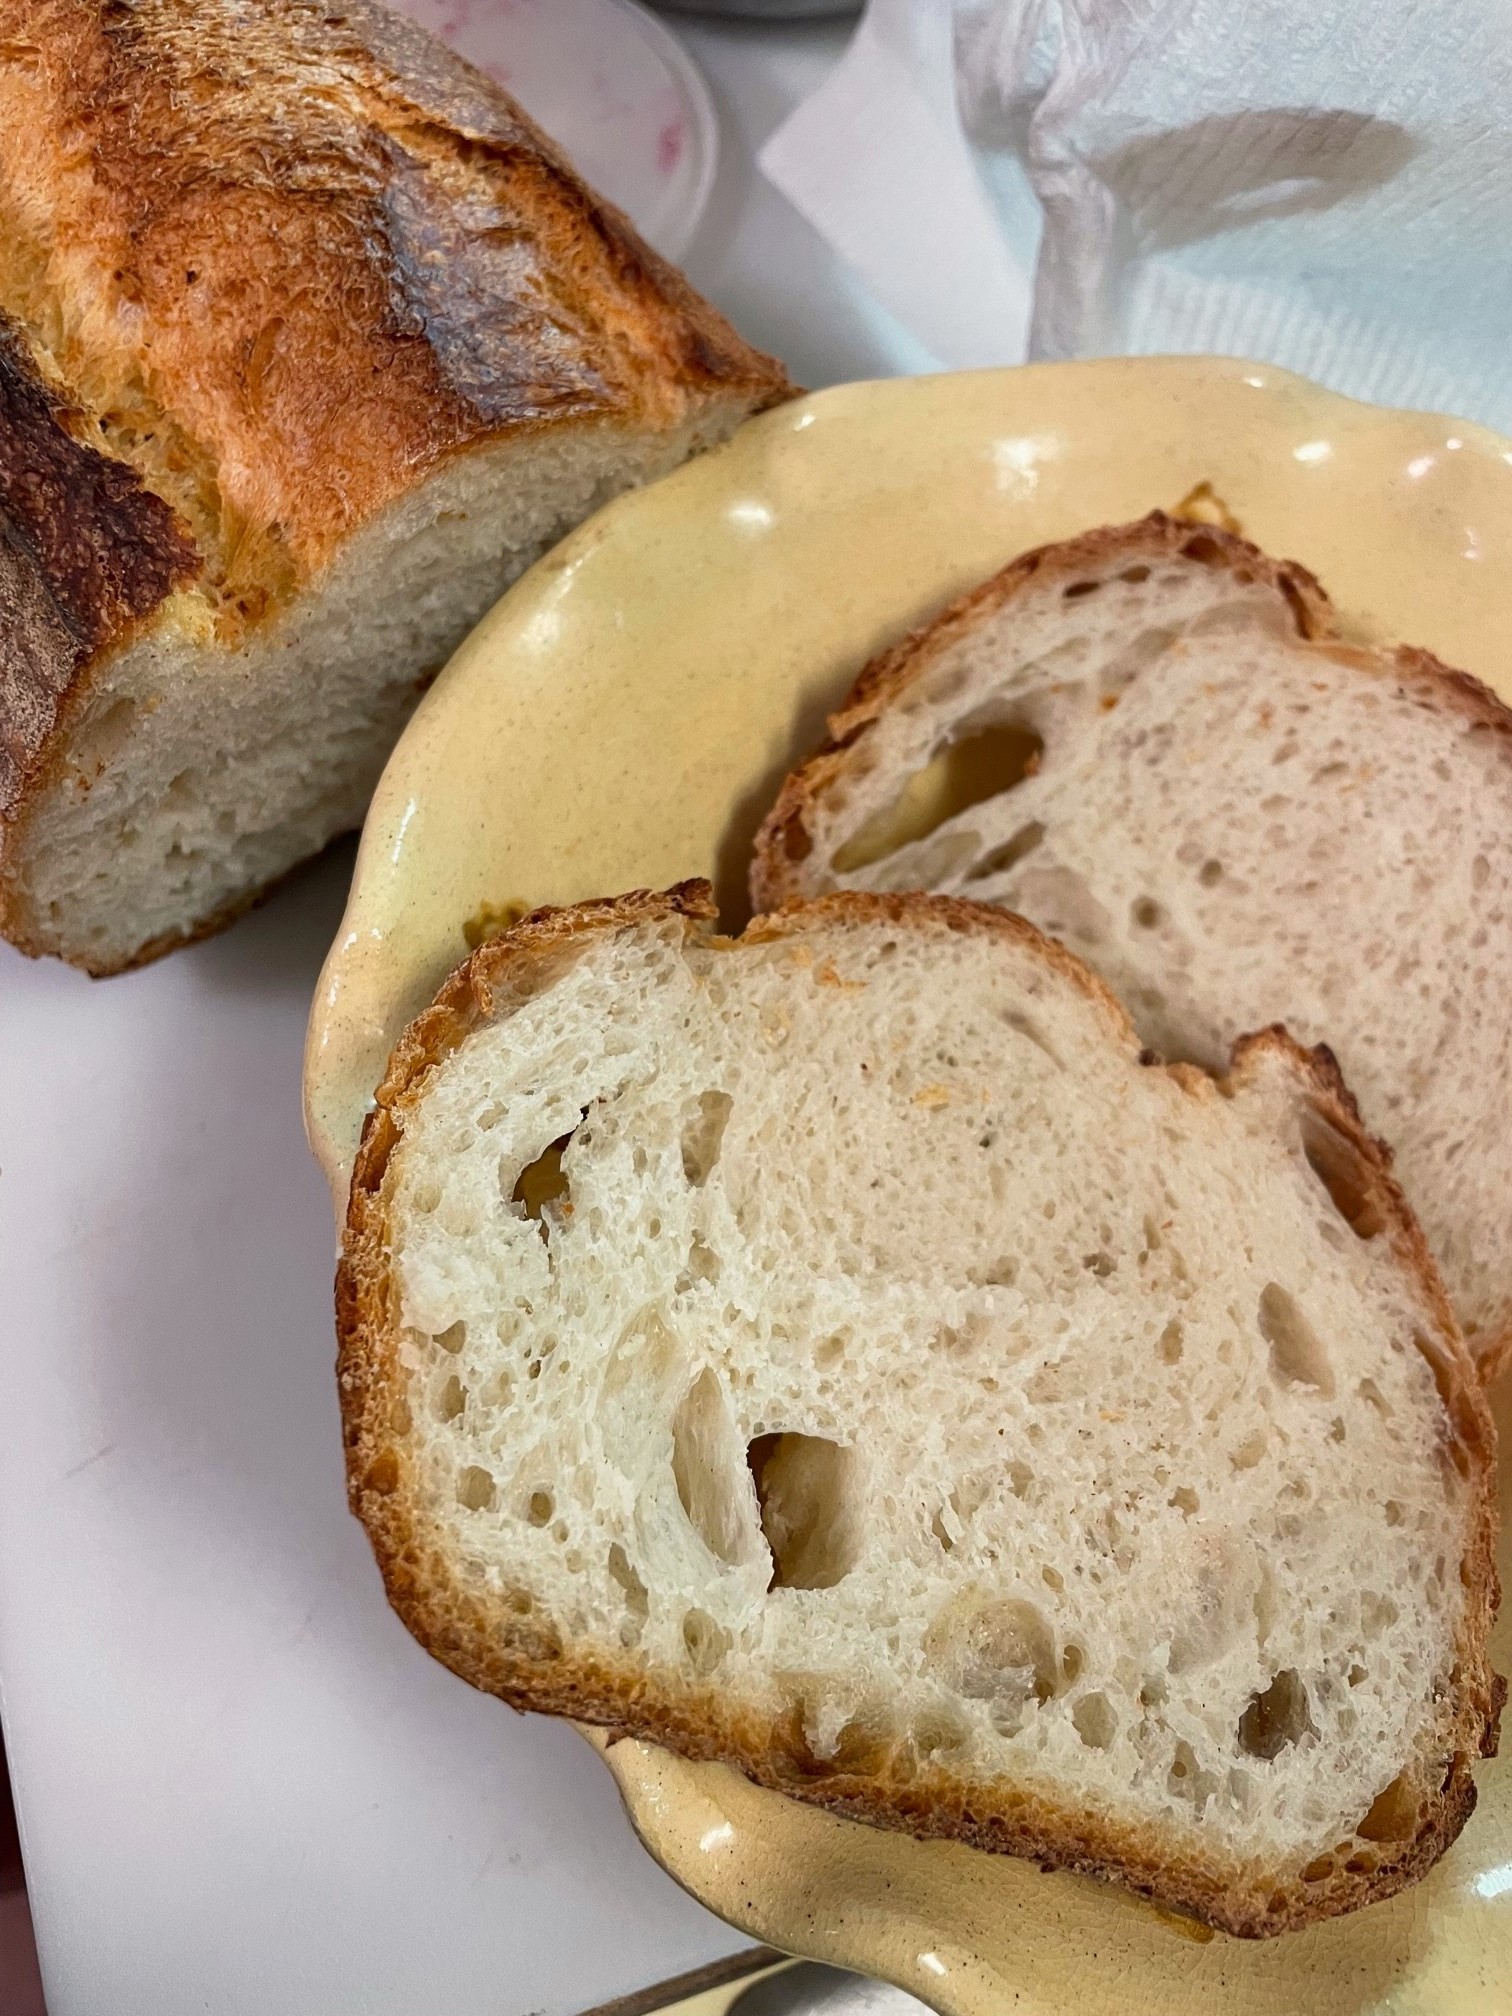
Make this loaf when you’re planning to serve cheese and some good wine or hearty sandwiches. It’s a favorite for grilled cheese because it holds up well in a panini press or on a griddle under a weight.

Kitchen Notebook
Emile Henry makes terrific, covered bakeware for home bread bakers. I’m especially fond of their Pullman Mold. Its long shape means lots of crust and slices that are good for sandwiches. In the past, I have worked with the company developing use and care advice for these products. While they gave me the mold I still use, I am not in any way compensated for this post.

This slow rise dough make a flavorful and chewy loaf.
Here is an important caveat: Make sure to form and retard the dough after two hours as described in the recipe. If you let the dough ferment longer, it will become very active. And it might proof too much in the refrigerator. If that happens, plan on baking the bread the same day you mix the dough.
Ingredients
¾ teaspoon instant yeast (2 grams) OR 1 teaspoon (3 grams) active dry yeast
1 ⅔ cups + 1Tablespoon (425 milliliters) water
4 ½ – 5 cups (575 grams) all-purpose flour
2 teaspoons (0.4 ounces/12 grams) salt
Directions
- Dissolve the yeast in the water in a large mixing bowl. Add the flour and salt. Stir with a rubber spatula until all of the flour is moistened. With wet hands, knead the dough a few times just to bring it together into a loose ball.
- Transfer the dough to a dough bucket or bowl then cover. Let the dough rise for 2 hours at room temperature, 70 - 72˚F. (Rising longer than 2 hours may result in overproofed dough.)
- Select a banneton, bowl or loaf pan large enough to hold the dough when it doubles in size. If using a banneton, dust it generously with flour. If using a bowl, line it with a clean tea towel then dust the towel generously with flour. If using a loaf pan, line it with parchment paper.
- Scrape the dough out onto a lightly floured surface. Form the dough into a smooth ball. Cover loosely and let the dough rest for 5 minutes. Uncover then roll the dough out into the proper shape to fit the mold you are using. (The loaf pictured was rolled into a fat log.) Transfer the shaped dough into the prepared banneton, bowl or loaf pan. Refrigerate the dough, covered for 12 to 16 hours.
- When ready to bake the bread, remove the dough from the refrigerator. Let the dough proof until risen nearly double in size. Proofing may take from 1 ½ to 3 hours depending on the temperature in your kitchen. A fingertip pressed into the dough should disappear in 2 to 3 seconds. If it springs back, wait longer. If it does not disappear, you have waited too long. The loaf may be somewhat flat after baking.
- Preheat the oven to 475˚F for at least 45 minutes. Place a bread mold or Dutch oven in the oven to preheat.
- Carefully remove the heated bread mold or Dutch oven from the oven. Remove the lid. Carefully transfer the proofed dough to the heated bread mold or Dutch oven. Quickly score the surface of the dough with a sharp or serrated knife. Cover and return to the oven.
- Bake for 30 minutes. Remove the lid and bake for 15 - 30 more minutes until the loaf is a burnished deep brown color. Cool the loaf on a wire rack for at least an hour before eating.
Notes
This recipe is mixed one day then baked the following. Plan your time accordingly.